
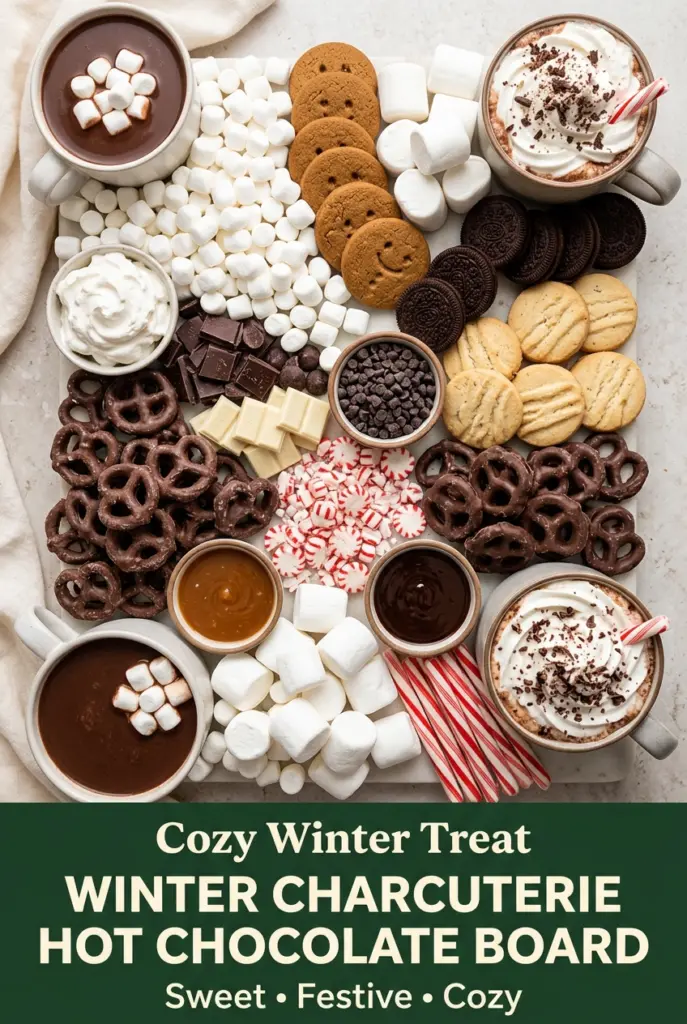
Rich hot chocolate turns into something far more fun when you set it out with bowls of marshmallows, cookies, peppermint, and chocolate for everyone to build their own mug. The cocoa stays the star, but the board makes it feel abundant and a little playful, with every topping adding a different texture: soft marshmallow, crisp cookie, salty pretzel, cool mint, and thick caramel. It’s the kind of dessert setup that gets people hovering around the table long after the first round of mugs is gone.
What makes this work is keeping the hot chocolate smooth and properly hot without letting it boil. Whole milk and heavy cream give you a richer base, and the chopped semisweet chocolate melts more evenly than chips, which often stay a little grainy. The toppings matter too, because the best board isn’t random clutter; it’s a mix of soft, crunchy, creamy, and sharp flavors that actually balance each other.
Below, I’ll show you how to keep the cocoa silky, which toppings hold up best on the board, and a few swaps if you want to adjust the setup for different diets or a bigger group.
The hot chocolate stayed smooth for the whole party, and the little bowls of marshmallows and peppermint made it feel like a coffee shop board at home. My kids loved building their own mugs and the caramel sauce was the first thing to disappear.
Save this Winter Charcuterie Hot Chocolate Board for the night you want a cozy cocoa setup with toppings everyone can build their own way.
Why the Hot Chocolate Needs to Stay Silky, Not Scalded
The biggest mistake with a board like this is treating the hot chocolate like an afterthought. If the milk boils, the chocolate can taste flat and the texture gets a little rough around the edges. If you rush the melting, you end up with tiny bits of undissolved cocoa or chocolate that never quite blends in.
Medium-low heat gives you control. You want the mixture hot enough to steam and loosen the chocolate, but not so hot that the dairy starts to tighten or separate. Whisking the cocoa powder in with the sugar also helps it disperse instead of floating around in dry clumps.
- Semisweet chocolate: Finely chopped chocolate melts into a smoother base than chips, which often hold their shape longer. Use a decent bar or baking chocolate here; this is the flavor backbone of the whole board.
- Heavy cream: This is what gives the cocoa that rounded, dessert-like finish. You can swap in half-and-half, but the drink will lose some body and won’t feel as lush in the mug.
- Cocoa powder: Unsweetened cocoa deepens the chocolate flavor without making the drink too sweet. Natural cocoa is fine, and Dutch-process also works if that’s what you keep in the pantry.
- Peppermint candies: Crush them just before serving so they keep their crunch. If they sit out too long, humidity starts to soften them and they lose that sharp little bite.
Building the Board So Every Topping Still Feels Intentional
Warm the Cocoa First
Start the milk and cream in a saucepan over medium-low heat and stop as soon as the surface steams. You’re looking for hot, not bubbling. If the pan starts to simmer hard, pull it back immediately, because overheated dairy dulls the chocolate and makes the finished drink less smooth.
Whisk in the Chocolate Base
Add the chopped chocolate, cocoa powder, sugar, vanilla, and salt, then whisk steadily until the mixture looks glossy and completely combined. At first it may look a little grainy from the cocoa, but that should disappear as the chocolate melts. Keep the heat gentle and the whisk moving so nothing catches on the bottom of the pan.
Set Up the Board by Texture
Pour the hot chocolate into a pitcher or carafe before you build the board so it stays hot while guests serve themselves. Then group the toppings in separate bowls or tight clusters instead of scattering them everywhere. That separation is what makes the board easy to use, and it keeps marshmallows from rolling into cookies and turning the whole thing messy.
Finish With the Small Details
Place the whipped cream, caramel sauce, and chocolate sauce where they’re easy to reach, then dust the whipped cream lightly with cinnamon. The cinnamon doesn’t need to dominate; it just gives the board a warm finish that plays well with the peppermint and chocolate. Serve right away so the cookies stay crisp and the marshmallows keep their soft texture.
How to Change the Board for Different Crowds and Diets
Dairy-Free Hot Chocolate Board
Use full-fat oat milk or coconut milk in place of the dairy, and choose dairy-free chocolate and toppings. The result is still rich, but it will taste a little lighter and less creamy than the original. Coconut milk gives the most body, while oat milk keeps the chocolate flavor more neutral.
Make It Gluten-Free
Swap in certified gluten-free cookies and pretzels, and check that your chocolate and sauces are labeled gluten-free as well. The board still looks generous and varied, but you won’t have the same wheat-based crunch from traditional shortbread or gingerbread.
Make It More Kid-Friendly
Leave the peppermint on the side for kids who don’t like mint and add more mini marshmallows, cookies, and chocolate chips. A lighter hand with the cinnamon also helps if you want the board to lean sweet and classic instead of spiced.
Storage and Reheating
- Refrigerator: Leftover hot chocolate keeps for 3 days in a covered container. The toppings should be stored separately so cookies stay crisp and marshmallows don’t turn sticky.
- Freezer: The hot chocolate base can be frozen, but the texture may separate slightly after thawing. If you freeze it, whisk well while reheating and don’t freeze any of the toppings.
- Reheating: Warm the cocoa slowly over low heat or in short microwave bursts, whisking between each one. High heat can scorch the dairy and make the chocolate taste flat, so patience matters here.
Answers to the Questions Worth Asking
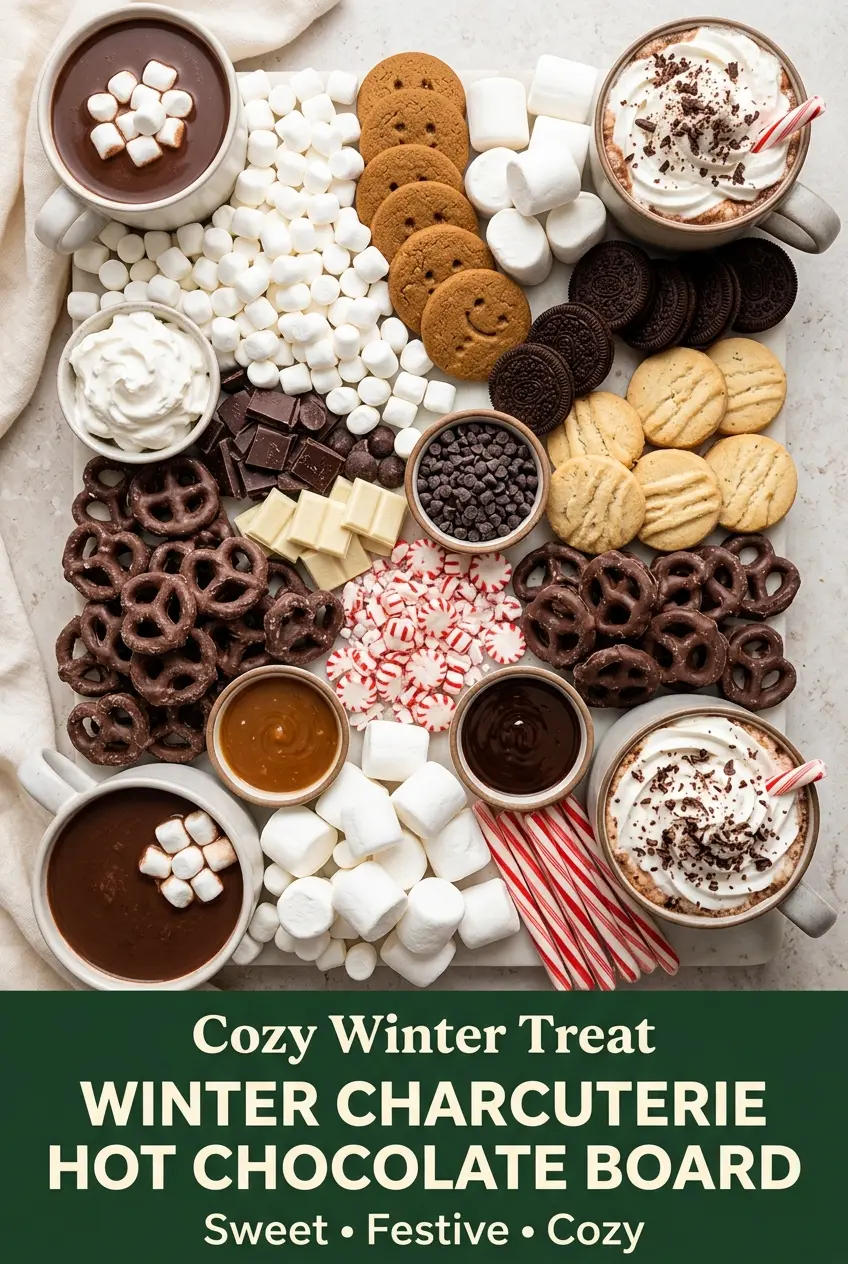
Winter Charcuterie Hot Chocolate Board
Ingredients
Equipment
Method
- Heat the whole milk and heavy cream in a saucepan over medium-low heat until hot but not boiling, keeping the surface from simmering.
- Whisk in the chopped semisweet chocolate, cocoa powder, sugar, vanilla extract, and salt until fully combined.
- Cook for 3–5 minutes, whisking frequently, until the chocolate melts completely and the mixture becomes smooth.
- Pour the hot chocolate into a serving pitcher or insulated carafe for easy serving.
- Arrange mini and large marshmallows in small bowls on a large serving board so each bowl is easy to reach.
- Group the gingerbread cookies, shortbread cookies, chocolate sandwich cookies, and chocolate-covered pretzels around the bowls in separate clusters.
- Add the semisweet chocolate chunks, white chocolate pieces, mini chocolate chips, crushed peppermint candies, and peppermint sticks in separate clusters for clear separation.
- Place small bowls of whipped cream, caramel sauce, and chocolate sauce on the board near the cookies and toppings.
- Dust the whipped cream lightly with cinnamon to give a visible speckled finish.
- Keep every topping clearly separated and easy to reach, then serve the board beside mugs of hot chocolate so everyone can build their own drink.