
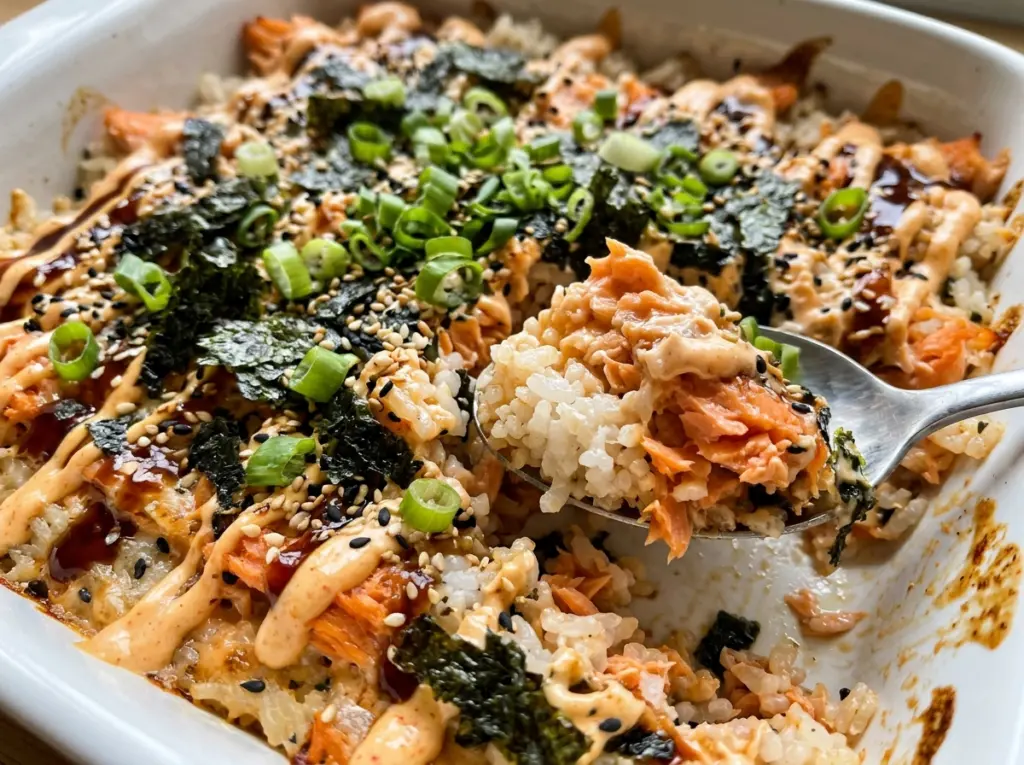
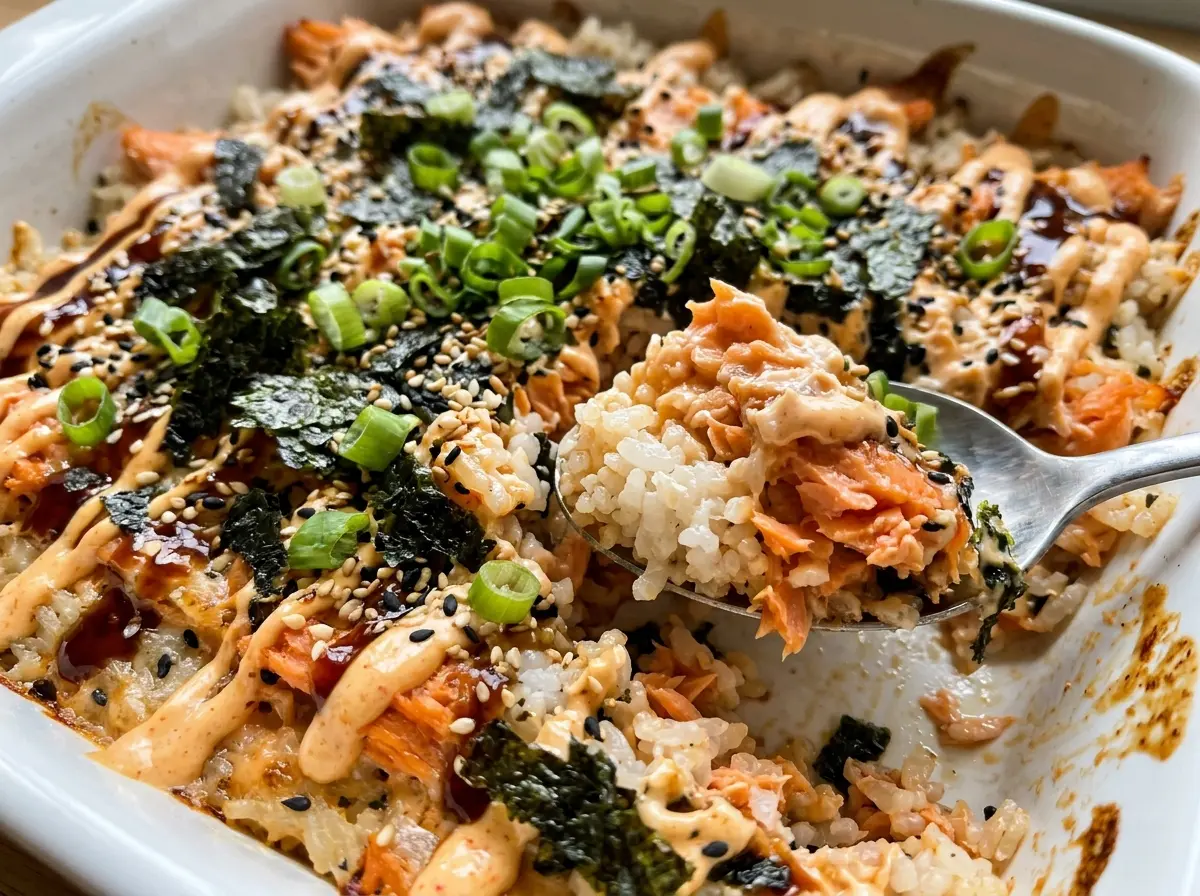
When the salmon flakes easily but still looks moist in the middle, it’s ready to come together with the spicy mayo. That’s the part I watch most closely for this Spicy Salmon Sushi Bake, because the fish gets another short turn in the oven once it’s layered over the rice. The finished bake has tender grains underneath and a creamy, gently spicy salmon topping that bubbles around the edges.
The rice needs a little attention before it goes into the dish. Rinsing it until the water runs mostly clear removes excess starch, and letting it rest covered after cooking gives the grains time to finish steaming. I fold in the vinegar mixture gently so the rice stays fluffy instead of turning pasty.
Serve each scoop on a piece of nori, with scallions and sesame seeds scattered over the top. You get the warm, savory filling and the crisp seaweed in every bite.
Kitchen Note
Leave the saucepan covered for the full 10-minute rest after cooking the rice. That pause lets the steam settle through the grains, so they’re tender without getting wet or clumping when you fold in the vinegar mixture.
Save this Spicy Salmon Sushi Bake for a warm, shareable dinner with a creamy sriracha topping and nori for scooping.
Why the Salmon Belongs in Its Own Layer
A sushi bake can seem like a casserole, but treating the rice and fish as one mixed filling changes what you get in the scoop. The rice is seasoned on its own, so its mild vinegar flavor stays distinct beneath the salmon. The topping keeps its flaky texture, too, rather than breaking down into the rice while everything bakes.
That separation also makes the dish easier to serve. A spoonful can include a little of each layer, and the nori gives you a handy wrapper without needing to roll individual sushi. Since the salmon is cooked before it goes over the rice, the final bake is about warming the topping and bringing the edges together, not cooking raw fish inside a dense casserole. I spread each layer evenly so the corners don’t end up with all the rice while the center gets all the salmon. The result is a tray that’s easy to scoop and still tastes like its components belong together.
The Rice, Salmon, and Seasonings That Shape Every Bite

- Sushi rice — Short-grain sushi rice cooks up cohesive enough to hold a scoop, unlike fluffy long-grain rice. Rinsing it well matters more than buying a premium brand; you want the water to run mostly clear before it goes into the saucepan.
- Unseasoned rice vinegar — It brings the clean tang that balances the sugar and salt without adding extra seasoning. Use unseasoned vinegar here, since seasoned rice vinegar already contains salt and sugar and would make the finished rice harder to balance.
- Skinless salmon — A boneless, skinless fillet is easy to flake evenly into the topping. Choose a fresh-looking piece, but there’s no need for an especially rich or expensive cut; the mayonnaise and seasonings keep the mixture moist.
- Mayonnaise, sriracha, soy sauce, and toasted sesame oil — Mayonnaise binds the fish and keeps the topping creamy, while sriracha brings heat and soy sauce adds savory depth. Toasted sesame oil has a more pronounced aroma than plain sesame oil, so a small amount is enough.
- Nori and the finishing toppings — Nori pieces act as little scoops for the warm rice and salmon. Scallions add a fresh, oniony finish, and toasted sesame seeds bring a nutty note; buy sesame seeds already toasted if you want to skip toasting them yourself.
Cook the Rice, Then Give the Salmon Its Own Bake
Seasoning the Rice Without Mashing It
Rinse the sushi rice in a fine-mesh strainer until the water runs mostly clear, then drain it well. Combine it with the water in a 3-quart saucepan and bring it to a boil over medium-high heat. Cover, turn the heat to low, and simmer for 15 minutes; then take the pan off the heat and leave it covered for 10 minutes. Whisk the vinegar, sugar, and salt until dissolved, then fold that mixture into the warm rice gently—the grains should stay distinct, not turn into a paste.
Baking and Flaking the Salmon
Heat the oven to 400°F and line a rimmed baking sheet with parchment paper. Set the salmon on the sheet and bake for 12 to 16 minutes, until a thermometer inserted at the thickest part reads 145°F. If the center still looks translucent, give it more time and check again rather than guessing from the surface. Flake the cooked fish into a medium bowl, then gently fold in the mayonnaise, sriracha, soy sauce, and toasted sesame oil.
Layering the Bake
Reduce the oven temperature to 375°F and grease a 9×13-inch baking dish with the neutral oil. Spread the seasoned rice evenly across the dish; an uneven base can leave some scoops short on rice. Spoon the salmon mixture over the top and spread it into a consistent layer. Bake for 10 to 12 minutes, until the topping is hot and you can see bubbles forming around the edges.
Resting and Serving on Nori
Let the dish rest for 5 minutes before adding the scallions and toasted sesame seeds. The short rest gives the layers a moment to settle, so scoops are easier to lift without needing to press them down. Cut the nori sheets into quarters if they aren’t already, and serve them alongside the bake. Scoop a portion onto each piece just before eating, so the nori stays firm enough to hold the filling.
Two Easy Ways to Adjust the Heat and Soy
Make the topping milder
Use 1 tablespoon of sriracha instead of 3 tablespoons in the salmon mixture. The mayo and sesame still make a creamy, savory topping, but the chile heat won’t dominate each bite.
Make it gluten-free with tamari
Replace the soy sauce with the same amount of gluten-free tamari. It keeps the savory, salty note in the salmon mixture; use gluten-free labeled mayonnaise, sriracha, and nori as well if you need the whole dish to be gluten-free.
Storage and Reheating
- Refrigerator: Cover leftovers and refrigerate within 2 hours; eat within 3 days. The rice firms up as it chills, but softens again when warmed.
- Freezer: I don’t recommend freezing the assembled bake. The rice can turn dry after thawing, and the mayonnaise-based salmon topping may lose its smooth texture.
- Reheating: Warm a portion covered in a 325°F oven until it reaches 165°F throughout. Leaving it uncovered the whole time can dry out the rice and salmon; add fresh nori when serving rather than reheating it with the bake.
Questions I Get Asked About This Sushi Bake
Spicy Salmon Sushi Bake
Ingredients
Equipment
Method
- Rinse the sushi rice in a fine-mesh strainer until the water runs mostly clear, then drain well.
- Combine the rice and water in a 3-quart saucepan and bring to a boil over medium-high heat.
- Cover, reduce the heat to low, and simmer for 15 minutes.
- Remove from the heat and let stand, covered, for 10 minutes.
- Whisk the rice vinegar, sugar, and salt in a small bowl until dissolved.
- Gently fold the vinegar mixture into the warm rice.
- Heat the oven to 400°F and line a rimmed baking sheet with parchment paper.
- Place the salmon on the baking sheet and bake for 12 to 16 minutes, until it reaches 145°F at the thickest part.
- Flake the salmon into a medium bowl.
- Gently fold in the mayonnaise, sriracha, soy sauce, and sesame oil.
- Reduce the oven temperature to 375°F and grease a 9x13-inch baking dish with the neutral oil.
- Spread the seasoned rice evenly in the dish.
- Spread the salmon mixture over the rice and bake for 10 to 12 minutes, until the topping is hot and the edges are bubbling.
- Let the bake rest for 5 minutes, then sprinkle with the scallions and sesame seeds.
- Scoop portions onto the nori pieces and serve.