
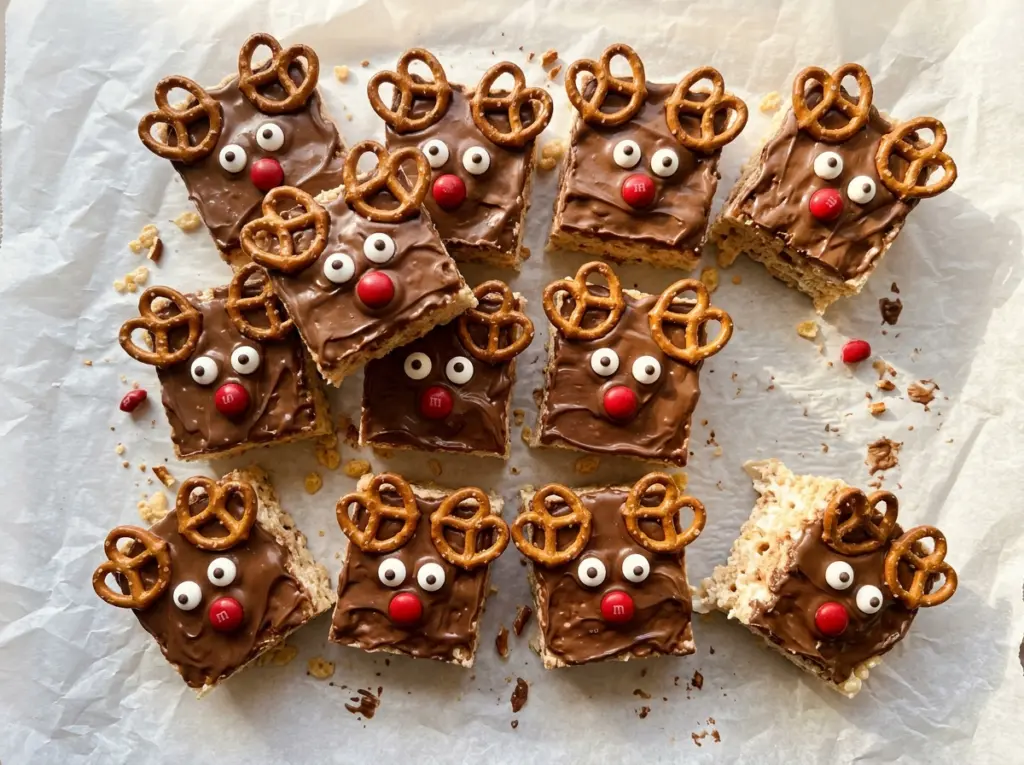
The marshmallows look like a solid white pile at first, then suddenly soften into one glossy, stretchy mixture. I keep the heat low and stir until there are no marshmallow lumps left; rushing that moment can leave the base uneven before the cereal even goes in. These Reindeer Rice Krispie Treats turn that familiar pan of cereal bars into twelve little reindeer, with pretzel antlers, candy eyes, and a red nose.
The decoration is simple, but the order matters: let the slab cool and set before cutting, then use melted chocolate to attach each piece. That gives you a steady surface to work on instead of soft bars that shift under your fingers. I also press the cereal mixture into the dish gently rather than packing it down. Each bar holds together, but still has the light, crisp bite you want from a marshmallow treat.
Kitchen Note
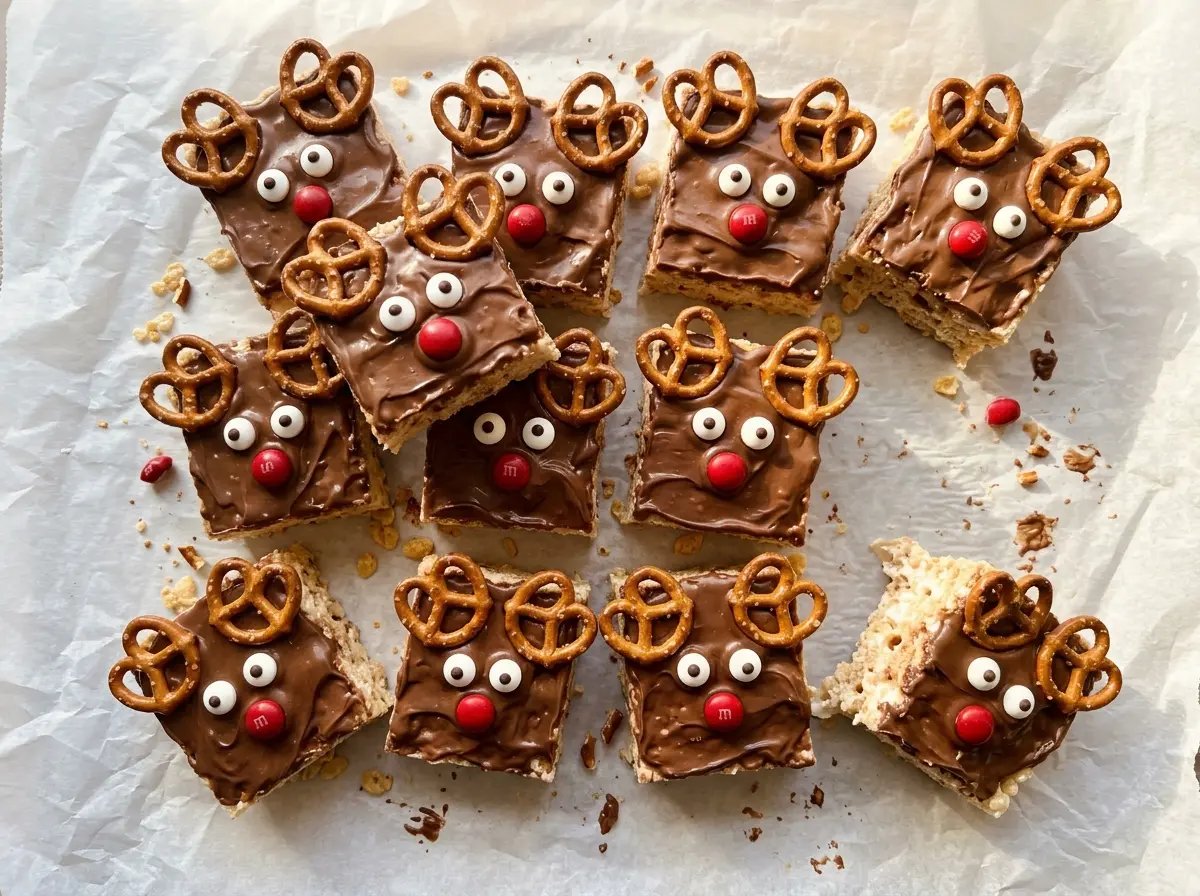
Butter your spatula or hands before pressing the cereal mixture into the dish. It keeps the sticky mixture from clinging, so you can level the top without pushing harder than you need to.
Save these Reindeer Rice Krispie Treats for a festive batch of crisp cereal bars with chocolate-attached pretzel antlers and bright red noses.
Why Pressing the Cereal Gently Makes a Better Bar
Marshmallow treats can turn dense and hard when the cereal gets compressed into the pan. The mixture needs to be even, but it doesn’t need to be tightly packed; a light press is enough to bring the pieces into contact and help the bars hold their shape after cooling. If you bear down to smooth every last bump, the finished bars lose some of their airy crunch.
This is also why a buttered spatula or buttered hands make a difference. The mixture is sticky, and an ungreased tool tends to pull it around rather than guide it. Work across the dish until the layer looks level, then stop. A few tiny ridges on top won’t affect how the treats cut or how the decorations sit. Keeping the pressure gentle gives you bars that stay together without feeling packed or tough.
What the Marshmallows, Cereal, and Chocolate Each Bring

- Mini marshmallows — They melt into a cohesive binder and soften quickly over low heat. Their small size makes them the most reliable choice for this stovetop timing; large marshmallows can take longer to melt evenly. I wouldn’t swap in marshmallow fluff, which has a different consistency and won’t set the bars the same way.
- Unsalted butter — Butter gives the marshmallow base a smooth, rich feel and helps keep the finished bars tender. Unsalted butter lets the kosher salt stay in balance. If salted butter is what you have, leave out the added salt so the bars don’t become too salty.
- Crisp rice cereal — The light, crisp pieces give the bars their familiar crunch and keep the marshmallow mixture from feeling heavy. A different brand of plain crisp rice cereal is fine; avoid puffed rice, which is much less crisp and changes the texture.
- Vanilla and kosher salt — Vanilla rounds out the sweetness, while a little salt keeps the marshmallow base from tasting flat. Add both after taking the pot off the heat so their flavor doesn’t have to cook in the pan.
- Semisweet chocolate chips — Melted chocolate is the edible glue that holds the face and antlers in place. Semisweet keeps the decoration from becoming overly sweet against the marshmallows. Finely chopped semisweet chocolate can stand in for the chips and melt the same way.
- Pretzel twists and candy decorations — Mini pretzel twists give each reindeer its antlers, and the candy eyes and red candy make the face easy to recognize. The twist shape is useful here because it gives you two antler points without extra shaping.
Building the Bars Before Adding the Reindeer Faces
Prepare the Dish and Melt the Butter
Grease a 9×13-inch baking dish with 1 tablespoon of the butter, reaching into the corners. Melt the remaining butter in a large pot over low heat for about 2 minutes. Keep the heat low rather than letting the butter sizzle or brown; this base is meant to stay mild and buttery. Have the marshmallows ready so they can go into the pot as soon as the butter has melted.
Stir the Marshmallows Until Smooth
Add the mini marshmallows to the melted butter and stir for 3 to 5 minutes, until they’re melted and smooth. Scrape along the bottom and sides as you stir so the mixture melts evenly. If you still see distinct marshmallow pieces, keep stirring over low heat rather than turning the burner up. Remove the pot from the heat before stirring in the vanilla and kosher salt.
Fold in the Cereal and Let the Slab Set
Fold the crisp rice cereal into the marshmallow mixture until the pieces are evenly coated. Move steadily around the pot and lift the cereal through the sticky base so you don’t leave dry pockets at the bottom. Transfer everything to the prepared dish, then gently press it into an even layer with a buttered spatula or clean, buttered hands. Cool at room temperature for 30 to 45 minutes, until the slab is set enough to cut.
Cut the Bars and Attach the Decorations
Cut the set slab into 12 bars. Put the chocolate chips in a small microwave-safe bowl and microwave on HIGH in 15-second bursts, stirring after each one, for 30 to 45 seconds total, until smooth. Use small dabs of chocolate to attach two pretzel twists as antlers, two candy eyeballs, and one red candy as a nose to each bar. Let the chocolate set for about 10 minutes before serving.
Two Ways to Adapt the Reindeer Treats
Make a gluten-free batch
Use gluten-free crisp rice cereal and gluten-free mini pretzel twists, and choose gluten-free chocolate and candy decorations. The bars keep their crisp, chewy texture; the pretzel antlers may taste a little different depending on the brand you use.
Serve them as plain cereal bars
Skip the chocolate, pretzels, candy eyes, and red candy for an undecorated batch. The buttery marshmallow-and-cereal bars are still easy to portion and have the same crisp-chewy base, just without the reindeer faces.
Storage and Reheating
- Refrigerator: Keep the bars at room temperature instead; refrigeration tends to make the cereal treats firm and hard to bite.
- Freezer: Freeze the bars in a tightly sealed container with parchment between layers for up to 6 weeks. Thaw them in the container at room temperature so condensation doesn’t land directly on the decorations.
- Reheating: Reheating isn’t needed. Don’t microwave the finished bars to soften them, since the chocolate and candy decorations can melt or shift.
Questions That Come Up While Making Reindeer Rice Krispie Treats
Reindeer Rice Krispie Treats
Ingredients
Equipment
Method
- Grease a 9x13-inch baking dish with 1 tablespoon of the butter.
- Melt the remaining 6 tablespoons butter in a large pot over low heat, about 2 minutes.
- Add the marshmallows and stir for 3 to 5 minutes, until melted and smooth.
- Remove the pot from the heat and stir in the vanilla and salt.
- Fold in the cereal until evenly coated.
- Transfer the mixture to the prepared dish.
- Gently press it into an even layer with a buttered spatula or clean, buttered hands.
- Cool at room temperature for 30 to 45 minutes, until set.
- Cut into 12 bars.
- Microwave the chocolate chips in a small microwave-safe bowl on HIGH in 15-second bursts, stirring each time, for 30 to 45 seconds total, until smooth.
- Use small dabs of melted chocolate to attach two pretzel twists as antlers, two candy eyeballs, and one red candy to each bar as a nose.
- Let the chocolate set for about 10 minutes before serving.