
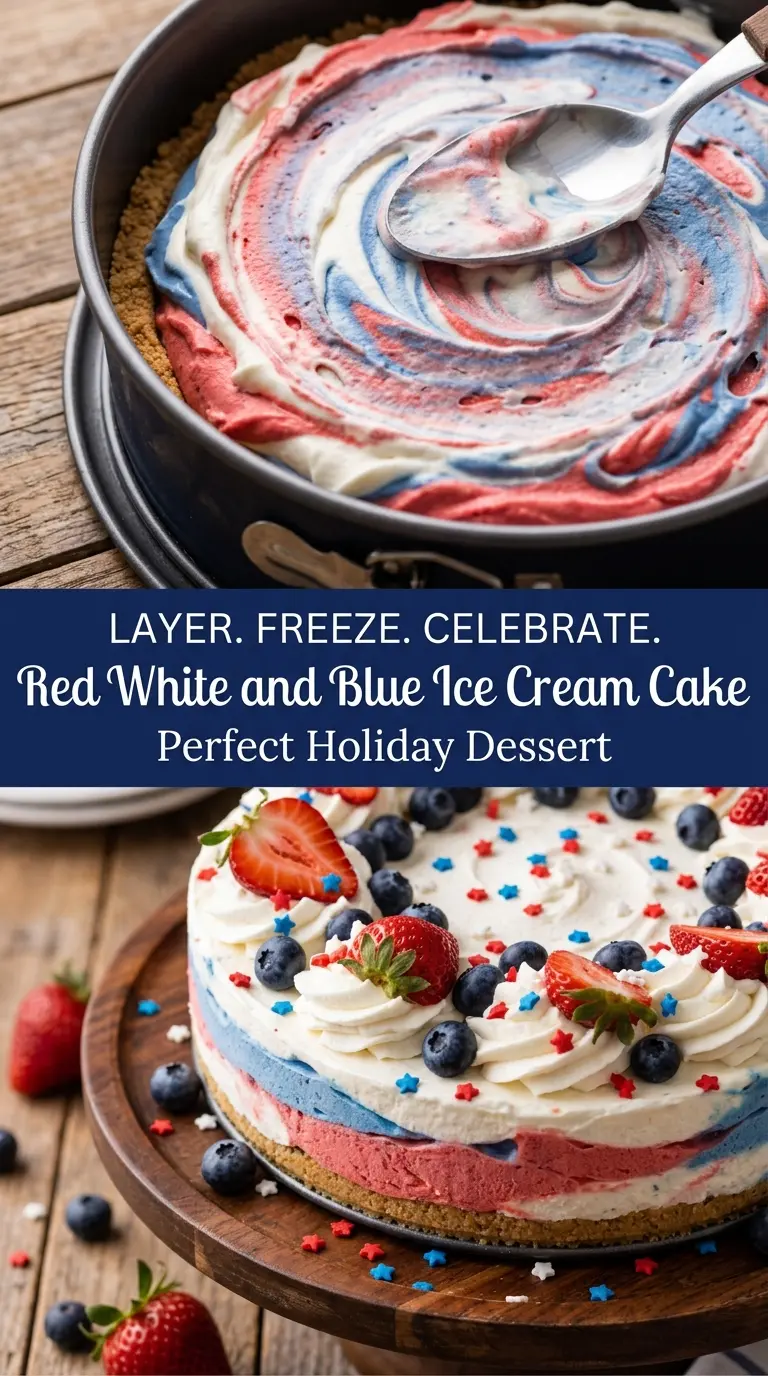
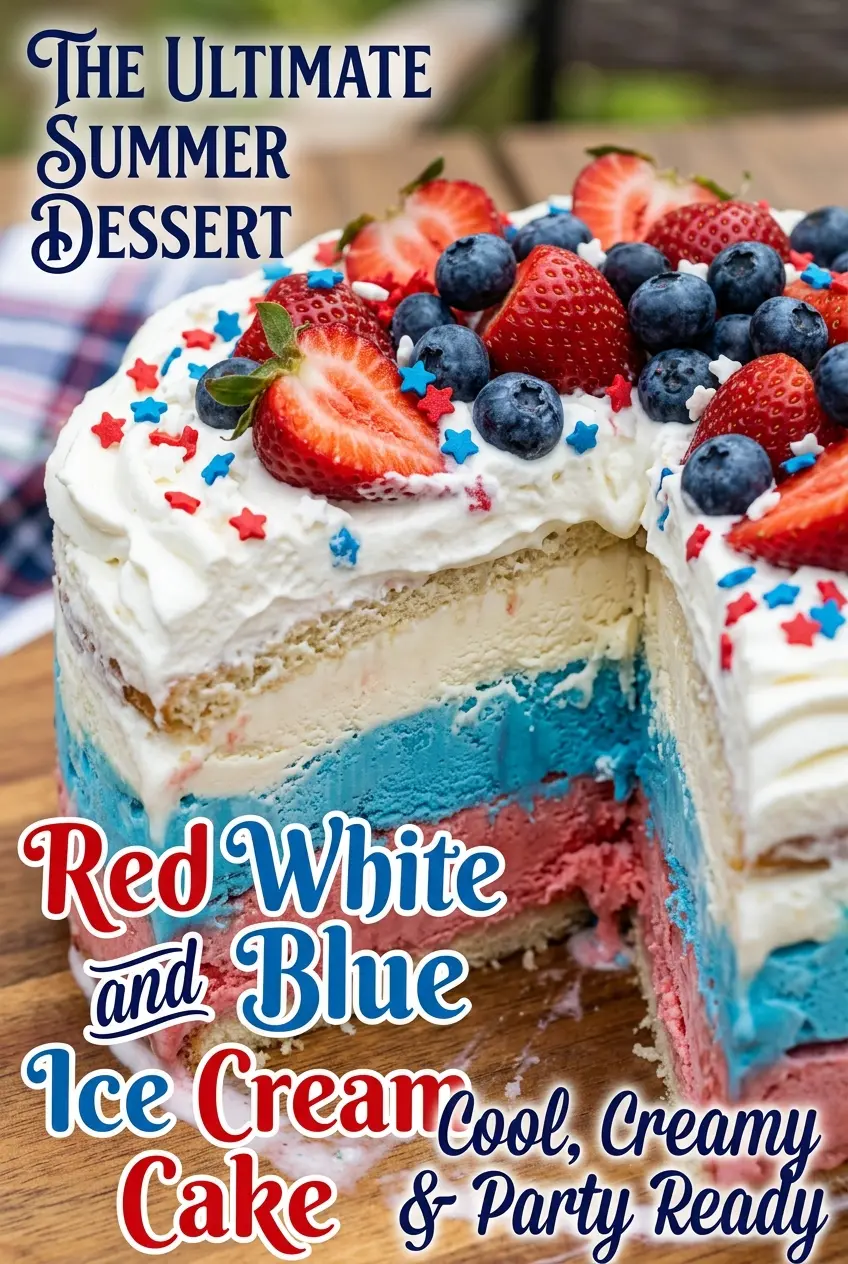
Cold, creamy layers stacked over a buttery cookie crust make this red white and blue ice cream cake the kind of dessert people remember long after the plates are cleared. The layers stay distinct, the crust gives each bite a little crunch, and the whipped topping keeps the whole thing from feeling heavy. It looks festive without needing any tricky decorating work, which is exactly why it keeps showing up at cookouts and holiday tables.
The part that makes this cake work is timing. Each ice cream layer gets a short freeze before the next one goes in, so the colors stay sharp instead of bleeding together. Softened ice cream spreads cleanly, but it still needs to be firm enough that it doesn’t melt into the layer underneath. The cookie crust also needs that first freeze so it sets into a solid base instead of crumbling when you slice it.
Below you’ll find the small details that matter most, from tinting the ice cream without making it runny to getting neat slices straight from the freezer. If you’ve ever had an ice cream cake slump at the edges before serving, this version gives you a much better shot at clean layers and a sturdy finish.
The layers froze up clean and the colors stayed bright, and the crust held together better than I expected. I let it sit out for about 8 minutes before slicing, and it cut into neat pieces without the ice cream sliding around.
Save this red white and blue ice cream cake for the days when you want a patriotic dessert with clean layers, a cookie crust, and no baking.
The Trick to Keeping the Layers Sharp Instead of Melting Together
Ice cream cake fails when the layers are too soft for too long. The goal isn’t to make the ice cream liquid enough to stir; it’s to soften it just enough to spread. If it gets soupy, the red and blue swirl into the white layer and the cake turns muddy instead of clean and striped.
The freezer breaks between layers matter just as much as the ingredients. Fifteen to twenty minutes is enough to set the surface so the next color sits on top instead of sinking in. If your freezer runs warm, give each layer a little longer. A rushed freeze is the fastest way to lose those crisp bands.
What the Cookie Crust and Food Coloring Are Actually Doing
- Vanilla sandwich cookies — These form a sturdy crust that tastes like a built-in shortcut to ice cream sandwich flavor. The filling helps the crumbs bind, so you don’t need much butter. Golden sandwich cookies or chocolate sandwich cookies can work, but the color and flavor will change the look and taste of the cake.
- Unsalted butter — Butter is what turns loose crumbs into a sliceable base. If you cut back too far, the crust falls apart when you lift the first piece. Melt it fully and mix until every crumb looks evenly moistened.
- Vanilla ice cream — Use a good-quality ice cream here because it makes up most of the cake. A dense, premium-style vanilla holds its shape better than an airy tub, which helps the layers stay neat. Let it soften on the counter just until it yields when stirred, not until it’s halfway melted.
- Red and blue gel food coloring — Gel coloring gives you bold color without thinning the ice cream. Liquid coloring can add extra moisture and make the texture loose. Start with a little and build slowly so the shade stays bright instead of turning neon.
- Whipped topping — This gives the outside a soft, stable finish that spreads more easily than fresh whipped cream. It also holds up a bit better once the cake starts warming at the table. If you use homemade whipped cream, serve the cake quickly because it softens faster.
Building the Cake So the Colors Stay Clean
Pressing the Crust
Mix the cookie crumbs with melted butter until the texture looks like damp sand and holds together when squeezed. Press it firmly into the bottom of a parchment-lined springform pan, using the bottom of a glass to pack it tight. If the crust feels loose now, it will crumble later when you slice the cake. Freeze it for 15 minutes so it sets before the ice cream goes on.
Spreading the Ice Cream Layers
Divide the softened vanilla ice cream into three bowls before you tint anything. Leave one bowl white, color one bowl red, and color one bowl blue with gel coloring, stirring just until the color is even. Spread the blue layer first, then freeze it before adding white, then freeze again before adding red. If the ice cream starts dragging or pulling up the crust, it’s too soft and needs a few minutes in the freezer before you keep going.
Finishing and Unmolding
After the final freeze, run a warm knife around the edge of the springform pan before releasing it. That helps the cake loosen without tearing the sides. Spread the whipped topping over the top, then decorate with strawberries, blueberries, and sprinkles right before serving so the berries stay fresh and the colors look crisp. Let the cake sit for about 5 to 10 minutes before slicing so the knife can pass through without cracking the top layer.
How to Adapt This for Different Crowds and Freezers
Make It Dairy-Free
Use a dairy-free vanilla ice cream, plant-based butter for the crust, and a whipped topping made for dairy-free desserts. The structure stays the same, but the cake may soften a little faster once it’s out of the freezer, so keep the serving window short.
Swap the Cookies for Gluten-Free Crumbs
Use gluten-free vanilla sandwich cookies in the crust and crush them the same way. The texture stays nearly identical, though some gluten-free brands need a touch more butter to hold together cleanly.
Change the Color Theme
The same method works with any two or three gel colors. Red and blue make it patriotic, but pink, purple, and white work for birthdays, or green and red for the holidays. Keep the same freezing rhythm so the layers stay distinct.
Storage and Reheating
- Refrigerator: Not recommended. Ice cream cake melts too quickly in the fridge and loses its shape.
- Freezer: Keep the cake tightly wrapped or in a covered container for up to 1 week. After that, the texture starts to pick up ice crystals.
- Reheating: No reheating needed. For the best slice, let the cake stand at room temperature for 5 to 10 minutes before cutting, and wipe the knife between cuts if the layers are sticking.
Answers to the Questions Worth Asking
Red White and Blue Ice Cream Cake
Ingredients
Equipment
Method
- Line a 9-inch springform pan with parchment paper to prevent sticking and make unmolding easier.
- Combine crushed vanilla sandwich cookies and melted unsalted butter until the mixture looks like damp sand.
- Press the cookie mixture firmly into the bottom of the pan, using steady pressure to create an even crust.
- Freeze the crust for 15 minutes to set before adding ice cream layers.
- Divide softened vanilla ice cream into three bowls for easy tinting and layering.
- Leave one bowl of vanilla ice cream white for the middle layer.
- Tint one bowl of ice cream red with red gel food coloring, mixing until the color is uniform.
- Tint the remaining bowl of ice cream blue with blue gel food coloring, mixing until the color is uniform.
- Spread the blue ice cream layer over the crust and smooth the top with an even layer.
- Freeze the blue layer for 20 minutes until firm to the touch.
- Spread the white ice cream layer evenly over the blue layer, keeping the surface level.
- Freeze for another 20 minutes until set.
- Spread the red ice cream layer on top and smooth it to cover the edges.
- Freeze for at least 4 hours until the cake is fully firm.
- Remove the ice cream cake from the pan so the sides release cleanly.
- Frost with whipped topping, covering the top completely for a creamy finish.
- Decorate with fresh strawberries and fresh blueberries across the top for the red-and-blue look.
- Sprinkle red and blue sprinkles over the whipped topping to add crunch and color.
- Slice and serve immediately for the neatest layers.