
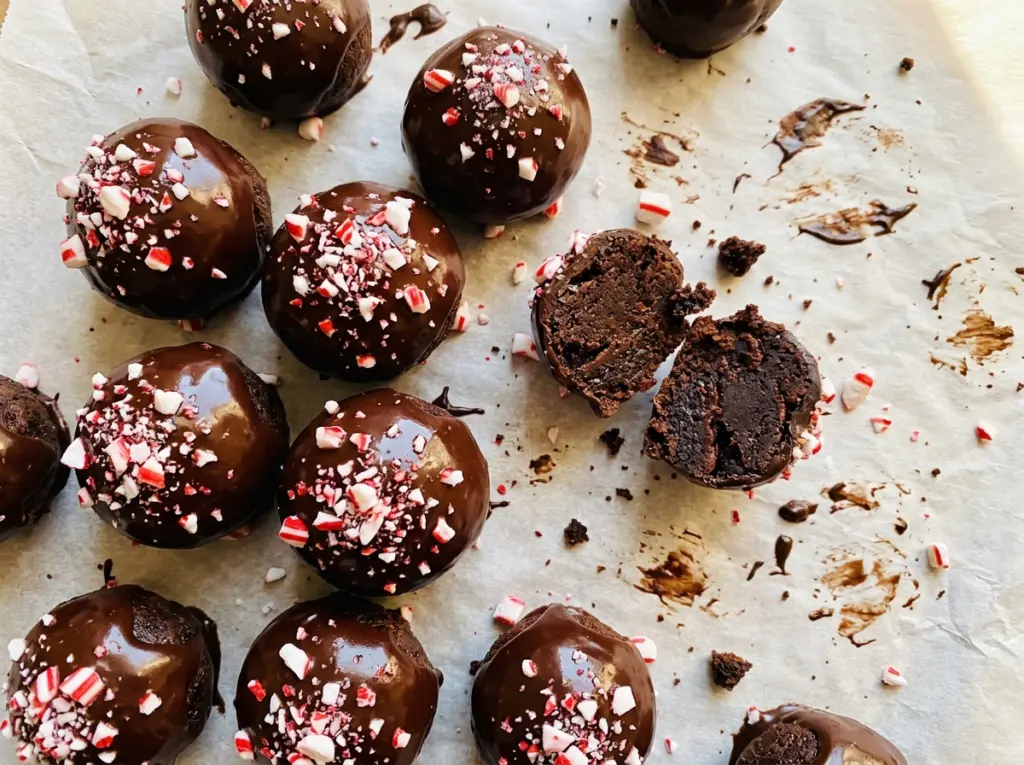
A toothpick with a few moist crumbs can look like a reason to leave the brownie pan in the oven longer. For these truffles, that’s the cue to stop: the brownie needs enough moisture to crumble and bind with cream cheese, not a dry, cakey crumb. I bake the brownie layer in an 8-inch square pan, let it cool completely, then turn it into 24 peppermint brownie truffles with cream cheese and peppermint extract.
The texture changes in stages. The cooled brownie is firm, but once it’s crumbled and mixed with the cream cheese, it becomes soft and cohesive enough to roll. A short refrigerator rest firms each ball before dipping, so the semisweet chocolate coats the center instead of dragging through a loose mixture. Coconut oil helps the chocolate coat smoothly, and crushed peppermint candies add a crisp finish. Each truffle has a dense chocolate center under a snappy chocolate shell.
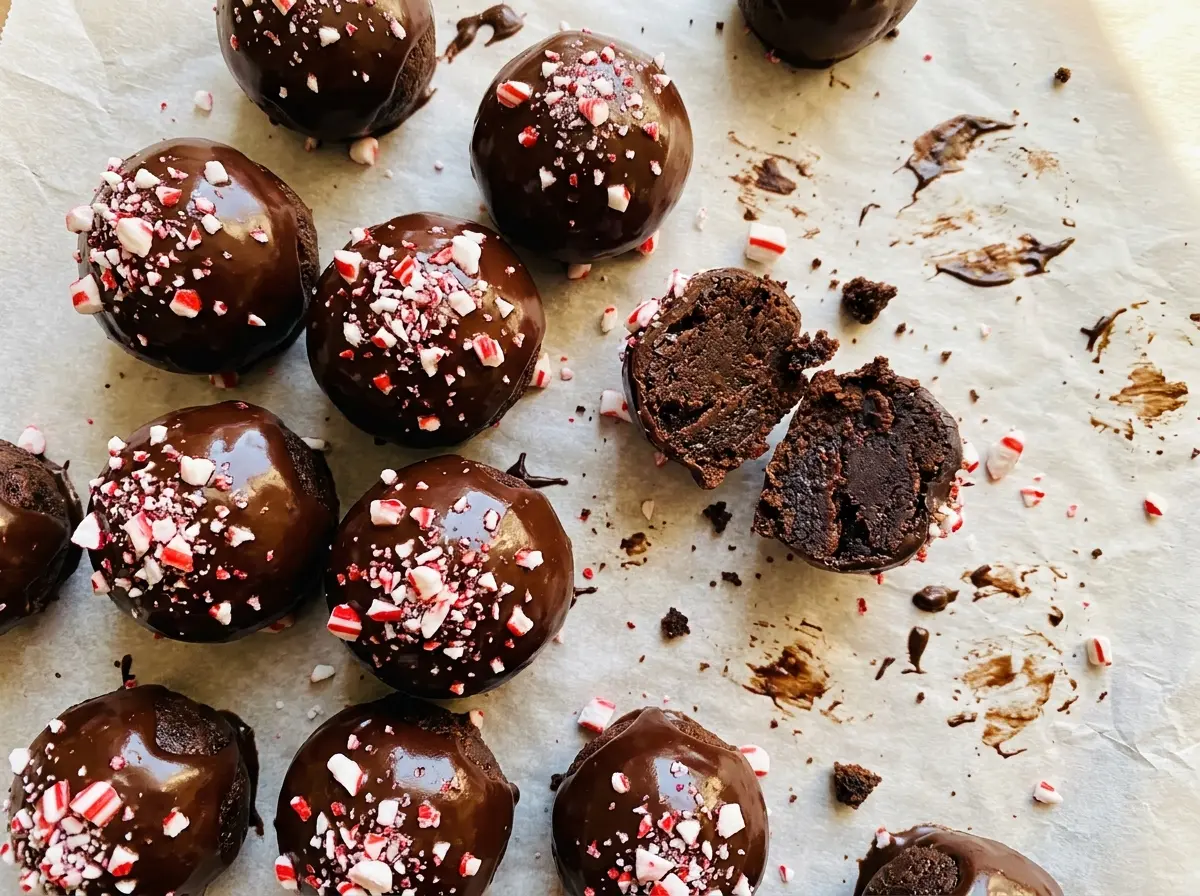
Kitchen Note
That parchment overhang earns its keep once the brownies are cool. Lift the whole slab out before crumbling, and you won’t have to scrape the corners of the pan to get every bit.
Save these peppermint brownie truffles for a chocolate-and-mint treat with a fudgy center and a crunchy candy finish.
Why a Cakey Brownie Makes a Loose Truffle Center
These centers start with brownies, not a light cake crumb. The brownie batter has no baking soda or baking powder, so it bakes into a compact base with plenty of chocolate flavor in each bite. That matters after you crumble it: the cream cheese binds those close, tender crumbs into a mixture you can shape without adding another binder.
Dry, airy crumbs don’t give you the same result. If the brownies are overbaked, they’re more likely to feel dry and take extra mixing to become cohesive. Fold the flour in only until the dry streaks disappear; a heavy hand can make the baked slab firmer than you want for rolling. Then let it cool completely before adding the cream cheese. The goal is a brownie base that holds its shape but still blends smoothly into the peppermint-scented center.
What the Brownie, Binder, and Coating Each Bring

- Unsalted butter — It melts into the brownie batter and lets you control the salt separately. If salted butter is what you have, leave out the kosher salt so the seasoning doesn’t stack up.
- Unsweetened cocoa powder — This supplies the brownie’s chocolate flavor without adding sugar. Use unsweetened cocoa rather than sweetened cocoa drink mix, which would change both the sweetness and the structure.
- All-purpose flour — Flour gives the brownie enough structure to crumble and roll. A 1:1 gluten-free baking flour blend is the most practical swap; choose one made for cup-for-cup baking.
- Large eggs — They hold the brownie batter together and give the baked layer its structure. Stick with large eggs for the intended balance in this small pan.
- Cream cheese — Softened cream cheese blends into the crumbs without leaving firm lumps. Block-style cream cheese gives a thicker, more reliable center than whipped cream cheese. A dairy-free cream cheese can work as a replacement, though its texture may make the mixture softer.
- Peppermint extract — Extract brings mint flavor directly into the brownie center. If you don’t have it, vanilla extract can stand in, but the centers will lose that peppermint note; the candy topping will still taste minty.
- Semisweet chocolate chips and coconut oil — Semisweet chocolate balances the sweet brownie and candy, while coconut oil helps it coat the chilled balls. Chopped semisweet chocolate can replace the chips; keep the pieces small so they melt evenly.
- Crushed peppermint candies — The candy adds a crisp finish and a brighter mint hit. Crushed candy canes work just as well; pieces that are too large are harder to sprinkle evenly.
From Brownie Batter to a Set Chocolate Shell
Bake the brownie slab
Heat the oven to 350°F and line an 8-inch square pan with parchment, leaving an overhang, then lightly grease the parchment. Melt the butter in a medium microwave-safe bowl and whisk in the sugar, eggs, and vanilla until smooth, followed by the cocoa. Fold in the flour and salt just until no dry streaks remain, then spread the batter evenly in the pan. Bake for 22 to 27 minutes, until a toothpick in the center comes out with a few moist crumbs, and cool the brownies completely in the pan.
Mix the crumbs into a cohesive center
Crumble the cooled brownies into a large bowl. Add the softened cream cheese and peppermint extract, then mix until the crumbs are evenly coated and the mixture holds together. Stop once it looks cohesive; you don’t need to keep mixing after the cream cheese is incorporated. Unevenly mixed cream cheese leaves pale pockets in the centers, so scrape the bowl as you combine everything.
Shape and chill the 24 centers
Shape the mixture into 24 balls and set them on a parchment-lined baking sheet. Keep the portions as even as you can so they chill at about the same rate. Refrigerate the balls for 30 minutes, until firm. If they still feel soft when you pick one up, give them more time in the refrigerator before dipping.
Dip, sprinkle, and let the coating set
Put the chocolate chips and coconut oil in a heatproof bowl. Microwave at 50% power in 30-second intervals, stirring between each one, until the chocolate is smooth. Dip each chilled ball, let the excess chocolate drip back into the bowl, and return it to the baking sheet. Sprinkle with crushed peppermint candies while the coating is still wet, then refrigerate for about 20 minutes, until the shell is set.
Three Ways to Change the Peppermint Crunch
Make the brownie layer gluten-free
Replace the all-purpose flour with a 1:1 gluten-free baking flour blend. The brownie may be a little more delicate when crumbled, but the cream cheese brings the mixture together for rolling.
Put peppermint crunch inside and out
Fold some of the crushed peppermint candies into the brownie-and-cream-cheese mixture, saving the rest for the tops. The centers get little crunchy bits throughout instead of keeping all the candy on the chocolate shell.
Skip the chocolate shell
Roll the shaped centers in crushed peppermint candies instead of dipping them in chocolate. You’ll get a softer, more candy-forward finish without the crisp chocolate coating.
Make-Ahead and Storage
- Refrigerator: Keep the finished truffles in an airtight container for up to 4 days. The peppermint candy topping may soften a little as it sits.
- Freezer: Freeze the truffles in a single layer until firm, then transfer them to an airtight container for up to 2 months. Thaw them in the refrigerator; the candy topping may be less crisp afterward.
- Serving: Serve chilled, or let a truffle sit at room temperature for about 10 minutes to soften the center slightly.
Questions That Come Up While Making These Truffles
Peppermint Brownie Truffles
Ingredients
Equipment
Method
- Heat the oven to 350°F.
- Line an 8-inch square baking pan with parchment paper, leaving an overhang, and lightly grease the parchment.
- Melt the butter in a medium microwave-safe bowl.
- Whisk in the sugar, eggs, and vanilla until smooth, then whisk in the cocoa powder.
- Fold in the flour and salt just until no dry streaks remain, then spread the batter evenly in the prepared pan.
- Bake for 22 to 27 minutes, until a toothpick inserted in the center comes out with a few moist crumbs.
- Cool completely in the pan.
- Crumble the cooled brownies into a large bowl.
- Add the cream cheese and peppermint extract, then mix until evenly combined and cohesive.
- Shape the mixture into 24 balls and place them on a parchment-lined baking sheet.
- Refrigerate for 30 minutes, until firm.
- Microwave the chocolate chips and coconut oil in a heatproof bowl at 50% power in 30-second intervals, stirring between intervals, until smooth.
- Dip each chilled ball in the melted chocolate, letting excess chocolate drip back into the bowl, then return it to the baking sheet.
- Sprinkle with crushed peppermint candies while the coating is still wet.
- Refrigerate for about 20 minutes, until the coating is set.