
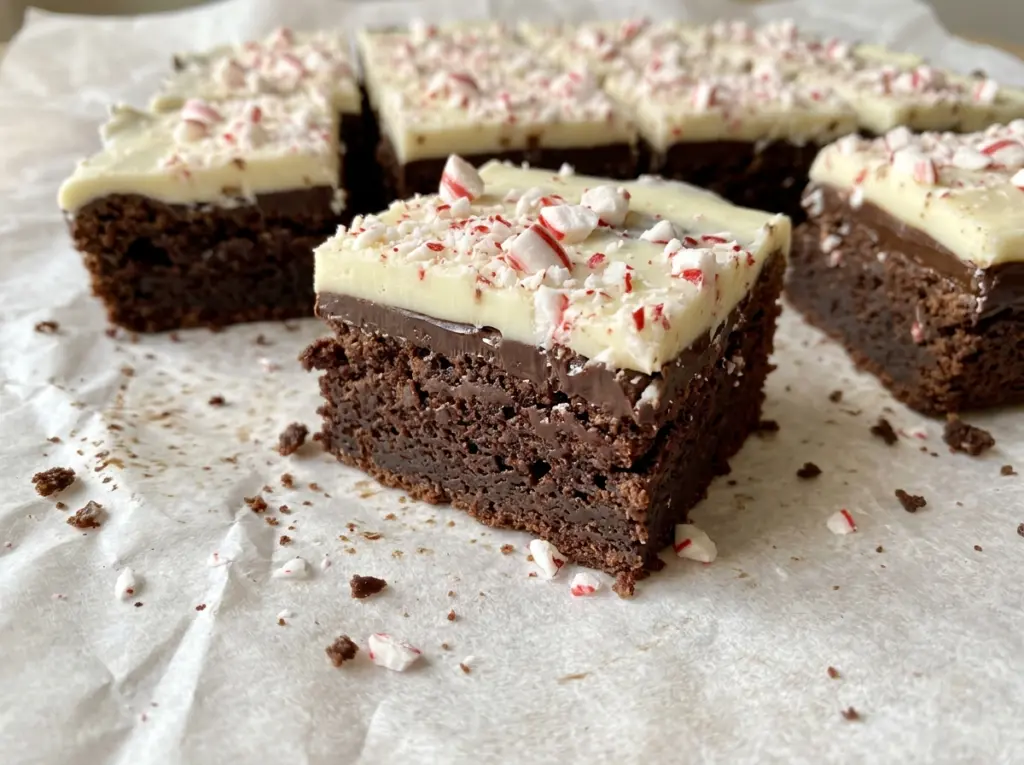
When the semisweet chocolate hits the cooled brownie slab, it spreads into a glossy layer that looks ready for the white chocolate right away. Give it a little time, though: chilling that first layer keeps the two chocolates distinct instead of letting them slide together.
I make these Peppermint Bark Brownies when I want a rich, chewy brownie with the crisp peppermint finish of bark. The brownie base is simple, but the layers reward a little patience. Melt the chocolate gently, fold the flour in just until the dry streaks disappear, and let the brownies cool completely before topping them. That gives you a tender center beneath two clean chocolate layers and a bright crunch of candy cane.
Kitchen Note
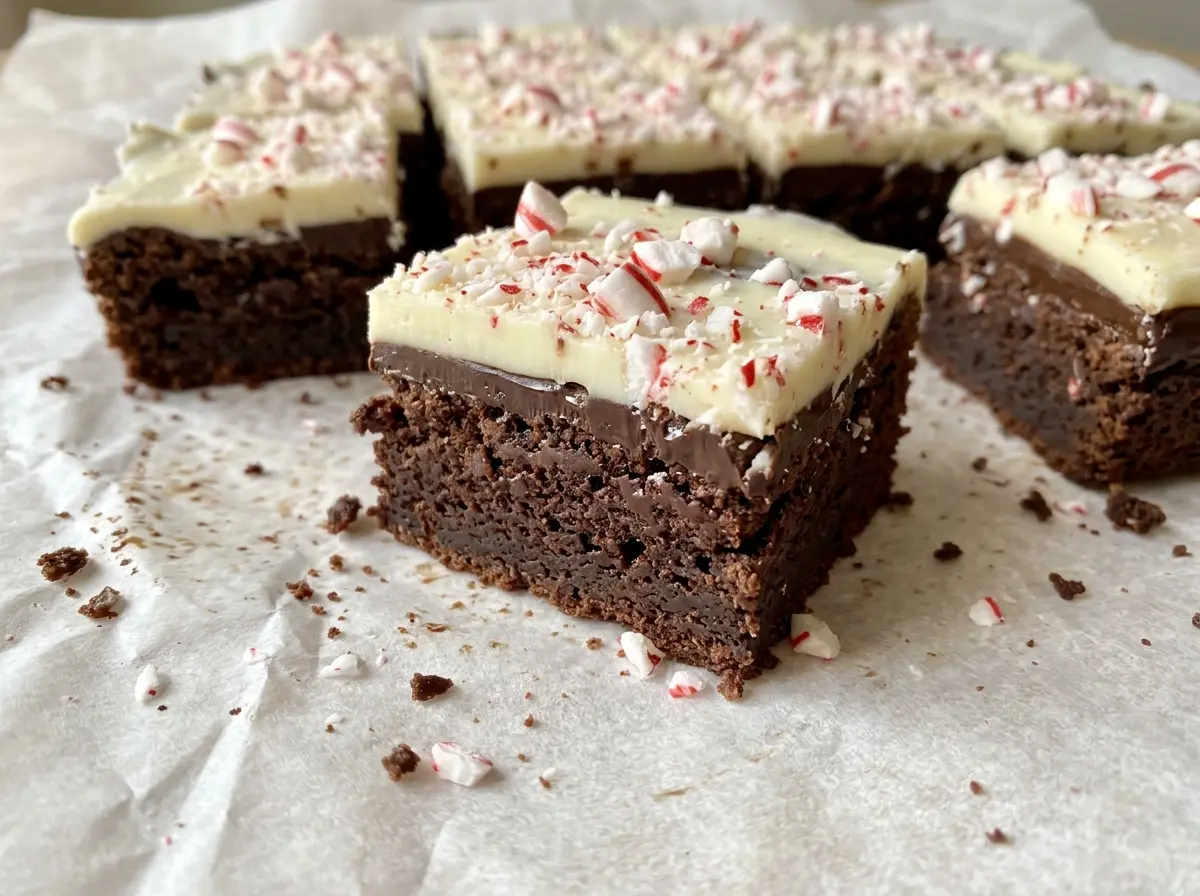
Use a clean bowl for the white chocolate, and keep it away from water. Even a little moisture can make melted chocolate seize and turn thick before you can spread it.
Save these Peppermint Bark Brownies for a bake sale or holiday tray: chewy chocolate brownies, a crisp peppermint top, and two distinct layers.
Why the Semisweet Layer Needs to Set Before the White Chocolate Goes On
The topping isn’t one melted mixture; it’s two separate chocolate layers. The semisweet chocolate goes down first, then gets a short chill until firm. That pause gives the white chocolate a stable surface to sit on, so you can spread it without dragging the darker layer into streaks.
That contrast matters when you cut the brownies, too. A firm dark layer beneath the white one gives each piece a clear top, and the crushed candy canes stay visible instead of disappearing into a marbled finish. Don’t leave the first layer in the refrigerator longer than needed to firm it. The goal is a set surface, not a long, hard chill that makes spreading the next layer awkward.
The brownie base has to be completely cool before either chocolate goes on. Warm brownies soften the semisweet layer from underneath, which can blur the boundary you just took time to create. Once the base is cool and the first topping is firm, the white chocolate spreads neatly across the pan.
What Each Chocolate Does in These Peppermint Bark Brownies

- Bittersweet chocolate — This gives the brownie base its deep chocolate taste and fudgy texture. A good-quality baking chocolate bar melts smoothly, but a reasonably priced bar works well; the main thing is to chop it so the pieces melt evenly. Semisweet baking chocolate can stand in if you prefer a sweeter brownie.
- Butter — Butter carries the melted chocolate through the batter and keeps the crumb rich. Store-brand unsalted butter is fine here; there’s no need for a specialty butter when its main job is to melt into the chocolate.
- Eggs — Whisking them in one at a time helps the chocolate mixture turn into a cohesive batter. Add the vanilla with them, then stop once it’s incorporated rather than continuing to whisk air into the mixture.
- All-purpose flour — Flour gives the brownies enough structure to hold the bark topping without making the center cakey. Fold it in gently and stop when no dry streaks remain. A cup-for-cup gluten-free baking blend is the most practical swap; see the variation below.
- White chocolate baking bar — The bar melts into a smoother, more spreadable layer than many white chocolate chips, which can stay thicker because of their stabilizers. For the cleanest top, chop the bar into small pieces before melting.
- Crushed candy canes — They bring the peppermint crunch and the familiar candy-cane finish. Crush them shortly before topping if you want the pieces to stay crisp, and press them gently into the white chocolate so they hold as it sets.
From Glossy Brownie Batter to a Snappable Bark Top
Build a smooth chocolate batter
Heat the oven to 350°F, grease a 9×13-inch pan, and line it with parchment with overhang on two sides. Set a large heatproof bowl over a saucepan of barely simmering water and stir the butter and chopped bittersweet chocolate until smooth. Take the bowl off the heat, stir in the sugar, and let the mixture cool for 5 minutes before whisking in the eggs one at a time and stirring in the vanilla. Fold in the flour and salt just until the last dry streaks disappear; overmixing at this point can make the brownies tougher.
Bake to moist crumbs, not a clean pick
Spread the batter evenly in the prepared pan so the center and edges bake at a similar pace. Bake for 28–33 minutes, then check the center with a toothpick. A few moist crumbs mean the brownies are ready; a completely clean toothpick usually means the center has gone further than you want for a fudgy base. Cool the brownies completely in the pan before adding any topping.
Set the semisweet chocolate first
Melt the semisweet chocolate chips in a microwave-safe bowl using 20-second bursts, stirring between each one. Stop when the chocolate is smooth rather than continuing to heat it for an extra burst. Spread it evenly over the cooled brownies, then refrigerate the pan for 10–15 minutes, until the chocolate feels firm. If the layer still looks wet or shifts when lightly touched, give it a little longer before adding the white chocolate.
Finish the bark and let it settle
In a clean microwave-safe bowl, melt the chopped white chocolate in 15-second bursts, stirring between each burst. Spread it over the set semisweet layer, then sprinkle the crushed candy canes on top and press them in gently. Refrigerate for 15–20 minutes, until the topping is set. Let the pan stand at room temperature for 20 minutes before lifting the brownies out by the parchment and cutting them.
Two Ways to Change the Bite Without Losing the Bark
Make the brownies gluten-free
Replace the all-purpose flour with the same volume of a cup-for-cup gluten-free baking blend made for baking. Use a blend that includes xanthan gum, if the brand requires it for structure. The chocolate layers stay the same, while the brownie crumb may be a little more delicate.
Choose your candy cane crunch
Crush the candy canes into small, even pieces for crunch in every bite, or leave a few larger shards for a more pronounced snap on top. Keep the amount the same and press the pieces lightly into the white chocolate so they stay in place.
Storage and Reheating
- Refrigerator: Store the cut brownies in an airtight container for up to 5 days. The brownie will be firmer when cold, and the candy cane pieces may soften.
- Freezer: Freeze pieces in a single layer until firm, then wrap them well and keep them in an airtight container for up to 2 months. Thaw while still wrapped to reduce condensation on the candy topping.
- Reheating: These are best without reheating; a microwave can soften the chocolate layers unevenly. Let a chilled piece sit at room temperature until the brownie softens slightly before eating.
Questions That Come Up When the Layers Meet
Peppermint Bark Brownies
Ingredients
Equipment
Method
- Heat the oven to 350°F.
- Grease a 9x13-inch baking pan, then line it with parchment paper, leaving overhang on two sides.
- Melt the butter and bittersweet chocolate in a large heatproof bowl set over a saucepan of barely simmering water, stirring until smooth.
- Remove the bowl from the heat.
- Stir the sugar into the chocolate mixture and let it cool for 5 minutes.
- Whisk in the eggs one at a time.
- Stir in the vanilla.
- Fold in the flour and salt just until no dry streaks remain.
- Spread the batter evenly in the prepared pan.
- Bake for 28–33 minutes, until a toothpick inserted in the center comes out with a few moist crumbs.
- Cool completely in the pan.
- Melt the semisweet chocolate chips in a microwave-safe bowl in 20-second bursts, stirring between bursts.
- Spread the semisweet chocolate evenly over the cooled brownies.
- Refrigerate the pan for 10–15 minutes, until the chocolate layer is firm.
- Melt the white chocolate in a clean microwave-safe bowl in 15-second bursts, stirring between bursts.
- Spread the white chocolate over the semisweet layer.
- Sprinkle with the crushed candy canes, pressing them in gently.
- Refrigerate for 15–20 minutes, until the topping is set.
- Let the brownies stand at room temperature for 20 minutes.
- Lift the brownies from the pan and cut them.