

The cream should be steaming, not bubbling hard, when it meets the chopped chocolate. Give the bowl five quiet minutes before whisking, and the pieces turn into a smooth, glossy base without any stovetop fuss. That gentle start is what makes these no-bake chocolate hazelnut snowflake truffles feel rich and creamy instead of firm like a candy bar.
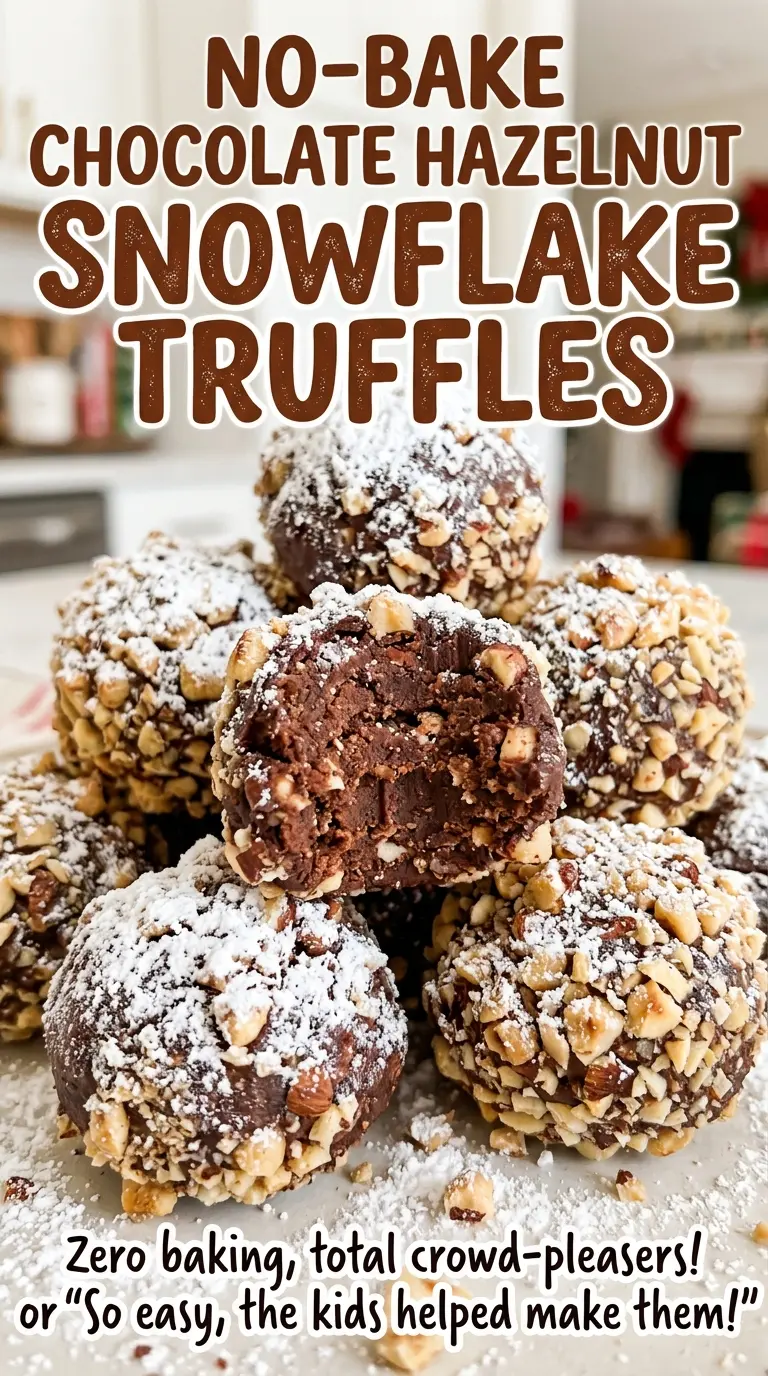
The centers bring semisweet chocolate and chocolate-hazelnut spread together, then a white chocolate shell gives each bite a crisp finish. I like how the snowflake sprinkles make them look dressed up without adding another fussy step. The truffles need a little refrigerator time between shaping and dipping, but the work itself is simple: a soft ganache center, a smooth coating, and a snowy finish.

Kitchen Note
Keep the portions close in size as you scoop. Uneven centers chill and coat at different rates, so a few oversized ones may still feel soft when the rest are ready.
Save these no-bake chocolate hazelnut snowflake truffles for a creamy ganache center tucked inside a crisp white chocolate shell.
Why These Truffles Have Two Different Chocolate Textures
The center and the coating do different jobs. Semisweet chocolate softened with cream makes a tender ganache, and the chocolate-hazelnut spread brings its own flavor and a softer, more yielding feel. The outer white chocolate layer is a separate shell, so each bite moves from a creamy middle to a firmer snap.
That contrast is also why swapping the two chocolates around isn’t a simple trade. The semisweet chocolate is part of a creamy center, while the melting wafers are meant to become a coating. Keeping each one in its role gives the truffles a clear chocolate-hazelnut flavor without making the outside as soft as the filling. The fine salt rounds out the sweetness, especially against the white chocolate.
Think of these as chilled ganache candies rather than little frosted cake balls. Their texture depends on the center being soft enough to enjoy but firm enough to hold its shape, while the shell gives a clean finish. The two parts complement each other instead of competing for the same texture.
What Each Chocolate Brings to the Snowflake Truffles
- Semisweet chocolate — This forms the truffle centers, so finely chopped pieces matter: smaller, even pieces soften more consistently under the hot cream. Use semisweet chocolate rather than replacing it with the white melting wafers; they play different roles and won’t give the center the same taste.
- Heavy cream — The cream melts the chocolate into ganache and contributes the rich, soft texture. It isn’t a good place to cut the fat with a thinner dairy substitute; the center may not set the same way.
- Chocolate-hazelnut spread — This is where the recognizable hazelnut note comes from, and it also makes the chocolate center softer and more spreadable. A different brand of the same kind of spread is the closest practical swap, though sweetness and texture can vary a little.
- White chocolate melting wafers — Wafers are designed to melt into a coating that firms around the chilled centers. Regular semisweet chocolate doesn’t give the same white shell, so keep these separate from the center chocolate.
- Coconut oil — A little oil loosens the melted wafers so they coat the truffles more easily. Leaving it out makes the coating thicker; there’s no need to add a different oil if you have the listed coconut oil.
- Snowflake sprinkles — These give the white shell its seasonal finish and a little crunch. They can be left off for a plain white coating, but there isn’t a substitute that keeps the snowflake look.
How to Chill, Shape, and Coat the Ganache Without a Mess
Let the Cream Soften the Chocolate
Put the finely chopped semisweet chocolate in a medium heatproof bowl. Heat the cream in a small saucepan until steaming, then pour it over the chocolate and leave it undisturbed for 5 minutes. That resting time gives the chopped pieces a chance to soften before you whisk. If you start whisking too soon, you may still see firm bits of chocolate in the bowl.
Whisk the Ganache Until Glossy
Whisk the chocolate and cream until smooth, then whisk in the chocolate-hazelnut spread and fine salt. The finished mixture should look uniform and glossy, without streaks of cream or spread. Cover the bowl and refrigerate it for 2 to 3 hours, until the ganache is firm enough to scoop. If it’s still loose, it won’t hold its shape cleanly.
Shape the Centers and Chill Again
Line a rimmed baking sheet with parchment paper before scooping. Portion the mixture into 24 pieces, about 1 1/2 tablespoons each, and roll each one into a ball with your hands. Set the balls on the prepared sheet and refrigerate them for 30 minutes. This second chill firms the outside of the centers for dipping.
Melt the White Coating in Short Bursts
Combine the white chocolate melting wafers and coconut oil in a heatproof bowl. Microwave in 20-second bursts, stirring between each burst, until the mixture is smooth. Keep stirring as the wafers soften so the heat spreads through the bowl instead of concentrating in one spot. Stop once the coating is smooth; overheating can make melted chocolate harder to work with.
Dip, Decorate, and Let the Shell Set
Dip each chilled truffle into the melted coating, then let the excess drip back into the bowl before returning it to the parchment-lined sheet. Add the snowflake sprinkles right away, while the coating is still wet; they won’t adhere once the shell sets. Refrigerate the finished truffles for 15 to 20 minutes, until the white coating is firm.
Three Ways to Change the Look and Size of These Truffles
Serve the Hazelnut Centers Uncoated
Skip the white chocolate coating, coconut oil, and snowflake sprinkles, and serve the chilled chocolate-hazelnut balls on their own. They have a softer, more direct ganache texture and a deeper semisweet chocolate taste, without the crisp outer layer.
Leave the White Shell Plain
Omit the snowflake sprinkles and keep the white coating smooth and undecorated. The truffles will have the same creamy center and crisp shell, but a simpler finish and no crunchy sprinkle topping.
Make Smaller, One-Bite Truffles
Scoop the ganache into smaller portions and roll them evenly, keeping the total mixture the same. You’ll get more than 24 smaller pieces, each with a higher proportion of white shell to center and a neat bite-size shape.
Storage and Serving
- Refrigerator: Store in an airtight container for up to 1 week. The centers and shell will be firm when chilled.
- Freezer: I don’t recommend freezing these; condensation as they thaw can leave marks on the white coating.
- Serving: Serve chilled, straight from the refrigerator. These are ganache truffles, so there’s no reheating step.
Questions That Come Up When Making Snowflake Truffles
No-Bake Chocolate Hazelnut Snowflake Truffles
Ingredients
Equipment
Method
- Put the chopped chocolate in a medium heatproof bowl.
- Heat the cream in a small saucepan until steaming.
- Pour the steaming cream over the chocolate and let stand for 5 minutes.
- Whisk the chocolate and cream until smooth.
- Whisk in the chocolate-hazelnut spread and salt.
- Cover and refrigerate for 2 to 3 hours, until firm enough to scoop.
- Line a rimmed baking sheet with parchment paper.
- Scoop the mixture into 24 portions, about 1 1/2 tablespoons each.
- Roll the portions into balls with your hands.
- Arrange the balls on the prepared baking sheet.
- Refrigerate for 30 minutes.
- Combine the white chocolate wafers and coconut oil in a heatproof bowl.
- Microwave in 20-second bursts, stirring between each, until smooth.
- Dip each chilled truffle in the melted coating.
- Let excess coating drip back into the bowl.
- Return each truffle to the baking sheet.
- Immediately add snowflake sprinkles before the coating sets.
- Refrigerate for 15 to 20 minutes, until the coating is set.
- Store the truffles in an airtight container in the refrigerator for up to 1 week.