

The edge of a tart shell can look perfectly golden while the base is still a little soft, and pastry cream will find that weak spot as soon as it goes in. I bake this shell with weights first, then without them, so the bottom has time to dry out and turn crisp. It gives the pistachio cream a sturdy place to sit without making the crust thick or hard.
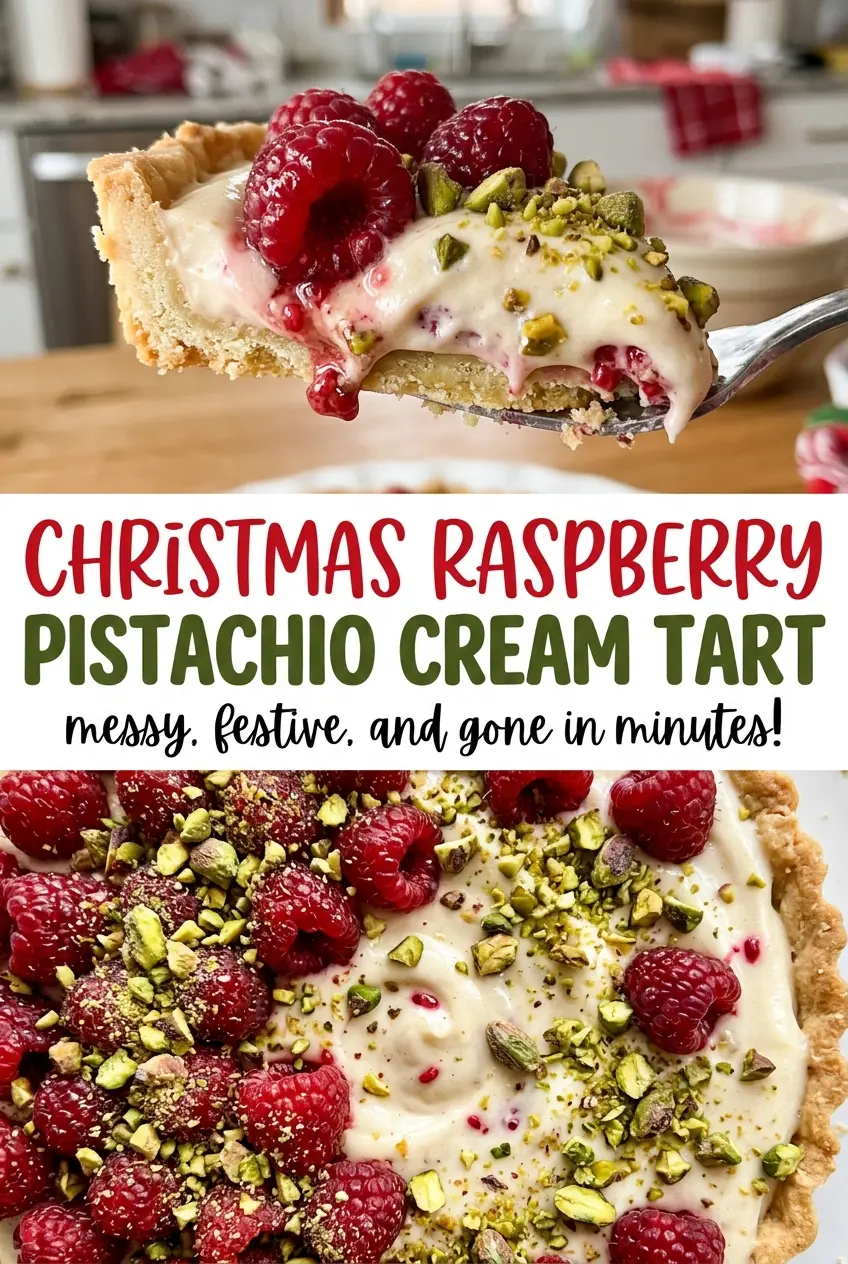
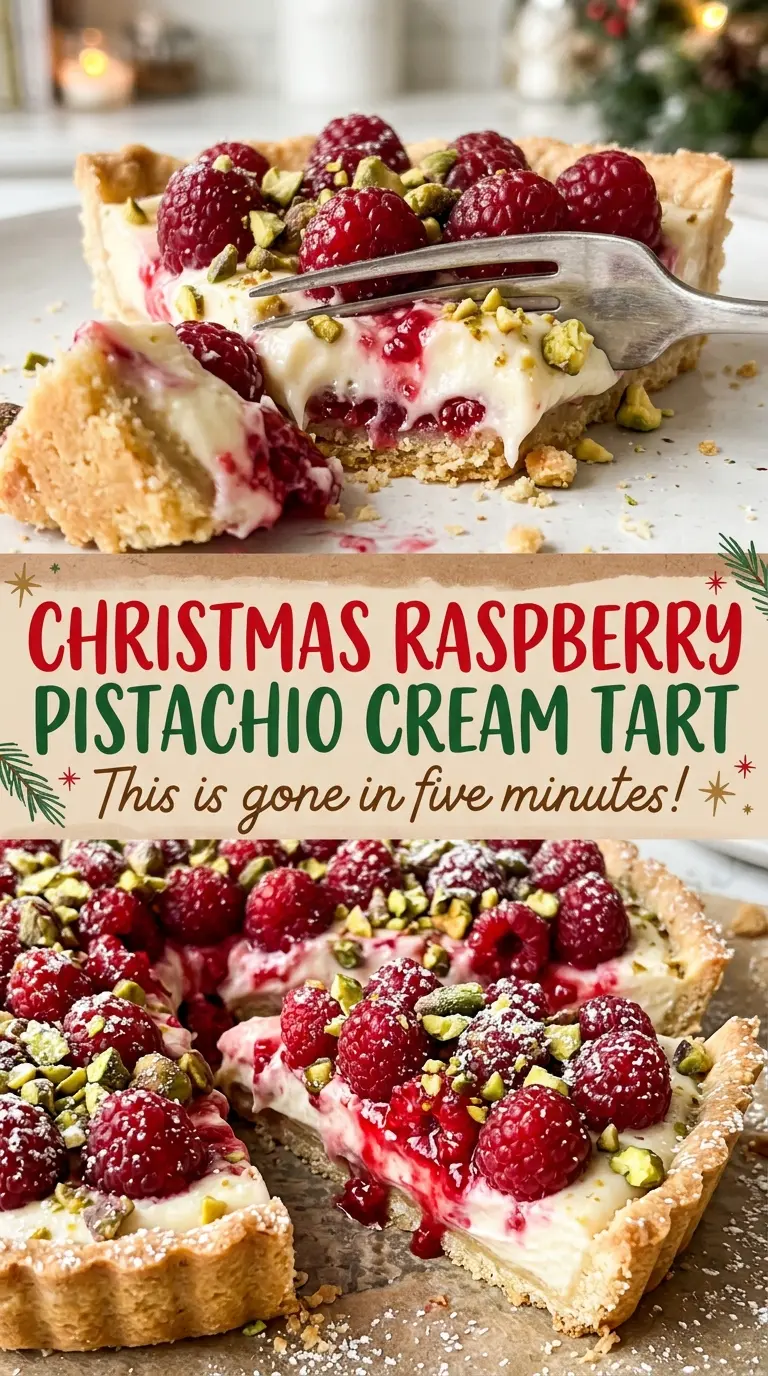
For this Christmas Raspberry Pistachio Cream Tart, the pistachios go into the cream itself, not just over the top. Grinding them with some of the sugar makes a fine, fragrant base that carries through the custard, while fresh raspberries keep each bite bright. The seedless preserve glaze adds a gentle shine without hiding the berries. Give the cream time to chill completely before filling the shell, and you’ll have neat layers of buttery crust, cool pistachio filling, and tart fruit.
Kitchen Note
Once the pistachio cream is thick and bubbling, keep whisking for the full extra minute. That brief finish helps the cornstarch set the filling properly, so it slices as cream instead of slumping into the shell.
Save this Christmas Raspberry Pistachio Cream Tart for its cool pistachio filling, crisp shell, and glossy raspberry top.
Why This Tart Shell Needs Two Separate Bakes
A custard tart asks more of its crust than a pie filled before baking. The filling is already cooked and chilled, so the shell has to be fully baked on its own and able to hold a soft, cool layer without turning damp underneath. That’s why I don’t skip the second bake after removing the pie weights. The first stretch helps the shell keep its shape; the uncovered stretch lets the base and sides finish browning.
Look for a shell that’s golden rather than pale before you take it out. The weights support the pastry while it starts to set, but they also cover the base, so the bottom needs more oven time once they’re gone. The dough’s two rests matter, too: one gives the disk time to firm up before rolling, and the other chills the pastry in its tart-pan shape before it meets the oven. Together, those pauses help the shell keep a clean edge and give the filling a crisp foundation.
What Gives the Pistachio Cream Its Character
- Cold unsalted butter — Cold cubes cut into the flour give the shell its tender, crumbly texture. Keep the butter cold while you work; a store-brand unsalted butter is fine, and there’s no need to use a specialty brand.
- Pistachios — Shelled, unsalted nuts keep the cream’s color and flavor clean, and grinding them with sugar helps them break down finely instead of clumping. Use nuts that taste fresh; stale or rancid pistachios will stand out in a filling with so few competing flavors.
- Whole milk, egg yolks, and cornstarch — These make the rich, set custard that holds the berries above the shell. Whole milk gives the cream a fuller texture than lower-fat milk, while the yolks add richness and the cornstarch helps it thicken. Whisk the yolks and cornstarch smooth before tempering.
- Fresh raspberries — Choose dry, firm berries without crushed or moldy spots so they sit neatly on the chilled cream. Fresh fruit is important here; thawed berries release liquid and won’t hold the same shape on top.
- Seedless raspberry preserves — Warming the preserves makes them easy to brush into a thin glaze, and the seedless texture keeps the finish smooth. A basic jar works well; no special preserves are needed.
From Buttery Dough to a Clean, Glossy Finish
Bring the Dough Together Without Overworking It
Whisk the flour, powdered sugar, and salt, then cut in the cold butter until the mixture looks like coarse crumbs. Toss in the ice water with a fork, starting with two tablespoons, and add more a teaspoon at a time only until a squeezed handful holds together. Press the dough into a disk, wrap it, and refrigerate it for 1 hour. Roll it between parchment sheets into an 11-inch round, fit it into a 9-inch tart pan with a removable bottom, and trim the edges without stretching the dough.
Bake the Shell Until the Base Is Golden
Refrigerate the lined tart pan for 30 minutes while the oven heats to 375°F. Line the shell with parchment and fill it with pie weights, then bake for 20 to 25 minutes. Lift out the parchment and weights and bake the shell for another 8 to 12 minutes, until golden. Let it cool completely in the pan before adding the cream; filling a warm shell can soften the pastry.
Cook and Chill the Pistachio Cream
Pulse the pistachios with part of the sugar in a food processor until finely ground. Whisk them in a saucepan with the milk and remaining sugar, then heat over medium until steaming. In a separate bowl, whisk the yolks and cornstarch until smooth, then slowly whisk in the hot milk mixture so the yolks warm gradually. Return everything to the saucepan and whisk constantly over medium heat until thick and bubbling, continue for 1 minute, then take it off the heat and whisk in the vanilla.
Transfer the cream to a bowl and press plastic wrap directly onto its surface. Refrigerate it for at least 2 hours, until cold. The cream should be chilled through before it goes into the shell, not merely cool around the edges.
Arrange the Berries and Brush on the Glaze
Spread the cold pistachio cream evenly in the completely cooled shell, then arrange the fresh raspberries over it. Warm the seedless raspberry preserves in a small microwave-safe bowl for 15 to 20 seconds and stir until smooth. Brush the preserves gently over the berries so they shine without getting crushed. Refrigerate the finished tart for at least 30 minutes before serving.
Two Sensible Ways to Adapt the Tart
A gluten-free shell
Replace the all-purpose flour with the same volume of a cup-for-cup gluten-free baking blend. The dough will be more delicate, so keep rolling it between parchment and transfer it carefully into the pan; the finished shell will be a little more crumbly but still gives the cream a crisp base.
A blackberry-and-raspberry top
Replace some or all of the fresh raspberries with fresh blackberries, keeping the total fruit amount the same. The berries make a darker, less tart topping, while the raspberry preserves still give the fruit a smooth glaze.
Keeping and Serving the Tart
- Refrigerator: Cover and refrigerate the tart, and enjoy it within 2 days. The berries soften and the shell gradually loses some of its crispness.
- Freezer: I don’t recommend freezing the assembled tart; the berries collapse as they thaw and the custard can turn watery.
- Reheating: No reheating is needed; serve it chilled. Warming the tart softens the cream and fruit.
Questions That Come Up With This Raspberry Pistachio Tart
Christmas Raspberry Pistachio Cream Tart
Ingredients
Equipment
Method
- Whisk together the flour, powdered sugar, and salt in a large bowl.
- Cut in the cold butter until the mixture resembles coarse crumbs.
- Toss in 2 tablespoons of ice water with a fork, then add up to 1 tablespoon more, a teaspoon at a time, until the dough holds together when squeezed.
- Press the dough into a disk, wrap it, and refrigerate for 1 hour.
- Roll the dough between sheets of parchment into an 11-inch round.
- Fit the dough into a 9-inch round tart pan with a removable bottom and trim the edges.
- Heat the oven to 375°F.
- Refrigerate the lined tart pan for 30 minutes.
- Line the shell with parchment and fill it with pie weights.
- Bake for 20 to 25 minutes.
- Remove the parchment and weights, then bake for 8 to 12 minutes more, until golden.
- Cool the tart shell completely in the pan.
- Pulse the pistachios with 1/4 cup of the sugar in a food processor until finely ground.
- Whisk together the milk, ground pistachios, and remaining 1/4 cup sugar in a medium saucepan.
- Heat over medium until steaming.
- Whisk the egg yolks and cornstarch in a medium bowl until smooth.
- Slowly whisk in the hot milk mixture.
- Return the mixture to the saucepan and cook over medium heat, whisking constantly, until thick and bubbling.
- Continue whisking for 1 minute.
- Remove from the heat and whisk in the vanilla.
- Transfer the cream to a bowl, press plastic wrap directly onto its surface, and refrigerate for at least 2 hours, until cold.
- Spread the cold pistachio cream evenly in the cooled tart shell.
- Arrange the raspberries over the top.
- Warm the raspberry preserves in a small microwave-safe bowl for 15 to 20 seconds.
- Stir the preserves until smooth, then gently brush them over the raspberries.
- Refrigerate the tart for at least 30 minutes before serving.