
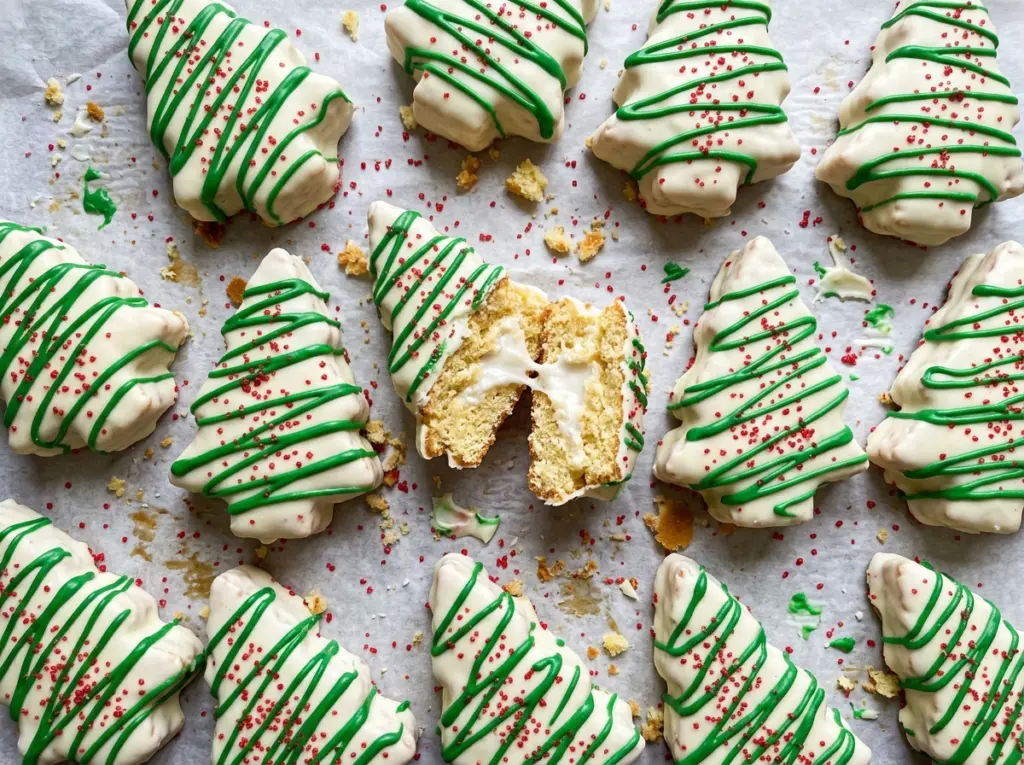
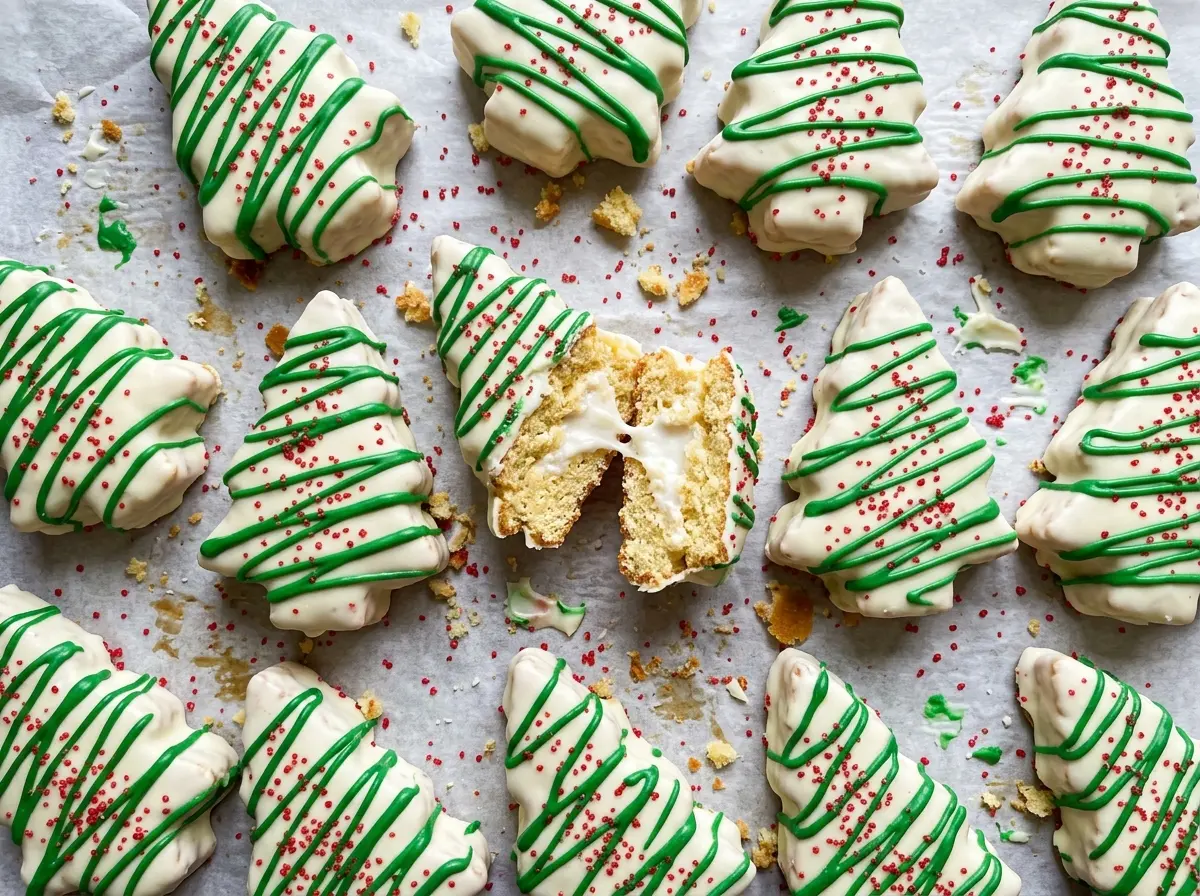
White candy coating makes every rough edge easy to see, so I want the cake underneath it soft and the cutouts neat. Homemade Little Debbie Christmas Tree Cakes start with two thin vanilla layers and a marshmallow-creme filling, then get their familiar white shell, green sugar, and red stripes. The layers are sturdy enough to hold the filling, but tender enough to eat without feeling like a dense block of cake.
I mix the batter just until the dry streaks disappear, then let the cakes cool completely before I stack them with the filling. A chill firms the sandwich so the tree cutter can pass through without dragging the layers around. Once dipped, the cakes have a smooth candy shell around a soft center, with a little crunch from the green sugar and bright red lines on top.
Kitchen Note
Have the green sanding sugar beside the pan before you start dipping. It needs to go on while the white coating is still wet; once the shell sets, the sugar won’t stick.
Save these homemade Little Debbie Christmas Tree Cakes for a bake day when you want soft vanilla layers, marshmallow filling, and that smooth white candy shell.
Why the Cake Sandwich Needs a Chill Before You Cut the Trees
A freshly stacked cake is soft, and the marshmallow filling is easy to push out of place. Press a cutter into it too soon and the top layer can slide while the filling squeezes toward the edges. Chilling firms the filling and gives the two layers a steadier grip on each other, so the cutter makes a defined outline instead of a squashed one.
The goal isn’t to make the cake cold all the way through; it’s to let the filling firm enough to support a clean cut. After 45 to 60 minutes in the refrigerator, the sandwich should feel set when you gently touch the top. If it still shifts under your hand, give it a little more time rather than forcing the cutter through. That small pause helps each finished tree keep its shape when you move it to the pan for dipping.
What Gives the Layers, Filling, and Shell Their Snack-Cake Texture

- All-purpose flour and baking powder — Flour gives the layers enough structure to hold a filling and take a cutout shape, while baking powder lifts the batter. All-purpose flour is the right choice here; self-rising flour would bring its own leavening and salt and throw off the balance.
- Butter, sugar, eggs, and whole milk — Softened butter beaten with sugar creates the base for a light cake, and room-temperature eggs and milk blend in more smoothly than cold ones. The vanilla carries through the mild cake flavor. A standard store-brand unsalted butter works well; use unsalted so the salt level stays controlled.
- Shortening, powdered sugar, and marshmallow creme — Shortening gives the filling a stable, fluffy texture that holds between the layers. Powdered sugar helps it thicken, while marshmallow creme brings the familiar sweet, stretchy quality. I wouldn’t replace the shortening with butter here; the softer filling is more likely to press out when you cut the trees.
- White candy melts — These make a smooth dipping shell that firms without the extra work of tempering chocolate. Brand isn’t the place to spend more; choose candy melts that are fresh and melt smoothly. White chocolate isn’t a direct swap because it doesn’t set the same way without tempering.
- Green sanding sugar and red candy melts — The sanding sugar adds a crisp sparkle, and the red melts make the diagonal stripes. The red candy melts are for decoration, not enough coating to dip the whole batch, so keep the white melts for the outer shell.
Building the Layers and Coating Without Crumbling the Trees
Mix and bake two tender cake layers
Heat the oven to 350°F with a rack in the center, then grease two 9×13-inch pans, line their bottoms with parchment, and spray the parchment. Whisk the flour, baking powder, and salt; beat the softened butter and sugar on medium-high for about 3 minutes, until pale and fluffy, then beat in the eggs one at a time and the vanilla. With the mixer on low, add the flour mixture in three additions, alternating with the milk in two additions; start and finish with flour, and stop when no dry streaks remain. Divide the batter between the pans and bake them side by side for 18 to 22 minutes, rotating front to back halfway through, until a toothpick in the centers comes out clean. Cool in the pans for 10 minutes, loosen the edges, turn the cakes onto wire racks, remove the parchment, and let them cool completely.
Whip the filling and stack the layers
Beat the shortening and powdered sugar for 2 minutes, until the mixture looks fluffy. Beat in the marshmallow creme until the filling is smooth, with no streaks of shortening showing. Line one empty 9×13-inch pan with fresh parchment, set one cooled cake layer inside, and spread the filling evenly over it before adding the second layer. Cover the pan and refrigerate the stack for 45 to 60 minutes, until the filling is firm.
Cut out the trees
Set a parchment-lined half-sheet pan nearby so the cutouts have a place to land. Press a 3-inch tree-shaped cookie cutter straight through both cake layers, then lift each tree carefully and transfer it to the prepared pan. Cut out 12 trees, keeping the cutter upright so the edges stay defined rather than leaning or tearing.
Dip, sprinkle, and pipe the stripes
Melt the white candy melts in a deep microwave-safe bowl in 30-second intervals, stirring after each one until smooth. Dip each tree, let the extra coating drip back into the bowl, and place it on the parchment-lined pan; add green sanding sugar while the coating is wet. Let the white coating set at room temperature for 20 to 30 minutes, until firm. Melt the red candy melts in a small microwave-safe bowl in 20-second intervals, stirring until smooth, then transfer them to a zip-top bag and snip a small corner. Pipe two diagonal stripes over each set cake.
Easy Changes That Keep the Tree Cakes Recognizable
A gluten-free batch
Replace the all-purpose flour with a cup-for-cup gluten-free baking blend that includes xanthan gum, using the same volume. The crumb may be more delicate, so let the layers cool completely before stacking and handle the cutouts gently. The cake won’t have quite the same tender, even crumb, but the filling and candy coating still work well with the adaptation.
Square snack cakes instead of trees
Skip the tree-shaped cutter and cut the chilled cake sandwich into 12 squares with a sharp knife. You’ll keep the same cake, filling, and white shell, but lose the narrow points that can be tricky to dip. Use the green sugar and red stripes on top for the same festive finish.
A simpler white-and-red finish
Leave off the green sanding sugar and decorate the white-coated cakes with the red diagonal stripes only. The finish looks cleaner and skips the crunchy sugar topping, while the cake and filling stay unchanged.
Storing and Serving the Cakes
- Room temperature: Keep the cakes in an airtight container for up to 2 days; the sponge is softest at room temperature.
- Refrigerator: Store airtight for up to 5 days. The cake and filling will feel firmer when chilled, so let a serving sit out briefly if you prefer a softer bite.
- Freezer: Freeze the cakes in a single layer until firm, then wrap them individually and store in an airtight container for up to 1 month. Thaw while wrapped to help keep condensation off the coating.
Questions That Come Up While Making These Tree Cakes
Homemade Little Debbie Christmas Tree Cakes
Ingredients
Equipment
Method
- Heat the oven to 350°F with a rack in the center.
- Grease two 9x13-inch baking pans with cooking spray, line the bottoms with parchment, then spray the parchment.
- Whisk the flour, baking powder, and salt together in a medium bowl.
- Beat the butter and sugar in a large bowl on medium-high speed for about 3 minutes, until pale and fluffy.
- Beat in the eggs one at a time.
- Beat in the vanilla.
- With the mixer on low, add the flour mixture in three additions, alternating with the milk in two additions; begin and end with the flour mixture, mixing just until no dry streaks remain.
- Divide the batter evenly between the pans and bake side by side for 18–22 minutes, rotating the pans front to back halfway through, until a toothpick inserted in the centers comes out clean.
- Cool the cakes in the pans for 10 minutes.
- Loosen the edges and turn the cakes onto wire racks.
- Remove the parchment and cool the cakes completely.
- Beat the shortening and powdered sugar in a bowl for 2 minutes, until fluffy.
- Beat in the marshmallow creme until smooth.
- Line one cooled, empty 9x13-inch pan with fresh parchment and set one cake layer in it.
- Spread the filling evenly over the cake and top with the second layer.
- Cover and refrigerate for 45–60 minutes, until the filling is firm.
- Cut out 12 trees with a 3-inch tree-shaped cookie cutter and transfer them to a parchment-lined half-sheet pan.
- Melt the white candy melts in a deep microwave-safe bowl in 30-second intervals, stirring after each, until smooth.
- Dip each cake in the melted coating, let the excess drip back into the bowl, and place it on the prepared pan.
- Sprinkle each cake with green sanding sugar while the coating is still wet.
- Let the coating set at room temperature for 20–30 minutes, until firm.
- Melt the red candy melts in a small microwave-safe bowl in 20-second intervals, stirring until smooth.
- Transfer the melted red candy melts to a zip-top bag and snip a small corner.
- Pipe two diagonal stripes over each cake.