
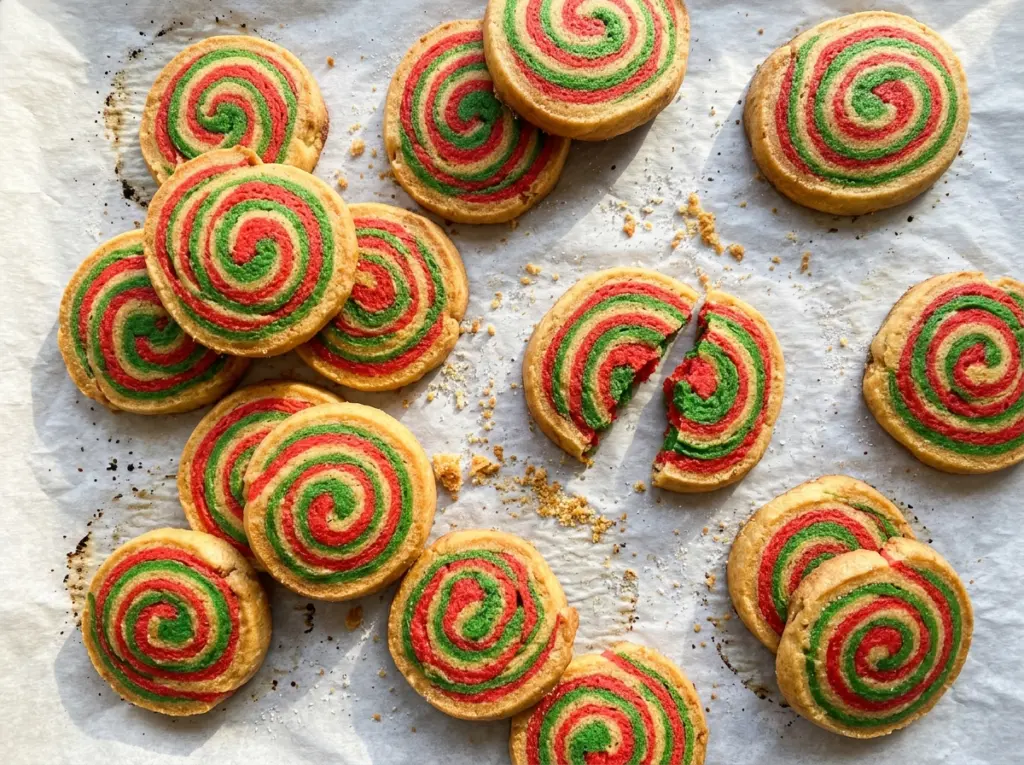
The cleanest swirl shows up when I cut into a fully chilled log: two bright colors, a tight center, and no dough dragging under the knife. These Christmas pinwheel cookies take a little patience between mixing and baking, but that rest is what turns two soft doughs into neat, sliceable rounds.
I cream the butter and sugar until they look light and fluffy, then divide the dough before adding the red and green gel coloring. Rolling each color between parchment keeps the rectangles even without burying the counter in flour. Once the layers are stacked, a snug roll gives every cookie its own crisp spiral, with buttery edges that just begin to turn golden in the oven.
Kitchen Note
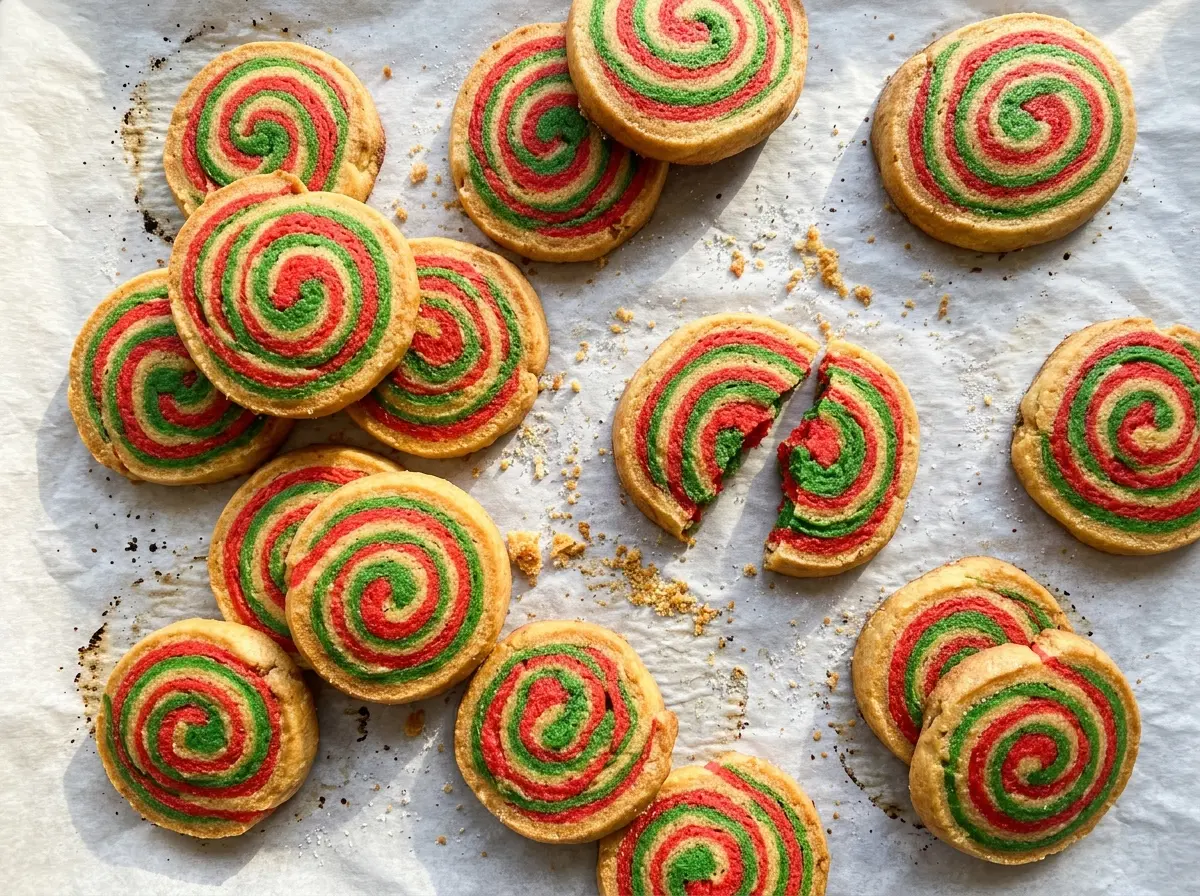
I wait until the log feels firm all the way through before slicing. If the center gives under the knife, the rounds can flatten or lose their shape; a clean, steady cut keeps the spiral defined.
Save these Christmas pinwheel cookies for a holiday bake day—the chilled log makes it easy to slice a batch of bright red-and-green spirals.
Why Even Dough Rectangles Make a Cleaner Pinwheel
A pinwheel can look off-center before it ever reaches the oven, and the problem often starts when the two dough rectangles don’t match. If one layer is thicker or wider than the other, the spiral won’t sit evenly around the center. Roll both portions to the same thickness and size, then line up their edges when you stack them. Parchment on top and underneath each piece helps you guide the dough without pulling or stretching it.
The dough is divided before coloring, which gives each half the same starting point. Knead the red and green gel into their own portions until the color looks even, rather than streaky. After the rectangles are stacked, roll from the specified 12-inch edge toward the opposite edge, keeping the layers close as you go. A tight, even roll gives the cookies a distinct swirl instead of a loose coil with a broad gap in the middle.
Why Gel Color Belongs in This Buttery Dough

- All-purpose flour — It gives the dough enough structure to roll, stack, and slice while keeping the baked cookies tender. A regular store-brand flour works well here; measure it without packing it down so the dough doesn’t turn dry and stiff.
- Unsalted butter — Softened butter creams smoothly with the sugar and gives the cookies their rich, tender bite. It should yield when pressed but shouldn’t look shiny or melted. Unsalted butter also lets the measured salt stay in control.
- Granulated sugar — Beating it with the butter adds air to the dough, helping the cookies bake up light rather than dense. Keep the mixer at medium speed and give the mixture the full 2 to 3 minutes to become light and fluffy.
- Egg and vanilla — The egg brings the dough together after creaming, while vanilla rounds out the buttery flavor. A standard pure or imitation vanilla works; scrape down the bowl so the egg and vanilla don’t linger in an unmixed streak.
- Red and green gel food coloring — Gel gives each half strong color without adding much liquid to the dough. Liquid coloring can make the dough softer and harder to handle, so gel is the better fit for clean layers and bold spirals.
From Two Colored Doughs to Neat, Golden Spirals
Cream the Butter Before Adding the Flour
Heat the oven to 350°F and line two 18×13-inch baking sheets with parchment. Whisk the flour, baking powder, and salt in a medium bowl so the leavening is distributed before it meets the butter mixture. In a large bowl, beat the softened butter and sugar with an electric mixer on medium for 2 to 3 minutes, until light and fluffy. Beat in the egg and vanilla, scraping down the bowl as needed, then mix in the flour mixture on low just until the dough comes together.
Color and Chill the Separate Portions
Divide the dough into two equal portions. Knead the red gel coloring into one portion and the green into the other, working until each color looks even throughout. Wrap both portions and refrigerate them for 30 minutes; this brief chill helps the dough hold its shape when you roll it. If the dough feels soft while you’re coloring it, keep working it gently rather than adding flour.
Stack the Rectangles and Roll a Tight Log
Roll each portion between sheets of parchment into a 10×12-inch rectangle about 1/4 inch thick. Peel away the top parchment, stack the rectangles, and align their edges before you begin rolling. Starting at a 12-inch edge, roll the stacked dough tightly toward the opposite edge to form a 12-inch log. Wrap the log and refrigerate it for 2 hours, until firm.
Slice, Bake, and Let the Edges Set
Cut the chilled log into 24 rounds, each about 1/2 inch thick, and arrange them with space between them on the prepared sheets. Bake for 10 to 12 minutes, swapping the sheets’ positions and rotating them halfway through. Look for set cookies with edges just beginning to turn golden; waiting for deep color can dry them out. Cool them on the baking sheets for 5 minutes, then transfer them to a wire rack to cool completely.
Change the Color Story Without Losing the Swirl
Choose a Different Two-Color Palette
Swap the red and green gel for two other gel colors, using the same amount in each dough portion. The buttery cookie stays the same, but the finished spirals can suit a birthday, school colors, or another celebration. Keep the colors in separate portions so the layers remain distinct.
Make One Half Gluten-Free
Replace the all-purpose flour with the same amount of a gluten-free 1:1 baking flour blend made to replace wheat flour in cookies. The dough may feel a little more delicate, so roll it between parchment and handle the rectangles gently when stacking. Choose a blend intended for baking rather than a single gluten-free flour.
Keep One Half Plain
Knead the red gel into one portion and leave the other portion uncolored instead of adding green. The finished cookies have a simple red-and-cream spiral, with the same buttery flavor and the same slice-and-bake method.
Storage and Reheating
- Refrigerator: Keep baked cookies in an airtight container for up to a week; chilling can make them firmer, so room-temperature storage is better for the tender texture.
- Freezer: Freeze completely cooled cookies in an airtight container, placing parchment between layers. Let them thaw at room temperature before serving.
- Reheating: These cookies don’t need reheating. If they’ve been frozen, thaw them at room temperature; microwaving can soften the edges and make the texture uneven.
Questions That Come Up While Rolling These Pinwheels
Christmas Pinwheel Cookies – Festive Holiday Recipe
Ingredients
Equipment
Method
- Heat the oven to 350°F and line two 18x13-inch baking sheets with parchment paper.
- Whisk the flour, baking powder, and salt together in a medium bowl.
- Beat the softened butter and granulated sugar in a large bowl with an electric mixer on medium speed for 2 to 3 minutes, until light and fluffy.
- Beat in the egg and vanilla extract until combined, scraping down the bowl as needed.
- Add the flour mixture and mix on low just until the dough comes together.
- Divide the dough into two equal portions and knead the red gel food coloring into one portion and the green gel food coloring into the other.
- Wrap each portion and refrigerate for 30 minutes.
- Roll each portion between sheets of parchment into a 10x12-inch rectangle about 1/4 inch thick.
- Stack the rectangles and align their edges.
- Starting at a 12-inch edge, roll the stacked dough tightly toward the opposite edge to form a 12-inch log.
- Wrap the log and refrigerate for 2 hours, until firm.
- Slice the log into 24 rounds, each about 1/2 inch thick, and arrange them on the prepared baking sheets with space between them.
- Bake for 10 to 12 minutes, swapping the sheets’ positions and rotating them halfway through, until the cookies are set and the edges are just beginning to turn golden.
- Cool the cookies on the baking sheets for 5 minutes.
- Transfer the cookies to a wire rack to cool completely.