
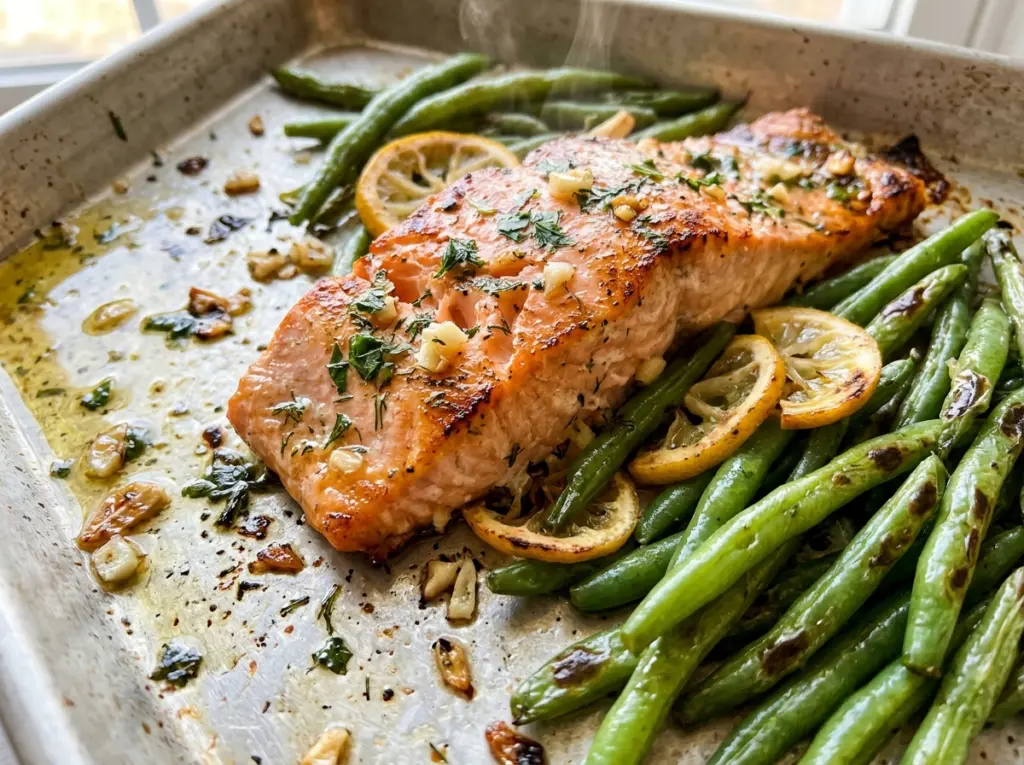
The green beans need a little time in the oven before the salmon goes on the pan. That head start lets them soften while the fish stays tender instead of spending the whole cook time waiting for the vegetables to catch up. When I pull the pan out, the beans are already beginning to turn tender, and there’s room to tuck the fillets right among them.
For this sheet pan garlic herb salmon with green beans, the herb mixture is stirred together while the vegetables roast. Olive oil carries the garlic, parsley, and thyme over the surface of each fillet, so you get a savory coating without making a separate sauce. The salmon cooks alongside the beans for the final stretch, and both are ready together.
I like this approach because the pan stays simple and the timing has a clear cue at each stage: roast the beans first, then let the salmon finish until it reaches its safe temperature and the beans are tender. The result is flaky salmon with a fragrant garlic-herb coating and green beans that have had enough time to soften.
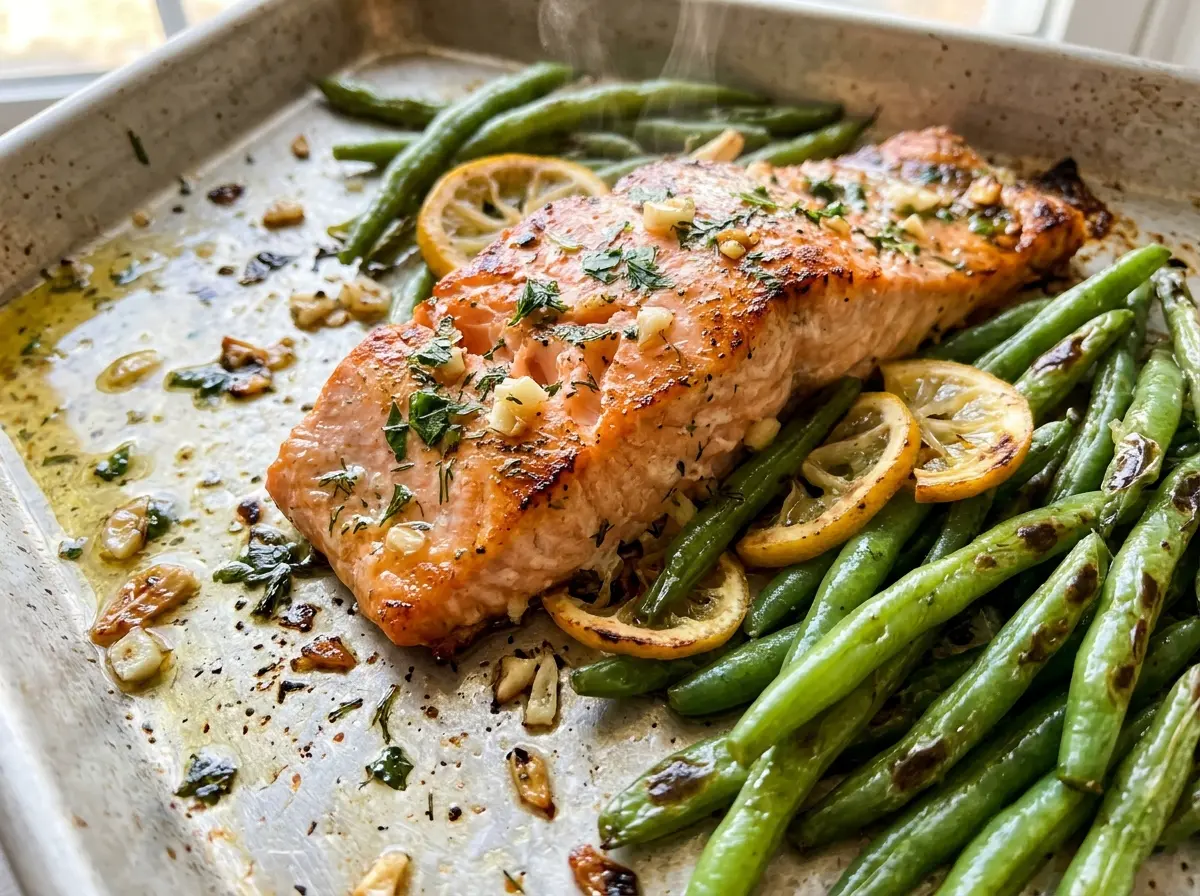
Kitchen Note
Stir the garlic and herbs through the oil until they’re evenly dispersed before brushing. Garlic can clump in the bowl, and an even coating means each fillet gets some of the parsley and thyme.
Save this sheet pan garlic herb salmon with green beans for a weeknight dinner with flaky fish and tender vegetables, all from one pan.
Why the Green Beans Go Into the Oven Before the Salmon
Green beans and salmon don’t need the same amount of oven time. Giving the beans their own first round means they’re already on their way to tender before the fillets arrive. Put everything in at once and the fish would need to stay in the heat while the beans caught up, which can leave the salmon drier than you want.
The timing here is deliberately split: the beans roast on their own first, then the salmon joins them for the finish. The 18×13-inch rimmed pan gives you room to spread the vegetables and arrange the fillets without piling everything into a deep layer. That matters because crowded vegetables release moisture into the pan rather than roasting evenly. Keep the sequence intact, and use the tenderness of the beans and the temperature of the thickest part of the salmon as your finish cues.
Think of the first roast as getting the vegetables started, not completing them. They continue cooking while the salmon finishes, so they can be tender at the same time the fish reaches 145°F.
Fresh Parsley and Dried Thyme Bring Different Things to the Pan

- Green beans — Trim the ends so the beans are ready to roast. Beans that are roughly similar in size tend to soften at a similar pace; especially thick ones may take longer to become tender. There isn’t a direct substitute I’d recommend here without changing the vegetable and its cooking time.
- Olive oil — The first portion coats the beans, while the rest carries the garlic and herbs over the salmon. A basic olive oil works well; a costly finishing oil isn’t needed for roasting. Keep the oil divided so both parts of the pan get their intended coating.
- Garlic, parsley, and thyme — Fresh parsley brings a brighter, leafy note, while dried thyme distributes easily through the oil. Mince the garlic finely so it can be stirred through the mixture and brushed across the fillets. I keep the fresh parsley and dried thyme in their listed forms rather than swapping one for another, since fresh and dried herbs don’t measure or behave alike.
- Skin-on salmon fillets — The skin helps the fillets hold together as they cook on the pan. Choose fillets close to the listed 6-ounce size for the stated timing. Since salmon is the main ingredient, look for fillets that smell clean and mild; avoid fish with a strong, unpleasant odor.
The Two-Stage Roast That Gets Both Parts Tender
Give the Green Beans Their First Roast
Heat the oven to 425°F and line a large rimmed 18×13-inch sheet pan with parchment paper. Toss the trimmed beans with their portion of olive oil, salt, and pepper, then spread them across the pan. Roast for 10 minutes before adding the salmon. The beans won’t be fully finished at this point; they’re getting the lead time they need for the second stage.
Stir and Brush on the Garlic-Herb Oil
While the beans roast, stir together the remaining olive oil with the minced garlic, chopped fresh parsley, dried thyme, and the remaining salt and pepper. Stir until the herbs and garlic are mixed through the oil rather than sitting in a mound at the bottom of the bowl. Brush the mixture over the salmon fillets so the surface is coated. If a little garlic settles while you work, stir the mixture again before brushing the next fillet.
Finish the Salmon Beside the Beans
Take the pan out of the oven and arrange the salmon among the beans. Return it to the oven for 10–14 minutes. Check the thickest part of a fillet with a thermometer; the salmon should reach 145°F, and the beans should be tender. Fillet thickness can affect where the fish lands within that time range, so use the temperature rather than appearance alone to decide when it’s finished.
Easy Ways to Change the Serving Style Without Changing the Ingredients
Serve the salmon in large flakes
For a more casual, bowl-style serving, break the cooked salmon into large flakes and arrange them with the green beans. The fish won’t look as polished as whole fillets, but the garlic and herbs get distributed through more bites. Don’t flake it until it’s cooked; the intact fillets are easier to handle on the sheet pan.
Make smaller portions for a lighter plate
Once cooked, divide each fillet into smaller pieces and portion the green beans alongside them. This changes the serving format without altering the ingredients or the oven timing. The pieces cool faster than whole fillets, so serve them promptly for the best texture.
Keep it naturally gluten-free and dairy-free
The ingredients in this salmon-and-green-bean dish contain no gluten or dairy, so there’s no replacement ingredient needed for those dietary needs. The olive oil and herbs provide the coating without butter, breadcrumbs, or a flour-based sauce. Keep the ingredient list unchanged and serve the salmon with the beans.
Storage and Reheating
- Refrigerator: Store leftovers in a covered container for 3–4 days. The salmon will lose some of its just-cooked flakiness, and the beans soften further.
- Freezer: Freeze cooled portions in an airtight container for up to 2–3 months. The salmon freezes better than the green beans, which will be softer after thawing.
- Reheating: Warm a portion in the microwave in short intervals until it reaches 165°F. Stop once it’s heated through; prolonged reheating dries out salmon quickly.
Questions That Come Up When Making Salmon and Green Beans Together
Sheet Pan Garlic Herb Salmon with Green Beans
Ingredients
Equipment
Method
- Preheat the oven to 425°F.
- Line a large rimmed 18x13-inch sheet pan with parchment paper.
- Toss the green beans with 1 tablespoon olive oil, 1/4 teaspoon kosher salt, and 1/8 teaspoon black pepper.
- Spread the green beans on the sheet pan.
- Roast the green beans for 10 minutes.
- Meanwhile, stir together the remaining 2 tablespoons olive oil, garlic, parsley, thyme, remaining 1/4 teaspoon salt, and remaining 1/8 teaspoon pepper.
- Brush the mixture over the salmon fillets.
- Remove the pan from the oven.
- Arrange the salmon among the green beans.
- Return the pan to the oven for 10–14 minutes, until the salmon reaches 145°F in the thickest part and the beans are tender.