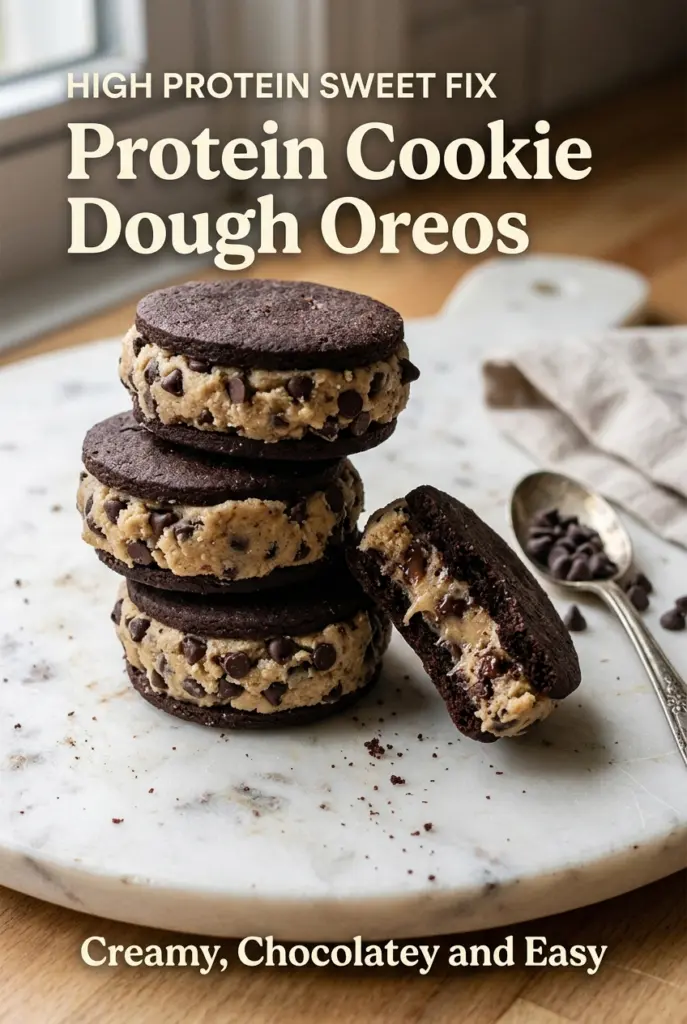
Protein Cookie Dough Oreos hit that rare spot between dessert and snack: sweet, creamy, chocolatey, and just sturdy enough to grab from the fridge when a craving shows up. The filling tastes like cookie dough, but it sets up with enough body to sit neatly between two chocolate sandwich cookies instead of oozing out the sides. That balance is what makes them worth making again.
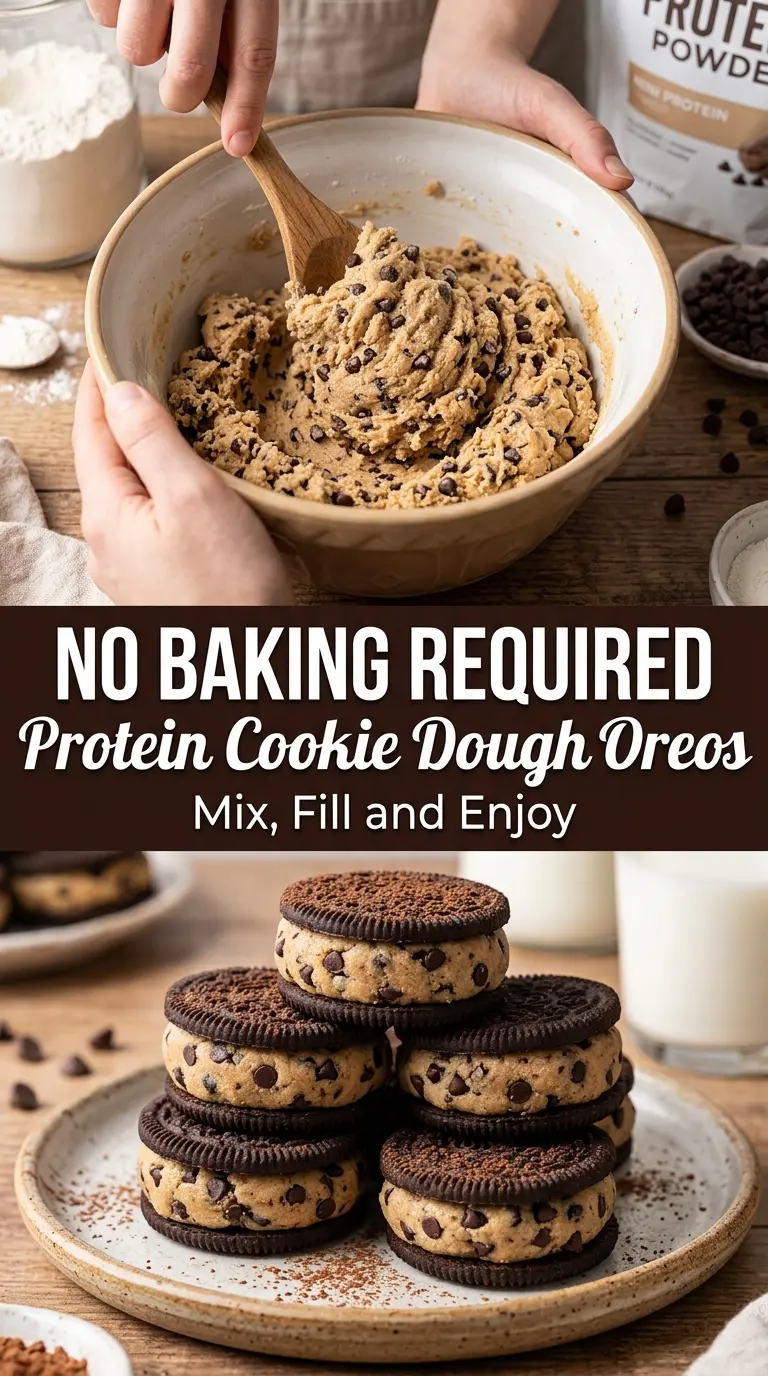
The texture comes from a careful mix of protein powder, almond flour, and powdered peanut butter. Protein powder gives the structure, almond flour keeps the filling soft instead of chalky, and powdered peanut butter adds that classic cookie dough richness without making the filling greasy. A little maple syrup and milk bring the dough together, but the key is stopping as soon as it becomes thick and pipeable. Add the chocolate chips at the end so they stay scattered through the filling instead of getting crushed.
Below, you’ll find the exact texture to aim for, the best way to sandwich the cookies without breaking them, and a few swaps that still keep the filling firm enough to hold in the fridge.
The filling set up fast and stayed thick, and the Oreo cookies didn’t get soggy even after a full day in the fridge. My kids said it tasted like cookie dough ice cream in sandwich form.
These Protein Cookie Dough Oreos are the kind of chilled treat you’ll want to keep in the fridge for grab-and-go snacking.
The Filling Needs to Be Thick Before You Touch the Cookies
The biggest mistake with cookie dough sandwich treats is rushing the filling. If it’s even a little soft, it smears out as soon as you press the cookies together and the whole thing loses that neat, bakery-style look. You want a dough that holds its shape on a spoon and clings in a thick mound, not a batter that slides back into the bowl.
Protein powder behaves differently from flour. Some brands drink up liquid fast, others stay loose longer, so the exact milk amount matters more than the number on the recipe card. Start with the lower end, then add just enough milk to make the mixture pressable. If the dough gets too stiff, a teaspoon of milk brings it back. If it gets too soft, almond flour fixes it without making the filling taste dry.
What Each Ingredient Is Actually Doing in This Dish
- Vanilla protein powder — This is the backbone of the filling. It gives structure and the higher-protein finish, but it also varies a lot by brand. If yours tastes chalky on its own, the final filling will too, so use a powder you already like in shakes or yogurt.
- Almond flour — This softens the protein powder and gives the filling that raw-cookie-dough feel. Regular flour won’t work here without cooking it first, and coconut flour would dry the mixture out too fast. There isn’t a perfect 1:1 substitute for the texture almond flour brings.
- Powdered peanut butter — This adds nutty depth without a heavy peanut butter texture. It also helps the filling stay lighter and less oily. If you don’t have it, use a tablespoon of smooth peanut butter and cut back the milk slightly so the mixture doesn’t loosen too much.
- Maple syrup and milk — These are the binders. Maple syrup gives sweetness and helps the dough feel cohesive, while the milk adjusts the final texture. Add the milk slowly because different protein powders absorb it differently.
- Mini chocolate chips — Mini chips distribute better through the filling than regular chips and keep every bite balanced. Stir them in at the end so they stay whole and don’t turn the dough streaky.
- Oreo cookies — These are the shell and the contrast. Their crisp, chocolatey crunch is what makes the filling stand out. Separate them gently so the halves stay intact, because broken cookies are harder to sandwich cleanly.
Build the Sandwiches Before the Cookies Start Cracking
Separating the Cookies Cleanly
Twist each Oreo slowly instead of pulling it apart. The cream filling usually releases one side first, and that’s fine. If the cookie cracks, use it as the bottom half where a little filling can hide the break. Keep the best-looking halves for the tops so the finished sandwiches look neat.
Mixing the Filling to the Right Texture
Stir the protein powder, almond flour, and powdered peanut butter together before adding the wet ingredients. That keeps the mixture from clumping in pockets. Once the maple syrup, milk, and vanilla go in, the dough should become thick enough to scoop and shape, not glossy or sticky like frosting. Fold in the mini chocolate chips last so the mixture stays even.
Filling and Chilling
Pipe or spread a generous layer onto half of the Oreo cookies, then top with the remaining halves and press gently. You want enough filling to show at the edges, but not so much that it squeezes out in a ring. Chill the finished cookies for 20 minutes so the filling firms up and the sandwiches hold together when you bite into them.
How to Adapt These Protein Cookie Dough Oreos Without Losing the Texture
Dairy-Free Version
Use a dairy-free protein powder and swap in an unsweetened non-dairy milk like almond or oat milk. The texture stays the same as long as you add the liquid slowly. Check the Oreo-style cookies you use if you want the whole treat fully dairy-free, because not every chocolate sandwich cookie is made the same way.
Lower-Sugar Option
Use a monk fruit or stevia-sweetened syrup in place of maple syrup if you want to cut the sugar a bit. The filling will still bind, but the flavor will be less round and a little more protein-forward. A pinch of salt helps bring the sweetness back into balance.
Nut-Free Swap
Replace the almond flour with oat flour and use sunflower seed powder or additional protein powder instead of powdered peanut butter. The filling will be a little less rich and slightly more earthy, but it still sets up well. If the mixture turns dry, add milk by the teaspoon until it comes together.
Storage and Reheating
- Refrigerator: Store in an airtight container for up to 5 days. The cookies stay firm, and the filling gets a little denser as it chills.
- Freezer: These freeze well. Layer them between parchment in a freezer-safe container for up to 2 months, then thaw in the fridge so the cookies don’t turn sticky.
- Reheating: No reheating needed. Let refrigerated cookies sit at room temperature for 5 to 10 minutes before serving if you want the filling slightly softer. Microwaving will soften the cookies too fast and can make the centers greasy.
Answers to the Questions Worth Asking

Protein Cookie Dough Oreos
Ingredients
Method
- Carefully separate the Oreo cookies and remove the cream filling, keeping the chocolate shells intact with their edges aligned.
- Set the Oreo cookie halves aside so they’re ready to be filled.
- In a bowl, combine the vanilla protein powder, almond flour, and powdered peanut butter and mix until evenly blended.
- Add the maple syrup, milk, and vanilla extract, then stir until a thick cookie dough forms with a spoonable consistency.
- Fold in the mini chocolate chips so they’re evenly distributed throughout the dough.
- Pipe or spread the protein cookie dough onto half of the Oreo cookies in an even layer.
- Top with the remaining Oreo halves to form sandwiches, then garnish with extra mini chocolate chips if desired.
- Refrigerate the assembled cookies for 20 minutes before serving so the filling firms slightly.
- Store in an airtight container in the refrigerator until ready to eat.