
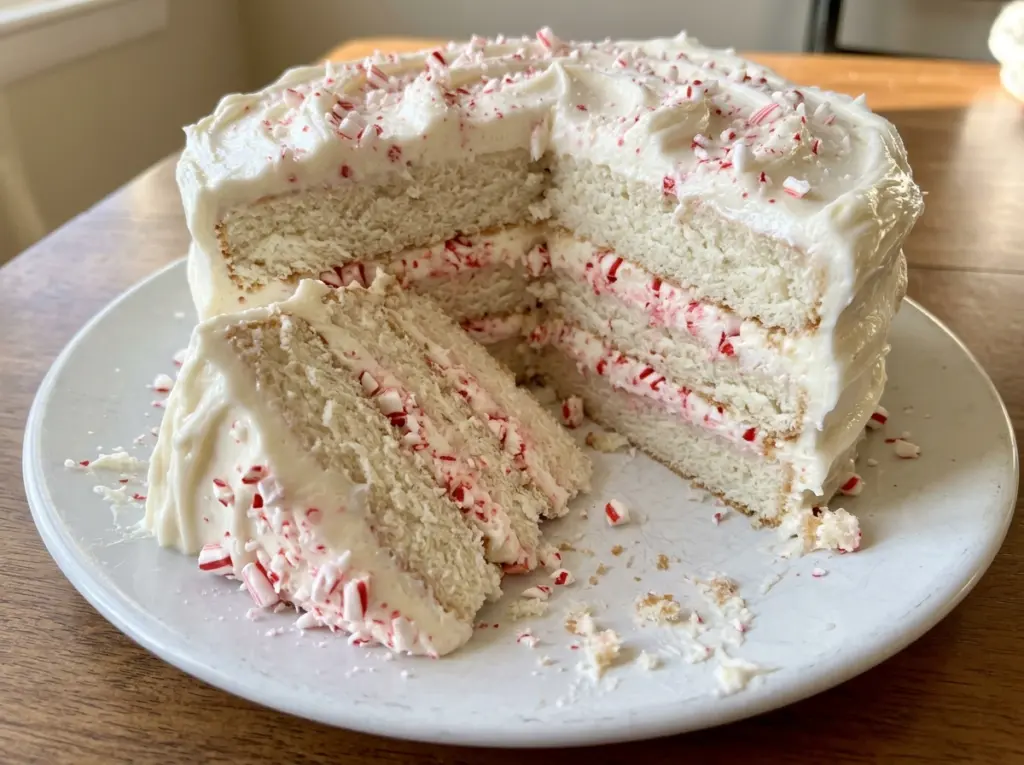
When butter and sugar are properly creamed, the mixture turns pale and fluffy before the eggs go in. That small visual cue matters in a layer cake: it gives the batter a light start instead of a heavy, tight crumb. I use it here to make Holiday Peppermint Cake tender enough to cut cleanly beneath its thick peppermint buttercream.
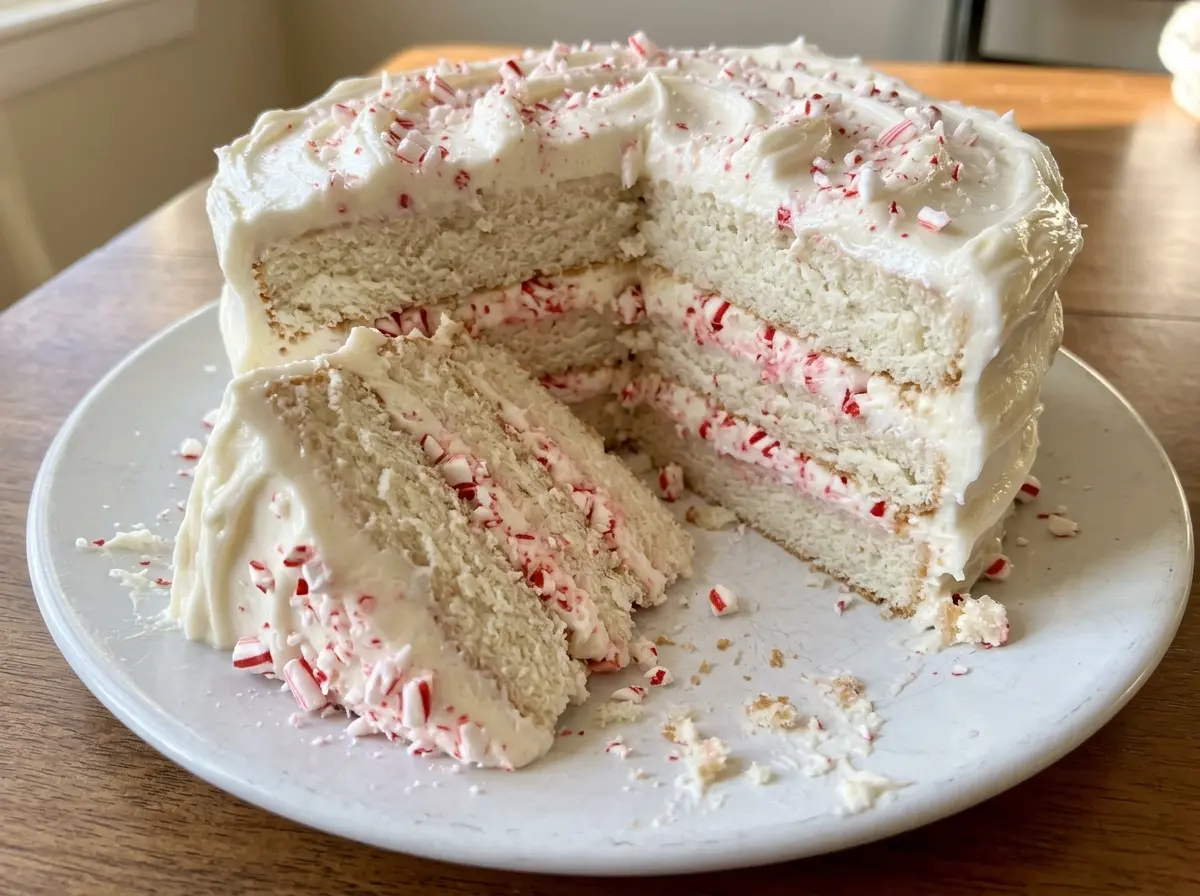
The mint stays balanced because it comes in two places: a little in the cake and more in the frosting, with crushed candy canes adding a crisp, sweet finish. The cake layers are straightforward to mix, but they need to cool completely before frosting; even a little warmth can soften the buttercream. Once the frosting is spread over the top and sides, the red-and-white candy pieces make each slice look festive without turning the whole cake into a hard peppermint crunch.
Kitchen Note
Give the cakes 10 minutes in their pans before turning them out. They’re delicate straight from the oven, and that short rest helps them release without breaking at the edges.
Save Holiday Peppermint Cake for a celebration that calls for soft vanilla-mint layers, fluffy peppermint buttercream, and a candy cane finish.
Why the Peppermint Should Stay in the Background
Mint can take over a cake quickly, especially when it’s in both the batter and the frosting. Here, the cake gets just enough peppermint to register alongside the vanilla, while the buttercream carries the clearer mint flavor. That separation matters: the cake stays like a classic, tender butter cake, and each bite gets its peppermint lift from the frosting and the candy cane topping.
Use peppermint extract, not peppermint oil, and measure it carefully. Extracts vary a little by brand, but a small amount gives the cake a cool note without masking the butter and vanilla. The crushed candy canes bring their own strong peppermint sweetness, so there’s no need to push the mint harder in the cake. Keep the topping in small, crunchy pieces rather than powder; it gives the soft frosting a pleasant contrast and looks more defined on the finished cake.
What Gives These Layers Their Tender Crumb

- All-purpose flour — It gives the layers enough structure to stack and hold frosting. A standard store-brand flour works well; spoon it into the measuring cup and level it rather than packing it down. For a gluten-free version, use a measure-for-measure baking blend that includes xanthan gum.
- Unsalted butter — Butter supplies the cake’s rich flavor and helps create a light base when beaten with the sugar. Use softened butter, not melted; it should give slightly when pressed but still hold its shape. Unsalted butter also lets the salt stay controlled.
- Granulated sugar and eggs — Beating the sugar with the butter adds air, while the eggs help bind and support the layers. Room-temperature eggs blend more smoothly into the creamed butter than cold ones. Large eggs are the right size for the batter’s balance, so don’t swap in extra-small or jumbo eggs without adjusting.
- Whole milk — Milk loosens the batter and keeps the crumb soft. Room-temperature milk combines more evenly with the butter mixture. Lower-fat milk can work, but whole milk gives the cake a richer texture.
- Peppermint and vanilla extracts — Vanilla rounds out the mint in both the cake and frosting. Keep to peppermint extract rather than substituting peppermint oil; oil is far more concentrated and doesn’t convert reliably spoon for spoon.
- Confectioners’ sugar and heavy cream — Confectioners’ sugar makes the buttercream smooth, while cream helps it spread over the layers and sides. Sift the sugar if it’s lumpy. Heavy cream gives a fuller, silkier frosting than a thinner milk would.
- Candy canes — Standard candy canes bring color, crunch, and an extra peppermint note. Any familiar brand is fine. Crush them in a sturdy bag so you can keep a mix of small pieces rather than turning the whole topping into dust.
How to Get Two Even Layers and Fluffy Peppermint Frosting
Prepare the Pans and Dry Mix
Heat the oven to 350°F, coat two 9-inch round cake pans with nonstick cooking spray, and line the bottoms with parchment. The parchment makes it easier to lift the cooled layers out without tearing their bases. Whisk the flour, baking powder, and salt in a medium bowl so the leavener is distributed throughout. Set the bowl aside while you mix the butter and sugar.
Cream the Butter, Then Alternate the Batter
Beat the softened butter and granulated sugar on medium speed until light and fluffy, about 3 minutes. Add the room-temperature eggs one at a time, then beat in the vanilla and peppermint extracts. Add the flour mixture in three additions, alternating with the milk in two additions; begin and finish with the flour mixture. Keep the mixer on low and stop as soon as the batter is combined, because extended mixing after the flour goes in can make the crumb tough.
Bake Until the Centers Spring Back
Divide the batter evenly between the prepared pans and bake for 28 to 33 minutes. The tops should spring back when lightly pressed, and a toothpick inserted in the center should come out with a few moist crumbs rather than wet batter. If the toothpick has streaks of uncooked batter, give the cakes a little longer and check again. Cool them in the pans for 10 minutes, then turn them onto wire racks, remove the parchment, and let them cool completely.
Beat and Spread the Buttercream
Beat the softened butter for the frosting on medium speed until smooth and creamy, about 2 minutes. Add the confectioners’ sugar one cup at a time on low speed; once it’s incorporated, add the heavy cream, peppermint extract, vanilla, and salt. Beat on medium-high until the frosting looks fluffy and spreadable, about 2 minutes. Set one cooled layer on a serving plate, spread about 1 cup of buttercream over it, stack the second layer on top, and cover the top and sides with the remaining frosting.
Two Easy Ways to Change the Peppermint Cake
Make It Gluten-Free
Replace the all-purpose flour with the same amount of a measure-for-measure gluten-free baking blend that contains xanthan gum. The layers may be a little more delicate and less springy than the wheat version, so let them cool fully before stacking and spread the frosting gently.
Add a Chocolate-Peppermint Finish
Drizzle melted semisweet chocolate over the frosted cake, then add the crushed candy canes. Let the chocolate cool slightly before drizzling so it doesn’t soften the buttercream. The chocolate brings a bittersweet note that makes the candy cane topping taste less sweet.
Storage and Serving
- Refrigerator: Cover the frosted cake and refrigerate for up to 4 days. The cake firms up when cold, so let slices soften before serving.
- Freezer: Freeze unfrosted layers, wrapped tightly, for up to 2 months. Thaw them while still wrapped, then frost once completely thawed.
- Reheating: No reheating is needed. Let refrigerated slices stand at room temperature for about 30 minutes so the buttercream softens; microwaving can melt the frosting unevenly.
Questions That Come Up When Making Holiday Peppermint Cake
Holiday Peppermint Cake
Ingredients
Equipment
Method
- Heat the oven to 350°F.
- Coat two 9-inch round cake pans with the cooking spray and line the bottoms with parchment paper.
- Whisk the flour, baking powder, and salt together in a medium bowl.
- Beat the softened butter and granulated sugar in a large bowl with an electric mixer on medium speed until light and fluffy, about 3 minutes.
- Beat in the eggs one at a time.
- Beat in the vanilla and peppermint extracts.
- Add the flour mixture in three additions, alternating with the milk in two additions, beginning and ending with the flour mixture; mix on low just until combined.
- Divide the batter evenly between the pans.
- Bake for 28 to 33 minutes, until the tops spring back when lightly pressed and a toothpick inserted in the centers comes out with a few moist crumbs.
- Cool the cakes in the pans for 10 minutes.
- Turn the cakes out onto wire racks, remove the parchment, and cool completely.
- Beat the softened butter in a large bowl with an electric mixer on medium speed until smooth and creamy, about 2 minutes.
- Beat in the confectioners' sugar, 1 cup at a time, on low speed.
- Add the heavy cream, peppermint extract, vanilla, and salt, then beat on medium-high until fluffy and spreadable, about 2 minutes.
- Place one cooled cake layer on a serving plate and spread about 1 cup of buttercream over it.
- Set the second layer on top and spread the remaining buttercream over the top and sides.
- Sprinkle the crushed candy canes over the cake just before serving.