
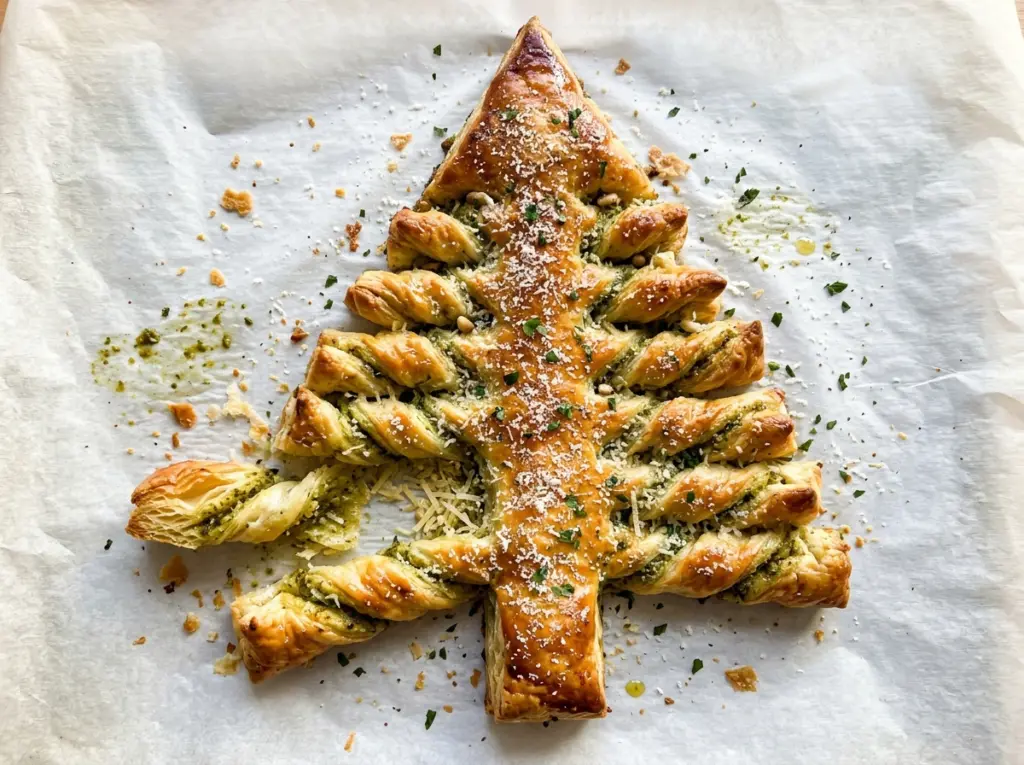
When puff pastry starts to lift in the oven, the thin layers turn into crisp, golden branches, and the pesto between them gives each bite a savory center. I like this Christmas Tree Puff Pastry Appetizer because it looks festive without asking you to make dough from scratch or fuss with a complicated filling. The shape comes from a simple cut, and the finished tree is easy to set out while it’s still warm.
The filling stays in place when you leave a narrow border around the pastry instead of spreading pesto right to the edges. That little margin gives the top sheet room to seal against the bottom one, so the pesto is less likely to squeeze out while you cut and twist. Finely grated Parmesan tucks into the pesto rather than sitting in thick clumps, and the egg wash gives the pastry a glossy, browned finish. You get crisp edges, tender flaky layers, and a bright basil-pesto bite in every branch.
Kitchen Note
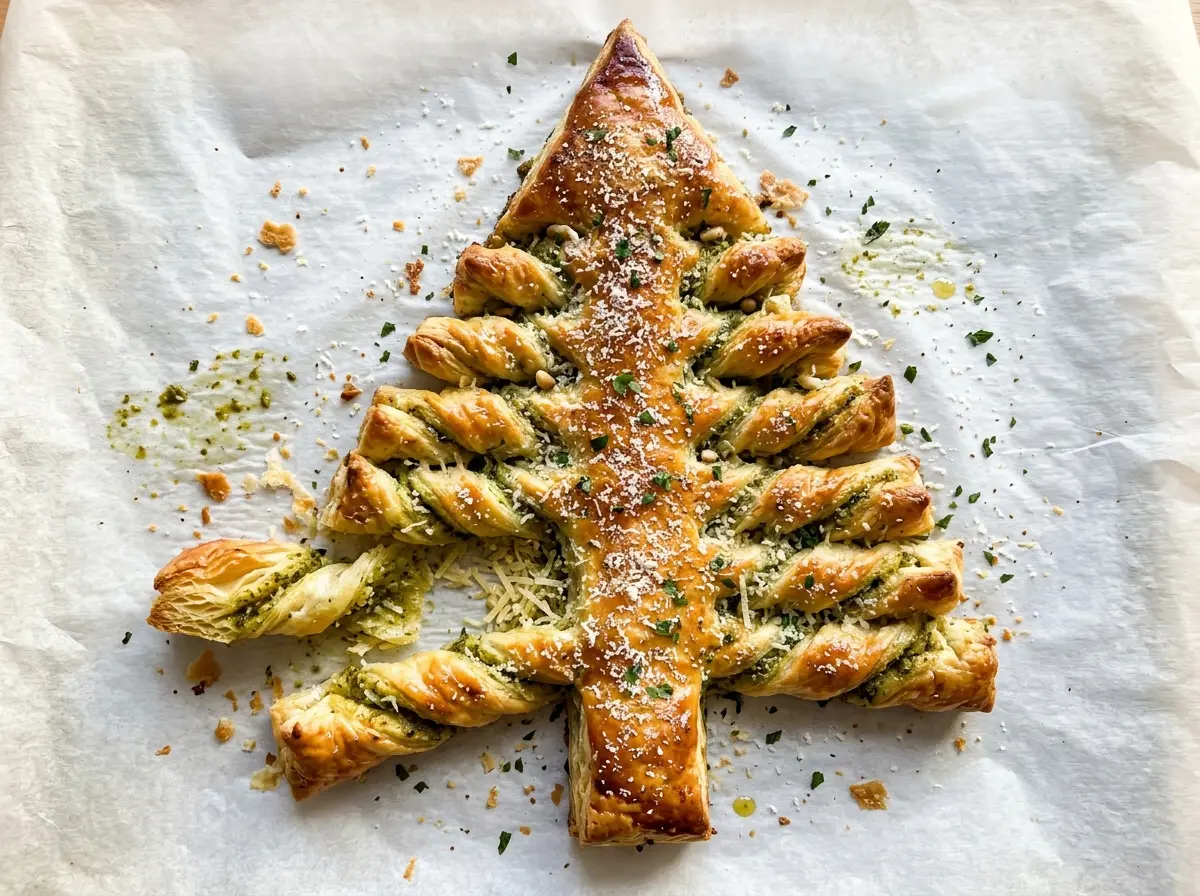
Twist each branch two or three times, then stop. A few relaxed turns keep the layers distinct and leave the tree’s branches easy to recognize once the pastry puffs.
Save this Christmas Tree Puff Pastry Appetizer for a flaky, pesto-filled centerpiece with crisp golden branches.
Why the Pesto Needs a Border Before the Top Sheet Goes On
It’s easy to spread pesto right to the edge when you’re trying to use every bit of filling, but that makes the pastry harder to handle. The pesto can squeeze out as you press the sheets together and cut through them. Once it’s on the baking sheet, escaped pesto can also brown against the parchment before the pastry has finished baking.
Leaving a half-inch border around the bottom sheet gives you a clean perimeter to press lightly after the second sheet is in place. You don’t need to mash the layers together; a gentle press is enough to hold them while you cut the tree. Keep the filling spread evenly rather than piling extra into the center, where thick spots can make it harder to cut a neat shape. The border isn’t wasted pastry. It’s a small bit of breathing room that helps the tree stay tidy from the first cut to the last twist.
There’s another practical benefit: a thinner, even layer lets the pastry puff around the filling instead of weighing down one section. The finished branches look more defined, and you get a more balanced pesto-and-pastry bite from the middle to the edges.
What the Pastry, Pesto, and Parmesan Each Bring to the Tree

- Puff pastry — The layers are what make the branches rise and turn crisp, so choose pastry that’s thawed and easy to unfold without tearing. A standard frozen package is a dependable choice; homemade dough isn’t needed here. Gluten-free puff pastry is the closest swap if you need it, though the layers can bake up a little less lofty and may be more delicate to twist.
- Basil pesto — Its oily, herb-packed texture spreads easily between the sheets and brings most of the tree’s savory flavor. A good-quality jarred pesto works well; the freshest basil taste matters more than a premium brand. A thick sun-dried tomato pesto can replace it for a deeper, tangier filling, while a watery pesto is more likely to run toward the edges.
- Finely grated Parmesan — Fine shreds distribute through the pesto instead of forming large pockets. Freshly grated cheese has a clean, nutty flavor, but packaged finely grated Parmesan is convenient and works. Pecorino Romano can replace it for a sharper, saltier result, so keep in mind that the filling will taste more assertive.
- Egg and water — Beating them together makes a brushable wash that helps the pastry surface turn glossy and golden. The egg doesn’t need to be a specialty product; a regular large egg is right for the job. If you can’t use egg, brush on milk instead, knowing the finish will be less shiny and may brown more softly.
Shape the Tree Before the Pastry Has Time to Warm Up
Get the oven and baking sheet ready
Heat the oven to 400°F and line a large baking sheet with parchment paper before you handle the pastry. The whole tree needs room on the pan, so use a large sheet rather than crowding the branches. Keep the thawed pastry sheets easy to work with and lay the first one flat on the parchment. Having the pan ready first means you won’t need to move a filled, cut tree later.
Spread the pesto and cover it with the second sheet
Spread the basil pesto evenly over the first sheet, stopping about a half-inch from every edge, then sprinkle the finely grated Parmesan over it. Look for an even coating rather than thick mounds; uneven filling makes some areas harder to cut cleanly. Lay the second pastry sheet on top and press lightly. If pesto pushes out at the edges, wipe away the excess before you shape the tree.
Cut the outline, then make the branches
Cut through both pastry layers to form a tree with a centered trunk, and remove the scraps. From each side, cut horizontal strips about an inch apart toward the middle, leaving a one-inch-wide strip uncut down the center. Twist each branch two or three times, working from the top down so you can see the shape take form. If a strip starts to tear, ease it back into place rather than pulling harder.
Brush, bake, and let the layers settle
Beat the egg with the water and brush it over the pastry, including the branches and outer edges. Bake for 20 to 25 minutes, until the tree is puffed and golden brown; a pale top needs more time in the oven. Let it rest on the baking sheet for 5 minutes before serving. That short pause gives the hot pastry a chance to settle before you lift or break off a branch.
Simple Ways to Adapt the Pesto Tree
Use sun-dried tomato pesto for a deeper center
Swap the basil pesto for a thick sun-dried tomato pesto and keep the same thin, even spread. The filling will taste tangier and more concentrated, with a warm red color between the golden pastry layers.
Make the filling vegetarian-friendly
Choose basil pesto made without animal rennet and use a Parmesan-style hard cheese labeled vegetarian. The pastry still bakes into flaky branches, though the cheese’s flavor may be a little milder than traditional Parmesan.
Storage and Reheating
- Refrigerator: Refrigerate leftovers within 2 hours and keep them covered for up to 3 to 4 days. The pastry will soften as it sits.
- Freezer: Freeze fully cooled leftovers in an airtight container for up to 2 months. The pastry may lose some of its crispness after thawing.
- Reheating: Warm in a 350°F oven until heated through and crisp at the edges. Avoid the microwave, which softens the flaky layers.
Questions That Come Up While Making This Puff Pastry Tree
Christmas Tree Puff Pastry Appetizer
Ingredients
Equipment
Method
- Heat the oven to 400°F and line a large baking sheet with parchment paper.
- Place one puff pastry sheet on the baking sheet, spread the pesto evenly over it leaving a 1/2-inch border, and sprinkle with the Parmesan.
- Lay the second pastry sheet on top and press lightly; cut through both layers to make a tree shape with a centered trunk, then remove the scraps.
- Cut horizontal strips about 1 inch apart from each side toward the center, leaving a 1-inch-wide strip uncut down the middle, and twist each branch 2 to 3 times.
- Beat the egg with the water and brush it over the pastry.
- Bake for 20 to 25 minutes, until the pastry is puffed and golden brown, then let it rest on the baking sheet for 5 minutes before serving.