

Some meringue desserts are soft in the middle, but these Christmas raspberry lemon curd meringue kisses are meant to stay crisp all the way through. The shells bake low and slow at 200°F, drying without taking on much color. I pipe them about an inch wide, so each one is small enough to sandwich neatly without hiding the bright filling.
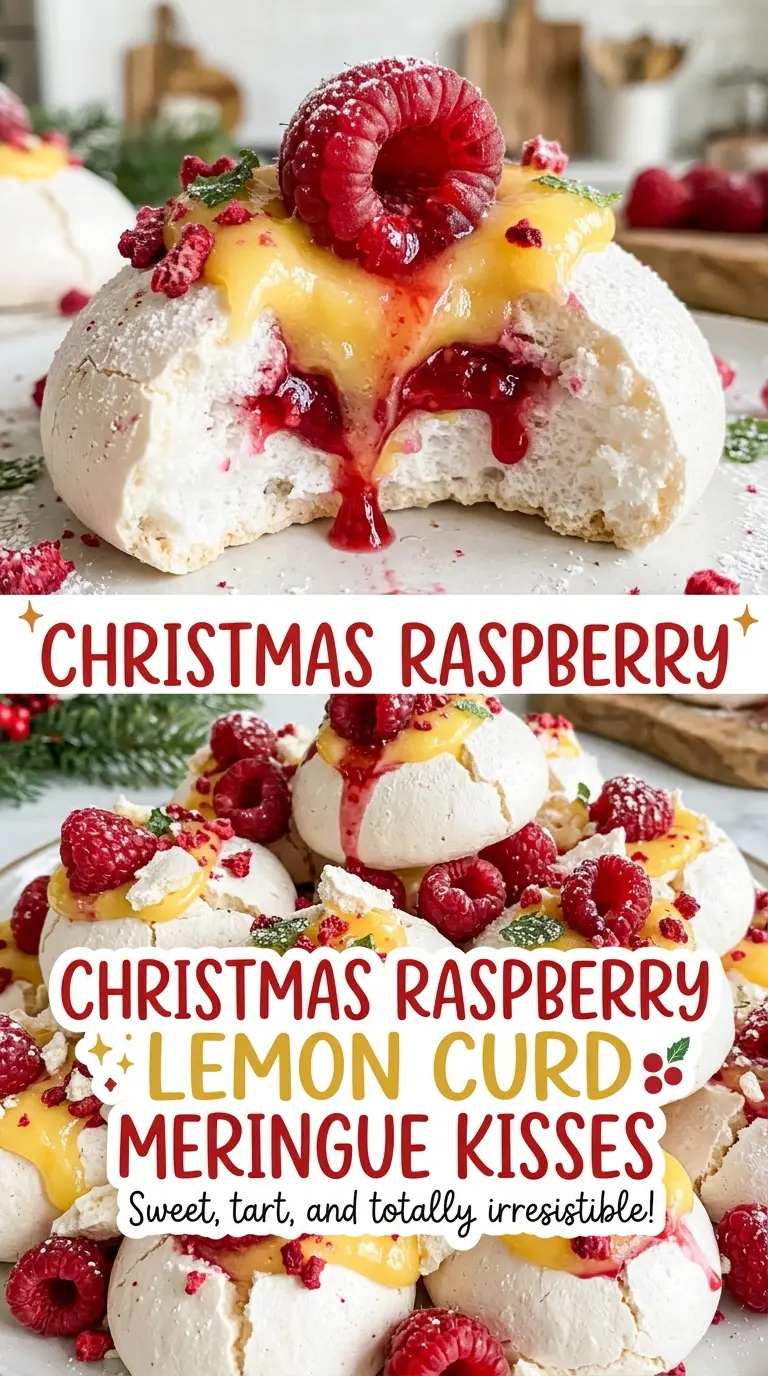
One batch makes 48 shells, enough for 24 filled kisses. Vanilla gives the meringue a gentle warmth, while lemon curd brings a sharp, citrusy note and seedless raspberry preserves add a sweet-tart berry layer. The finished kisses are light and crisp, with a glossy red seam peeking out between the pale shells.

Kitchen Note
After baking, leave the kisses in the turned-off oven with the door closed for the full hour. That gentle cooldown helps them dry without a sudden temperature change.
Save these Christmas raspberry lemon curd meringue kisses for a crisp, delicate holiday treat with a tart berry-filled center.
Why the Filling Waits Until the Last Minute
A baked meringue shell is crisp because it has dried slowly in the oven. Lemon curd and raspberry preserves are moist, so once they touch the shell, that crisp texture starts to soften. The change is gradual, but it matters: fill the kisses too far ahead and the shells lose the clean little crunch that makes them feel so light.
For each sandwich, both fillings go on the flat side of one cooled kiss, then the second kiss caps them. That keeps the curd and preserves together in one thin layer rather than turning the center into a thick, slippery mound. Assemble them just before serving, and the first bite gives you a crisp shell followed by the tangy, fruity middle. It also keeps the red filling visible at the seam instead of squeezed out around the edges.
What Gives These Kisses Their Crisp Shell and Tart Center
- Egg whites — Room-temperature whites whip into a stable, airy foam more readily than cold ones. Use large eggs for the right balance in this batch; cartons of egg whites can behave differently when whipped, so fresh whites are the more dependable choice.
- Cream of tartar — This small addition helps stabilize the foam as it grows. It’s worth keeping in the mix rather than skipping it, especially as the whites are beaten to firm peaks.
- Granulated sugar — Regular granulated sugar gives the meringue its structure and glossy finish. Add it gradually, one tablespoon at a time; a different sweetener won’t behave the same way in this crisp meringue.
- Vanilla extract — Vanilla rounds out the sweetness without competing with the fruit. Since it’s a background note, use a good everyday extract rather than a specialty ingredient.
- Lemon curd — Its bright citrus tang cuts through the sweet shells. A smooth prepared curd works well, and there’s no need for a particularly fancy brand; choose one you enjoy eating by the spoonful.
- Seedless raspberry preserves — Seedless preserves spread smoothly beside the curd, so the middle stays soft rather than seedy. The berry flavor is the main point here, so use preserves with a clear raspberry taste.
From Foamy Whites to Crisp, Filled Kisses
Prepare the Oven and Baking Sheets
Position the racks in the upper and lower thirds of the oven and heat it to 200°F. Line two 18×13-inch rimmed baking sheets with parchment paper before you start whipping. The low temperature dries the meringue gradually, so don’t raise it to speed things along. Keep the prepared sheets nearby for piping.
Whip the Whites to Soft Peaks
Use a clean, dry mixer bowl fitted with the whisk attachment, then beat the room-temperature egg whites on medium until foamy, about 1 minute. Add the cream of tartar and continue beating until the whites reach soft peaks. At this point, the foam should look airy and hold a peak that bends over rather than standing straight. If the bowl or whisk is damp, the whites may take longer to build volume.
Add Sugar Slowly for a Glossy Meringue
Turn the mixer to high and add the granulated sugar one tablespoon at a time. Beat for 6 to 8 minutes, until the meringue looks thick and glossy and holds stiff peaks. Adding the sugar gradually gives it time to incorporate; dumping it in all at once can leave the mixture heavy and grainy. Beat in the vanilla once the meringue reaches the right texture.
Pipe Even Kisses and Dry Them Slowly
Transfer the meringue to a piping bag fitted with a 1/2-inch plain tip. Pipe 48 kisses, each about 1 inch wide, spacing them evenly across the two parchment-lined sheets. Bake for 1 1/2 to 1 3/4 hours, switching the sheets between racks and rotating them front to back halfway through. They’re ready when they feel dry and lift easily from the parchment.
Cool Completely, Then Build the Sandwiches
Turn off the oven and leave the kisses inside for 1 hour with the door closed. Once cooled, spread 1/2 teaspoon lemon curd and 1/2 teaspoon raspberry preserves on the flat side of 24 kisses. Top each with one of the remaining kisses. The filling belongs between the flat sides, which gives each sandwich a tidy edge.
Three Ways to Change the Raspberry-Lemon Balance
Make the Center More Raspberry-Forward
For each kiss, use 3/4 teaspoon seedless raspberry preserves and 1/4 teaspoon lemon curd instead of equal portions. The center tastes fruitier and a little sweeter, with just enough lemon to keep the berry from feeling flat.
Lean Into the Lemon
Switch those proportions: use 3/4 teaspoon lemon curd and 1/4 teaspoon raspberry preserves per sandwich. The brighter, tangier center makes the sweetness of the shell stand out more, while the raspberry still gives each bite a little color.
Use Raspberry-Only Centers for a Dairy-Free Option
Leave out the lemon curd and use seedless raspberry preserves alone for the filling, choosing preserves made without dairy. The result is sweeter and less tangy than the original, while the meringue shells stay light and crisp.
Storage and Reheating
- Unfilled shells: Keep them in an airtight container at room temperature for up to 1 week; humidity can make them sticky.
- Filled kisses: Refrigerate leftovers in a covered container and eat within 2 days. The filling softens the shells as they sit.
- Freezer and reheating: Freezing isn’t recommended because thawing can leave the shells damp. These kisses don’t need reheating.
Questions That Come Up When Making Meringue Kisses
Christmas Raspberry Lemon Curd Meringue Kisses
Ingredients
Equipment
Method
- Position racks in the upper and lower thirds of the oven.
- Heat the oven to 200°F.
- Line two 18x13-inch rimmed baking sheets with parchment paper.
- In a clean, dry mixer bowl fitted with the whisk attachment, beat the egg whites on medium speed until foamy, about 1 minute.
- Add the cream of tartar and beat to soft peaks.
- With the mixer on high, gradually add the sugar, 1 tablespoon at a time, and beat until the meringue is thick, glossy, and forms stiff peaks, 6 to 8 minutes.
- Beat in the vanilla.
- Transfer the meringue to a piping bag fitted with a 1/2-inch plain tip and pipe 48 kisses, about 1 inch wide, spacing them evenly between the prepared sheets.
- Bake at 200°F for 1 1/2 to 1 3/4 hours, switching the sheets between racks and rotating them front to back halfway through, until the kisses are dry and lift easily from the parchment.
- Turn off the oven and let the kisses cool inside with the door closed for 1 hour.
- Just before serving, spread 1/2 teaspoon lemon curd and 1/2 teaspoon raspberry preserves on the flat side of 24 cooled kisses, then top with the remaining kisses.