
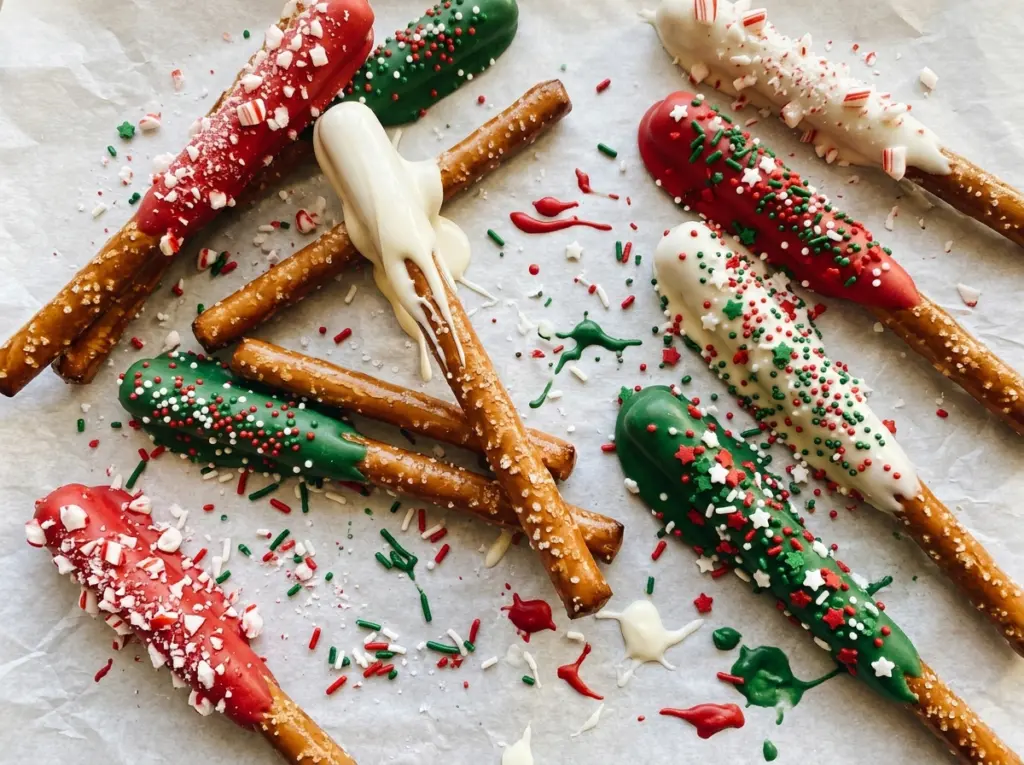
The white coating starts to creep down a pretzel rod as soon as you lift it, so I keep an eye on how much I spoon over each one. These Christmas pretzel rods are a sweet-and-salty treat with a crisp center and a smooth candy shell, and they’re easier to decorate when you work one at a time instead of trying to coat a whole handful.
Melting wafers make the white coating simple to work with: warm them gently until smooth, then let the extra drip back into the bowl. Red and green candy melts add the holiday stripes, and the sprinkles bring a little crunch. Each rod comes out with a generous layer of candy and plenty of pretzel left to bite through.
Kitchen Note
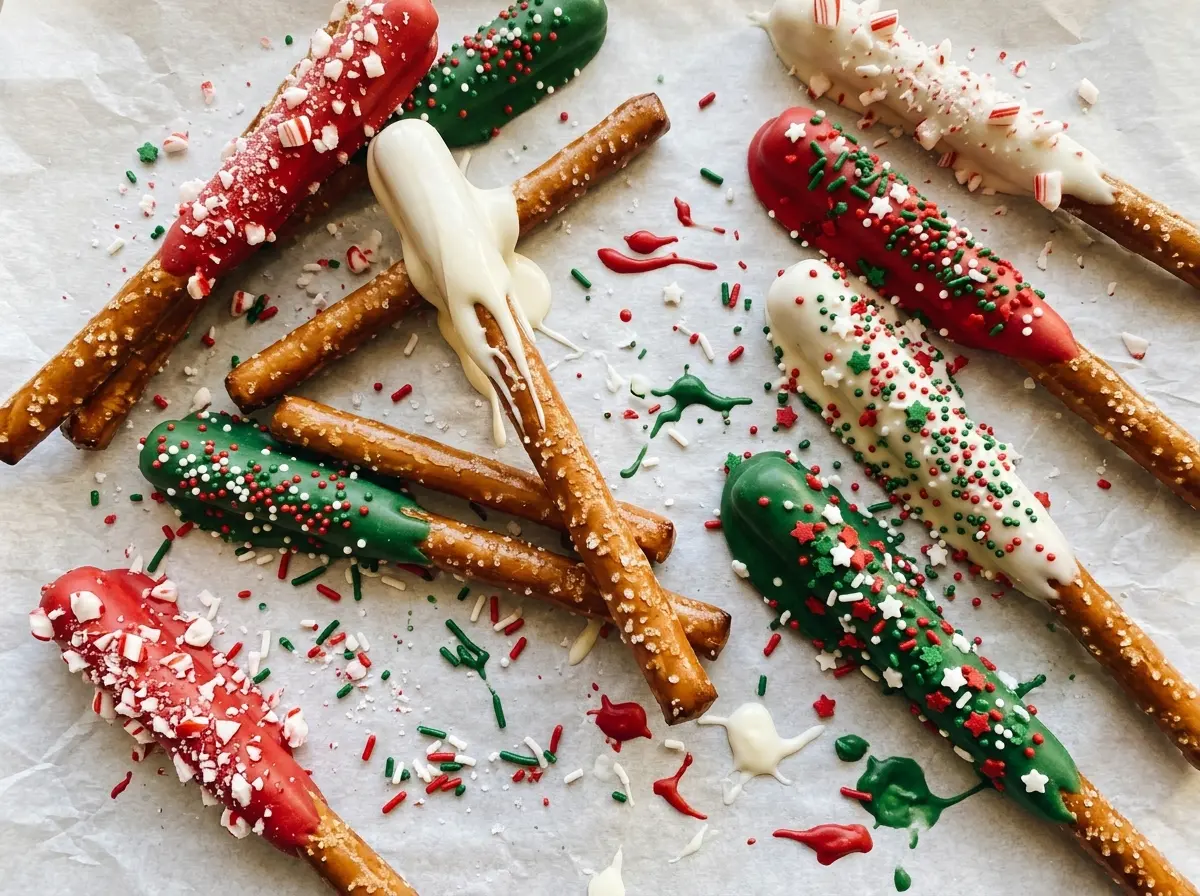
Scatter the sprinkles while the red and green drizzle is still wet. Once those candy lines start to firm, sprinkles won’t stick as well.
Save these Christmas pretzel rods for a festive treat with a crisp, salty bite, white candy coating, and red-and-green drizzle.
Why These Rods Need a Bare Handle
Coating only the upper two-thirds isn’t just a tidy way to keep the candy off your fingers. That uncovered end gives you a natural place to hold each rod while you eat it, without pressing into the white coating or the decorative drizzle. It also keeps the pretzel’s shape visible, so the finished rods look like pretzels rather than solid candy sticks.
There’s a practical benefit while you’re coating them, too. The bare section gives you room to turn each rod as you spoon the white coating over it, and it’s easy to lay the finished rod on parchment without handling the freshly coated part. Covering the full length might seem like a way to get more candy on each bite, but it leaves you with no clean grip and makes the rods awkward to pick up.
Keep the coated area consistent from rod to rod, and leave enough bare pretzel at the bottom to hold comfortably. The result is a neat stripe of white coating with a salty handle built right in.
What Makes the Coating and Decorations Work

- Pretzel rods — Their straight, sturdy shape is easy to turn while you spoon on the coating. A fresh, crisp bag is all you need; broken rods are harder to decorate neatly. For a gluten-free version, use straight gluten-free pretzel rods, which may be more fragile to handle.
- White chocolate melting wafers — These make the smooth base that clings to the rods and gives the colored drizzle a clear contrast. The wafers’ smooth melt matters more here than choosing a premium brand. Chocolate chips aren’t a direct swap for this coating method because they can melt thicker and won’t flow the same way.
- Red and green candy melts — These provide the bright drizzle without changing the pretzel’s crisp bite. Either color can be used on its own if you want a simpler look, or keep both for the classic two-color decoration. Stirring as they melt helps you catch any unmelted pieces before they scorch.
- Christmas sprinkles — The sprinkles add crunch and make the rods look finished. Any Christmas sprinkle mix works; choose small pieces that will sit neatly on the drizzle. Larger decorations are heavier, so scatter them over the rods while the candy lines are wet.
How to Coat and Decorate Each Pretzel Rod
Line the Sheets Before Melting
Line two 13×18-inch rimmed baking sheets with parchment paper before you start melting anything. Set them close to where you’ll work so the coated rods can go straight onto the lined sheets. This gives the candy a clean surface to set on and keeps the rods from sticking to the pans. Leave enough room to lay each rod down without stacking or overlapping them.
Melt the White Coating Until Smooth
Put the white chocolate melting wafers in a microwave-safe bowl and microwave at 50% power in 30-second intervals. Stir after each interval, even if the wafers still look mostly solid; the stirring helps distribute the heat. Stop when the mixture is smooth, with no visible pieces left. Don’t rush the last bit with a long blast, since overheating can make the coating difficult to work with.
Spoon and Turn the Rods
Work with one pretzel rod at a time. Spoon the white coating over the upper two-thirds, turning the rod so the sides are coated, then let the excess drip back into the bowl. If a thick drip hangs from the bottom edge, give it a moment to fall before laying the rod on parchment. Keep the bare lower section clear so it stays easy to hold.
Melt the Red and Green Candy Separately
Place the red candy melts in one microwave-safe bowl and the green candy melts in another. Microwave each bowl at 50% power in 20-second intervals, stirring after every interval until smooth. Keeping the colors in separate bowls makes it easier to drizzle each one where you want it. If a few pieces remain, stir again before deciding the melts need more heat.
Drizzle, Sprinkle, and Let Them Set
Drizzle both colors over the white-coated rods, then scatter the Christmas sprinkles while the coatings are still wet. Let the rods stand at room temperature for 30 to 45 minutes, until the coatings are firm. Try not to move them while the drizzle is setting, since soft candy can smear against the parchment. They’re ready when the candy feels firm rather than tacky.
Two Easy Ways to Change the Look
Use Gluten-Free Pretzel Rods
Replace the regular pretzel rods with gluten-free pretzel rods and keep the coatings and decorations the same. Choose rods with a similar straight shape so they’re easy to coat, and handle them gently if they’re more delicate than standard pretzels. The finished treat keeps the same salty-sweet contrast.
Make a Single-Color Drizzle
Use only the red or the green candy melts for the drizzle instead of combining both colors. The rods still have the white base and the same crunchy sprinkles, but the simpler finish looks a little less busy. This is an easy choice when you want the decorations to match a particular color scheme.
Storage and Reheating
- Refrigerator: These don’t need refrigeration. Cold storage can lead to condensation when the rods return to room temperature, which may leave the candy coating tacky.
- Freezer: I don’t recommend freezing them; condensation during thawing can soften the pretzels and affect the candy finish.
- Reheating: Reheating isn’t needed for finished rods. Store them in an airtight container in a cool, dry place, with parchment between layers if you stack them.
Questions I Get About Christmas Pretzel Rods
Christmas Pretzel Rods
Ingredients
Equipment
Method
- Line two 13x18-inch rimmed baking sheets with parchment paper.
- Microwave the white chocolate wafers in a microwave-safe bowl at 50% power in 30-second intervals, stirring after each, until smooth.
- Working one rod at a time, spoon white chocolate over the upper two-thirds of each pretzel rod, turning to coat; let excess drip back into the bowl, then lay the rods on the prepared sheets.
- Microwave the red candy melts in a separate microwave-safe bowl at 50% power in 20-second intervals, stirring after each, until smooth.
- Microwave the green candy melts in another microwave-safe bowl at 50% power in 20-second intervals, stirring after each, until smooth.
- Drizzle the red and green melts over the rods, then scatter the Christmas sprinkles over them while the coatings are wet.
- Let the rods stand at room temperature for 30 to 45 minutes, until the coatings are firm.