
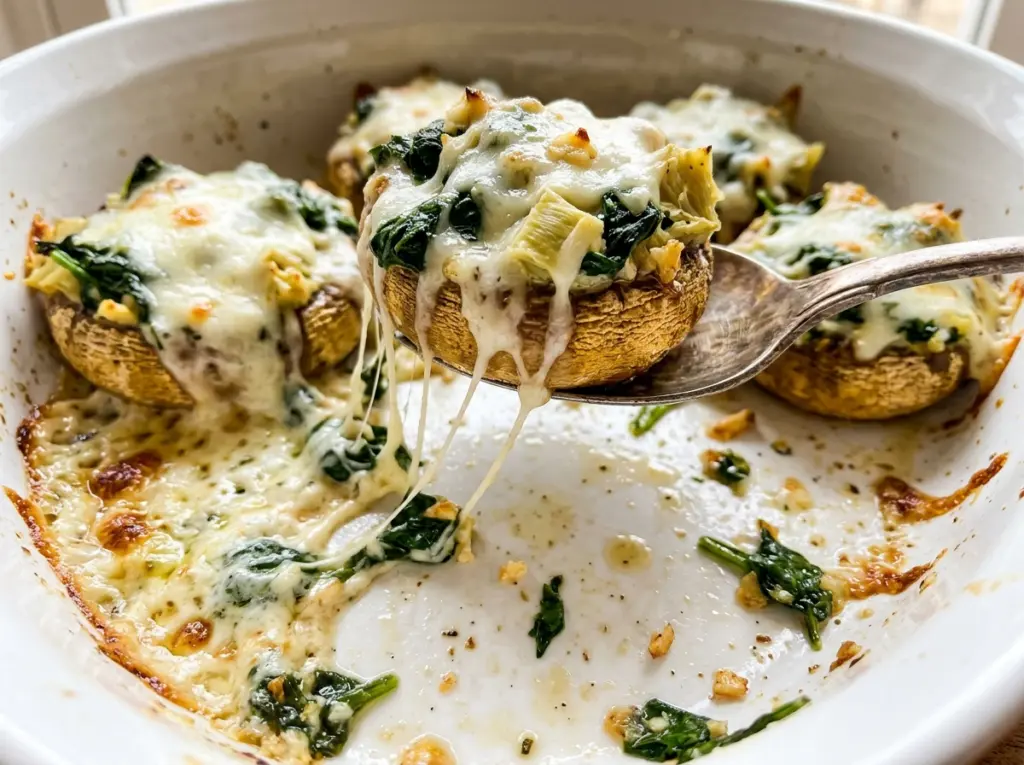
The filling should sit in the mushroom caps, not slouch over the edges, and these bake up with just enough golden color on top to make them look ready for the table. I make these cheesy spinach artichoke stuffed mushrooms when I want the familiar creamy spinach-artichoke combination in a tidy, savory bite instead of a dip.
Large cremini caps give the filling a sturdy little home, while chopped stems go right into the skillet instead of being tossed. That means the mushrooms bring their own earthy flavor to the filling, and every part of the bunch has a job. The cream cheese makes it easy to spoon the mixture into each cap, with mozzarella and Parmesan adding a gentle pull and a more savory finish.
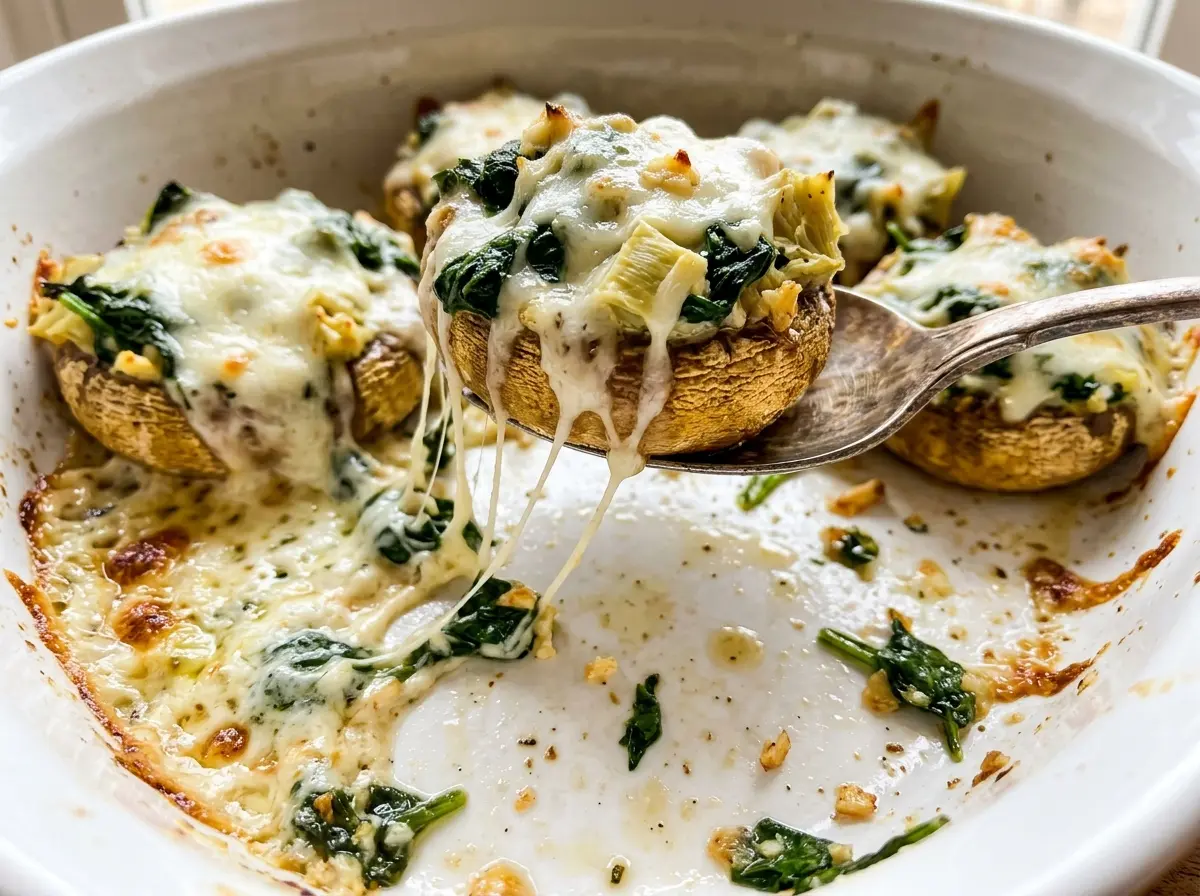
Serve them while the caps are tender and the centers are hot, after a short rest on the baking sheet. The tops turn lightly golden, and the filling stays creamy against the soft, earthy mushrooms.
Kitchen Note
Let the spinach and mushroom mixture cool for the full 5 minutes before adding the cream cheese. If it’s still steaming, the filling can loosen and become harder to mound neatly in the caps.
Save these cheesy spinach artichoke stuffed mushrooms for a party platter with creamy centers and lightly golden tops.
Why the filling turns watery if the skillet work gets rushed
These mushrooms have two sources of moisture before they ever go into the oven: the chopped stems and the spinach. If that liquid stays in the skillet, it has nowhere to go once it’s enclosed in the caps. The cream cheese can look smooth when you stir everything together, but the extra moisture leaves the finished filling loose and makes the mushrooms sit in a puddle.
Cooking the stems until their moisture has evaporated, then cooking the spinach until the skillet is nearly dry, handles that problem at the beginning. You’re not trying to brown the vegetables or cook them into a paste; you’re concentrating their flavor and getting rid of excess liquid. That small distinction is what lets the filling stay creamy rather than watery.
Artichoke hearts need the same attention when you prep them. Drain them well before chopping, since liquid clinging to the pieces adds moisture back into the bowl. Once the vegetables are cooked down and the artichokes are drained, the mixture should hold together when you spoon it into the caps without leaking around the edges.
What the cheeses and vegetables each bring to the filling

- Large cremini mushrooms — Their broad caps hold a generous spoonful without needing a separate dish. Choose caps that feel firm and have enough room inside once the stems are removed; wiping them clean keeps them from taking on extra water. Chop the stems finely so they soften evenly in the skillet.
- Baby spinach — Fresh baby spinach wilts quickly and brings a mild green flavor that doesn’t overpower the mushrooms. Chop it before cooking so it mixes evenly with the stems and is easy to portion into the caps.
- Artichoke hearts — They add the tender, tangy bites that make the filling taste like spinach artichoke dip. Drain and chop them well; large wet pieces are harder to distribute and can leave pockets of liquid.
- Cream cheese — Softened cream cheese binds the vegetables and gives the filling its smooth, spoonable texture. Let it soften before mixing so you can combine it without leaving stubborn lumps.
- Low-moisture mozzarella and Parmesan — Low-moisture mozzarella melts into the filling without adding the water that fresh mozzarella would bring. Parmesan contributes a saltier, savory edge, so use finely grated cheese that stirs in evenly rather than leaving large clumps.
- Olive oil — The first portion helps the chopped stems cook evenly, and the remaining oil coats the caps so they bake tender instead of drying out. Divide it between those two jobs rather than adding it all to the skillet.
Cooking the filling until it’s ready to mound in the caps
Soften the chopped stems
Heat the oven to 400°F and line a rimmed baking sheet with parchment paper. Warm 1 tablespoon of olive oil in a 10-inch skillet over medium heat, then add the finely chopped mushroom stems. Cook for 4 to 5 minutes, stirring, until they soften and their moisture has evaporated. If the stems still look wet, keep cooking until the skillet no longer has liquid pooling around them.
Wilt the spinach and garlic
Add the chopped spinach and minced garlic to the skillet, stirring for 2 to 3 minutes. The spinach should wilt down, and the skillet should look nearly dry rather than glossy with liquid. Transfer the mixture to a bowl and let it cool for 5 minutes. A quick stir as it cools helps release steam.
Stir together the creamy filling
Add the softened cream cheese, drained chopped artichoke hearts, mozzarella, Parmesan, kosher salt, and black pepper to the bowl. Stir until the vegetables and cheeses are evenly distributed through the cream cheese. Break up any large cream cheese lumps against the side of the bowl. The finished filling should be thick enough to stay on a spoon.
Fill and bake the caps
Brush the mushroom caps with the remaining olive oil and arrange them cavity side up on the prepared baking sheet. Spoon the filling into the caps, keeping it contained within each mushroom. Bake for 20 to 25 minutes, until the mushrooms are tender and the filling is hot and lightly golden. Let them rest on the baking sheet for 5 minutes before serving so the filling settles.
Two small changes for a different balance of cheese and vegetables
Make the filling more spinach-forward
Leave out the artichoke hearts and keep the other filling ingredients unchanged. The result is less tangy, with the spinach and creamy cheeses coming through more clearly; you’ll have a little less filling to divide among the caps.
Put more Parmesan on top
Reserve some of the Parmesan and sprinkle it over the filled caps before baking, folding the rest into the filling. The tops will have a more noticeable savory finish, while the inside stays creamy. Use the same total amount of Parmesan.
Storage and Reheating
- Refrigerator: Refrigerate leftovers within 2 hours and keep them covered for 3 to 4 days. The mushroom caps soften as they sit.
- Freezer: Freezing isn’t recommended. The caps release moisture as they thaw, and the creamy filling may lose its smooth texture.
- Reheating: Warm leftovers in the microwave in short bursts until hot throughout. Stop as soon as they’re heated; extended reheating makes the mushrooms softer and wetter.
Questions that come up when making stuffed mushrooms
Cheesy Spinach Artichoke Stuffed Mushrooms
Ingredients
Equipment
Method
- Heat the oven to 400°F.
- Line a rimmed baking sheet with parchment paper.
- Heat 1 tablespoon of the olive oil in a 10-inch skillet over medium heat, add the chopped mushroom stems, and cook for 4 to 5 minutes, stirring, until softened and their moisture has evaporated.
- Add the spinach and garlic and cook for 2 to 3 minutes, stirring, until the spinach is wilted and the skillet is nearly dry.
- Transfer the spinach mixture to a bowl and cool for 5 minutes.
- Stir the cream cheese, artichoke hearts, mozzarella, Parmesan, salt, and pepper into the spinach mixture until evenly combined.
- Brush the mushroom caps with the remaining 1 tablespoon olive oil.
- Arrange the mushroom caps cavity side up on the prepared baking sheet.
- Spoon the filling into the caps.
- Bake for 20 to 25 minutes, until the mushrooms are tender and the filling is hot and lightly golden.
- Let the mushrooms rest on the baking sheet for 5 minutes before serving.