
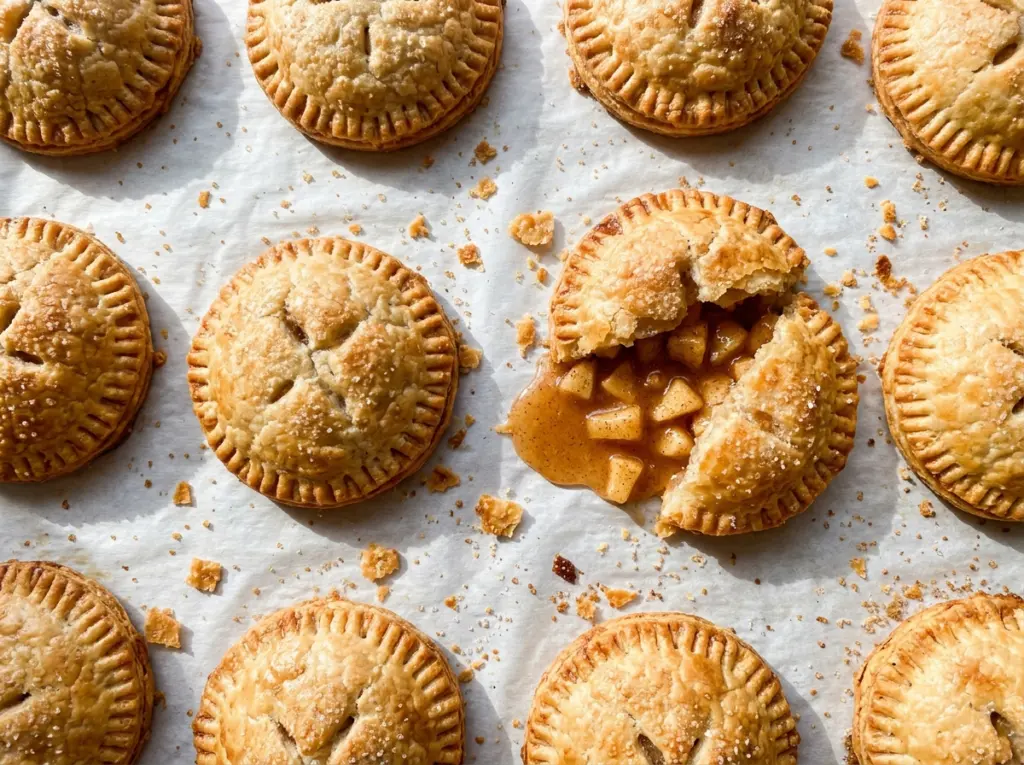
The first sign of trouble is usually a little puddle of apple juice escaping from the edge of a hand pie. I learned to cook the filling before it goes anywhere near the pastry: the apples soften, the cornstarch thickens their juices, and the mixture has a chance to cool before assembly. That small bit of timing makes these homemade apple hand pies much easier to seal and gives you a flaky crust instead of a damp one.
The dough should feel cool and pliable, not sticky, and it needs a full hour in the refrigerator before rolling. I keep the rounds between parchment so they’re easy to lift without adding extra flour. Once the pies are filled, another short chill helps them hold their shape in the oven, where the pastry turns golden and the apple filling bubbles at the edges.
Kitchen Note
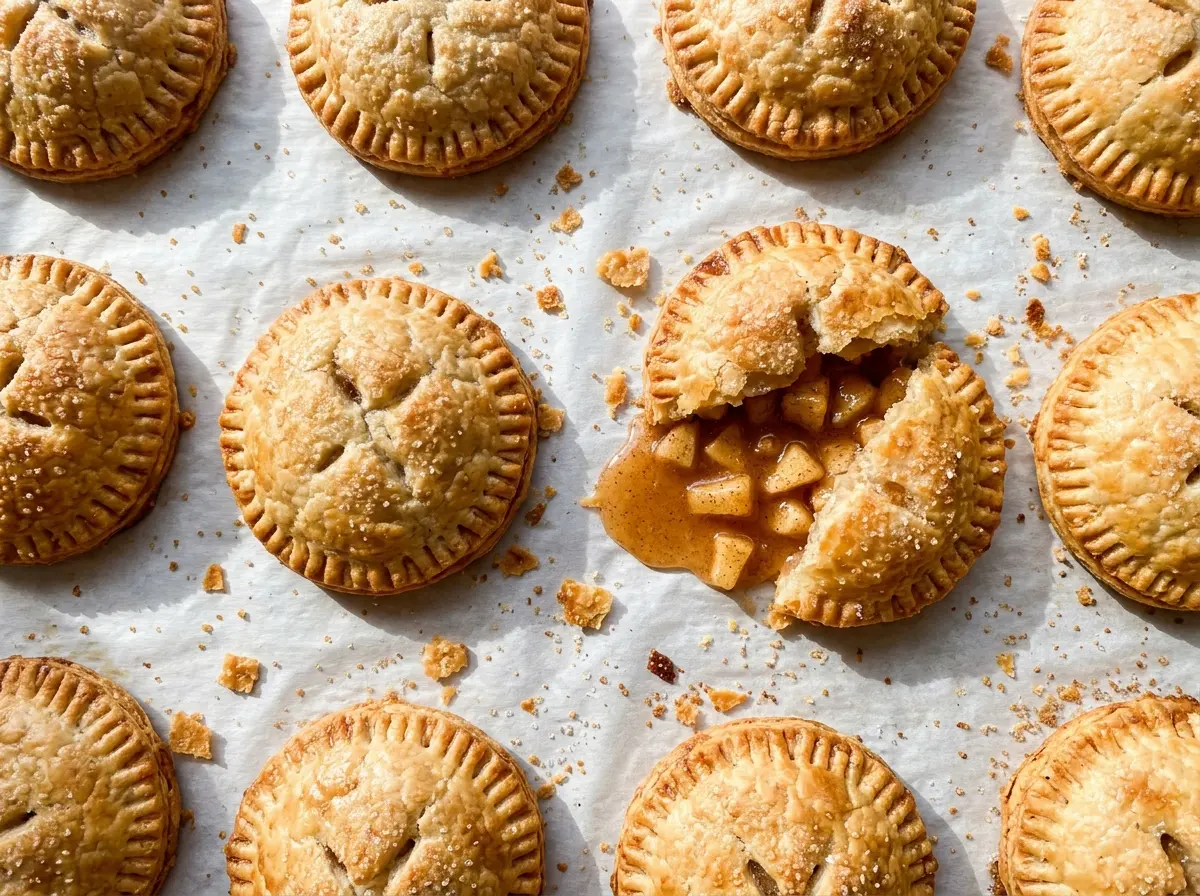
After the first four tablespoons of ice water, add any more just one tablespoon at a time. Stop when a handful of dough holds together when squeezed; if it feels sticky, you’ve gone past the texture you want.
Save these homemade apple hand pies for a bake day when you want cinnamon apples tucked inside crisp, golden pastry.
Why the Apple Filling Needs to Cool Before It Meets the Pastry
Raw apple pieces keep releasing juice as they bake. Inside a sealed pastry round, that liquid has nowhere to go, and it can make the bottom soft or push open a carefully crimped edge. Cooking the diced apple first gives the filling a head start: the fruit softens in the skillet, while cornstarch thickens the juices into a glossy coating instead of a loose puddle.
Cooling matters just as much as thickening. Hot filling warms the butter in the dough before the pies even reach the oven, which makes the pastry harder to handle and less likely to stay neat around the edges. Spread the filling in a shallow bowl and wait until it’s completely cool. It should look thick and spoonable, with the apple pieces coated rather than swimming in liquid. That’s the consistency that stays tucked inside each little pie.
What the Tart Apple, Butter, and Cornstarch Each Bring

- Tart apple — A firm, tart apple keeps its shape as it cooks and balances the brown sugar. Choose one that feels firm and has unblemished skin; a familiar tart baking apple such as Granny Smith works well. Dice it evenly so the small pieces soften at the same pace.
- Cold unsalted butter — Cold cubes create the small pockets that make the pastry tender and flaky. A standard unsalted butter is fine; the technique matters more than buying a specialty brand. Keep it cold until you cut it into the flour, and use your fingertips or a pastry cutter as the dough method allows.
- Cornstarch — This thickens the apple juices without turning the filling cloudy or pasty when cooked through. It’s worth using cornstarch here rather than leaving it out; the filling needs that extra structure to sit cleanly inside the pastry.
- Lemon juice and cinnamon — Lemon brightens the cooked apple and keeps the brown sugar from tasting flat, while cinnamon gives the filling its familiar warm note. Fresh lemon juice is a nice choice, but bottled juice works for this small amount. Ground cinnamon from the pantry is all you need.
From Chilled Dough to Sealed, Golden Hand Pies
Bring the Dough Together Without Overworking It
Whisk the flour, granulated sugar, and salt in a large bowl, then cut in the cold butter with a pastry cutter or your fingertips. Stop when the largest butter pieces are about the size of peas; the mixture shouldn’t look like a smooth paste. Toss in four tablespoons of ice water, then add more a tablespoon at a time only if needed. Divide the dough in half, shape each portion into a disk, wrap, and refrigerate for at least one hour.
Cook the Apples Until the Juices Thicken
Melt the butter in a medium skillet over medium heat, add the diced apple, and cook for three minutes, stirring occasionally. Stir in the brown sugar, cornstarch, cinnamon, and salt, then cook for three to five minutes, stirring, until the apple is tender and the juices have thickened. The filling should cling to the pieces rather than run across the skillet. Stir in the lemon juice, transfer everything to a shallow bowl, and let it cool completely.
Roll, Fill, and Close Each Round
Heat the oven to 400°F and line a large baking sheet with parchment paper. Roll each chilled dough disk between sheets of parchment until it’s 1/8 inch thick, then cut five 4 1/2-inch rounds from each disk, rerolling scraps as needed. Spoon about two tablespoons of cooled filling into the center of each round. Brush one half of the edge with beaten egg, fold the dough over the filling, and press the edges together with a fork.
Chill the Assembled Pies Before Baking
Arrange the pies on the prepared baking sheet and refrigerate them for 15 minutes. This brief chill helps the folded pastry stay in place as it bakes. Brush the tops with the remaining beaten egg and sprinkle with coarse sugar just before the pan goes into the oven. Bake for 18 to 22 minutes, until the pastry is golden brown and filling bubbles at the edges, then cool the pies on the baking sheet for 10 minutes before serving.
Easy Changes for a Different Apple Hand Pie
Use a sweeter baking apple
Swap the tart apple for a firm, sweeter baking apple, keeping the same size and dice. The filling will taste less tangy and more mellow; choose fruit that holds its shape when cooked rather than a soft apple that breaks down quickly.
Make the pastry gluten-free
Replace the all-purpose flour with a cup-for-cup gluten-free baking blend formulated for pastry or baking. The dough is more delicate, so roll it between parchment and lift the rounds carefully; the finished crust may be a little more crumbly than a wheat-flour crust.
Make the filling and crust dairy-free
Use unsalted plant-based butter sticks in place of the butter in both the pastry and filling; avoid soft tub spreads, which don’t handle the same way in dough. The pastry may have a slightly different flavor and texture, and the egg wash still contains egg.
Storage and Reheating
- Refrigerator: Store cooled pies in an airtight container for up to 3 days. The crust softens as it sits.
- Freezer: Freeze fully cooled pies in a single layer until firm, then wrap individually and keep in an airtight freezer container for up to 2 months. Thaw overnight in the refrigerator.
- Reheating: Warm in a 350°F oven for 8 to 10 minutes, until heated through. The microwave is faster, but it softens the pastry.
Questions That Come Up While Making Apple Hand Pies
Apple Hand Pies – Homemade Recipe
Ingredients
Equipment
Method
- Whisk the flour, granulated sugar, and salt in a large bowl.
- Cut in the cold butter with a pastry cutter or your fingertips until the largest pieces are about the size of peas.
- Add 4 tablespoons ice water and toss until the dough starts to come together, adding more water 1 tablespoon at a time as needed; the dough should hold when squeezed but should not feel sticky.
- Divide the dough in half and shape each half into a disk.
- Wrap the dough disks and refrigerate for at least 1 hour.
- Melt the butter in a medium skillet over medium heat.
- Add the apple and cook for 3 minutes, stirring occasionally.
- Stir in the brown sugar, cornstarch, cinnamon, and salt; cook for 3 to 5 minutes, stirring, until the apples are tender and the juices are thickened.
- Stir in the lemon juice.
- Transfer the filling to a shallow bowl and cool completely.
- Heat the oven to 400°F.
- Line a large baking sheet with parchment paper.
- Roll each dough disk between sheets of parchment to 1/8 inch thick.
- Cut out five 4 1/2-inch rounds from each disk, rerolling scraps as needed.
- Put about 2 tablespoons filling in the center of each round.
- Brush the edge of one half of each round with beaten egg.
- Fold the dough over the filling and press the edges together with a fork.
- Arrange the pies on the baking sheet.
- Refrigerate the assembled pies for 15 minutes.
- Brush the tops with the remaining beaten egg.
- Sprinkle with coarse sugar.
- Bake for 18 to 22 minutes, until the pastry is golden brown and the filling is bubbling at the edges.
- Cool the hand pies on the baking sheet for 10 minutes before serving.