
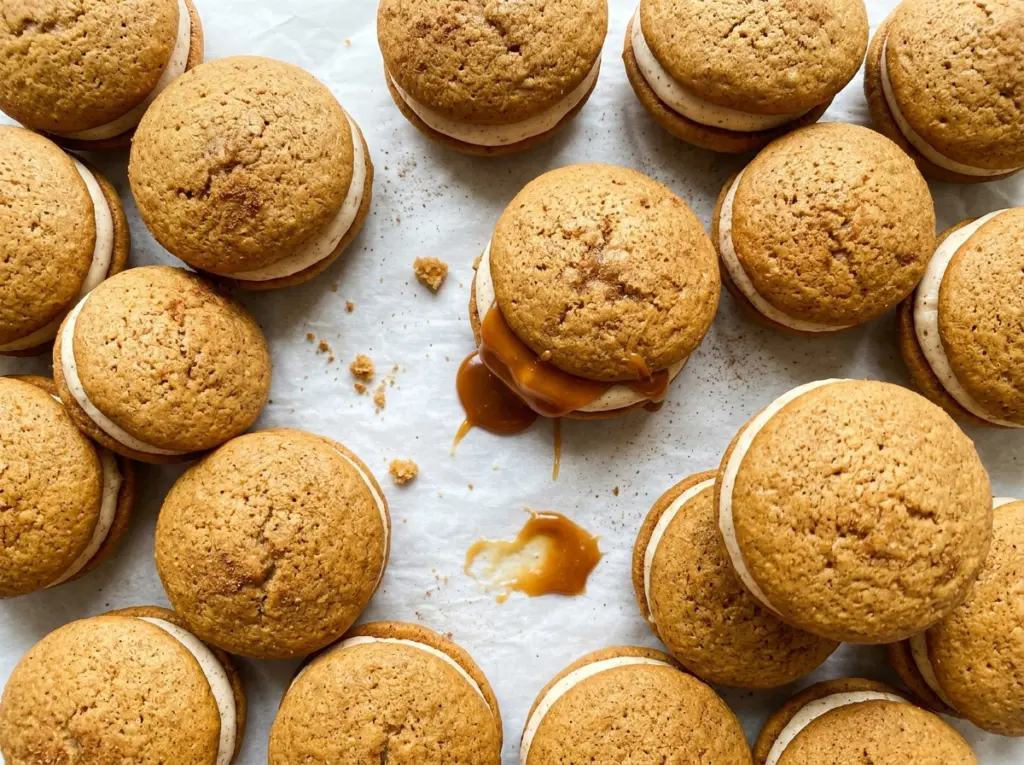
Little rounds of spiced batter come off the baking sheet with springy tops and soft centers. Once they’ve cooled, they’re sturdy enough to sandwich but still tender to bite through. These apple cider whoopie pie cookies with caramel bring together warm cinnamon, a cream cheese filling, and the deep sweetness of homemade caramel.
I like the balance in this filling: cream cheese gives the caramel a mellow tang, so the center tastes rich without turning into a hard, sticky layer. Let the cookies cool completely before filling them, and the soft rounds hold together neatly around that smooth caramel center.
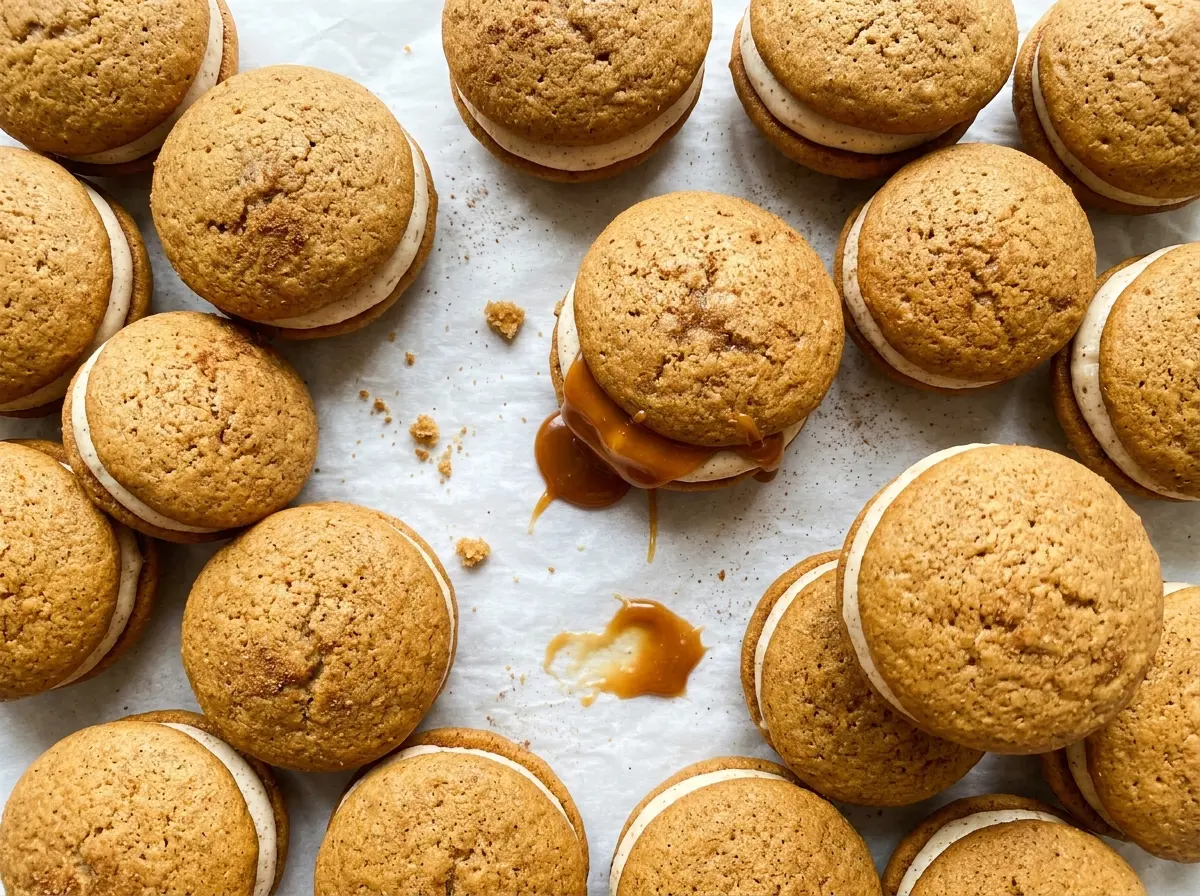
Kitchen Note
Keep the caramel pan moving with gentle swirls, but don’t stir the sugar and water. Stirring can encourage crystals to form; wait for the syrup to turn deep amber before taking it off the heat.
Save these apple cider whoopie pie cookies with caramel for a bake that pairs tender cinnamon-spiced rounds with a smooth, tangy caramel filling.
Why the Cider Needs to Reduce Before It Goes Into the Batter
Apple cider brings plenty of flavor, but it also brings liquid. Adding it straight from the carton would add more moisture than these small cakes need, which can leave the batter loose and the baked rounds less defined. Simmering it down concentrates the apple taste while keeping the liquid in check.
Start with a cup of cider and let it reduce to half a cup; that’s the point where it’s concentrated enough to give the cookies a clear apple note without overwhelming the cinnamon and nutmeg. The reduced cider needs to cool completely before it goes into the butter mixture. Warm cider can soften the butter and make the batter harder to mix evenly, so transfer it to a heatproof measuring cup and let it cool while you prepare the other ingredients.
This is also why apple cider is a better fit here than cider-flavored syrup or a sweet topping. The reduced liquid becomes part of the cookie batter itself, adding apple character throughout each round rather than only in the filling.
What Gives These Cookies Their Soft Bite and the Filling Its Body

- All-purpose flour — Spoon it into the measuring cup and level the top rather than scooping straight from the bag. Packed flour can make the rounds dry and dense. For a gluten-free version, use a measure-for-measure baking blend that contains xanthan gum; see the variation below.
- Apple cider — Fresh cider gives the cookies a more rounded apple flavor, though regular grocery-store cider works well. Apple juice can replace it; reduce the juice by half in the same way, knowing the result will taste a little lighter and sweeter.
- Butter and light brown sugar — Softened butter creams smoothly with brown sugar, while the molasses in the sugar adds moisture and a deeper note than white sugar alone. The butter should yield to a fingertip without looking shiny or melted.
- Egg and sour cream — A room-temperature egg blends into the butter mixture more evenly than a cold one. Full-fat plain Greek yogurt can replace the sour cream in the same amount; it keeps the batter moist, with a slightly more pronounced tang.
- Cinnamon and nutmeg — These warm spices give the apple a clear, bakery-style aroma. Fresh spices taste brighter, but a basic pantry jar is fine; replace spices that smell faint when you open the container.
- Cream cheese and powdered sugar — Cream cheese gives the caramel filling its gentle tang and helps it hold its shape. Use softened cream cheese so it beats smooth, and add the powdered sugar gradually to keep the filling from turning lumpy. If the sugar has hard clumps, sift it first.
- Granulated sugar and heavy cream — Granulated sugar creates the caramel, and heavy cream smooths it into a sauce that can blend into the filling. Heavy cream is worth using here; a thinner dairy product can leave the caramel less rich and the filling softer.
From Reduced Cider to Neat, Cream-Filled Sandwiches
Concentrate the cider and cool it
Simmer the cider in a small saucepan over medium heat for 8–12 minutes, until it measures half a cup. Pour it into a heatproof measuring cup and let it cool completely; don’t add it while warm. This gives you time to whisk together the dry ingredients and set up the baking sheets.
Mix the batter gently
Whisk the flour, baking soda, cinnamon, nutmeg, and salt in a medium bowl. In a large bowl, beat the softened butter and brown sugar with an electric mixer on medium for 2–3 minutes, until fluffy, then beat in the egg, sour cream, and vanilla followed by the cooled cider. Add the flour mixture in two additions on low speed, stopping as soon as no dry streaks remain so the cookies don’t turn tough.
Bake until the tops spring back
Heat the oven to 350°F and line two baking sheets with parchment. Scoop the batter into 24 portions of about 1 1/2 tablespoons each, spacing 12 on each sheet about 2 inches apart. Bake for 10–12 minutes, swapping the rack positions and rotating the sheets front to back halfway through; the tops should spring back lightly when touched. Leave the cookies on the sheets for 5 minutes, then move them to a wire rack and cool completely.
Make a smooth caramel filling
Warm the heavy cream in a microwave-safe cup for 10–15 seconds, just until warm but not boiling. Combine the granulated sugar and water in a 1-quart heavy saucepan over medium heat, gently swirling the pan for 4–6 minutes until the syrup turns deep amber. Take it off the heat and carefully whisk in the warm cream, then return the pan to low heat and stir for 1–2 minutes until smooth. Pour the caramel into a heatproof bowl and let it cool completely.
Fill, sandwich, and chill
Beat the softened cream cheese until smooth, then gradually beat in the powdered sugar and the cooled caramel. Cover the bowl and refrigerate the filling for 20–30 minutes, until thick enough to spread. Spread about 2 tablespoons of filling on the flat side of 12 cooled cookies and top each with another cookie, flat sides facing the filling. Refrigerate the assembled whoopie pies for 20 minutes so the centers firm up.
Three Ways to Adapt the Spice, Sugar, or Flour
Make the cookies gluten-free
Replace the all-purpose flour with a measure-for-measure gluten-free baking blend that includes xanthan gum, using the same volume and spoon-and-level method. The cookies may have a more delicate crumb, so let them cool fully before moving or filling them.
Use dark brown sugar for deeper molasses notes
Swap the light brown sugar for packed dark brown sugar. The cookies will have a more pronounced molasses flavor that stands up well to the cider and caramel, with a slightly darker color.
Leave out the nutmeg for a cinnamon-forward batch
Omit the nutmeg and keep the cinnamon as it is. You’ll get a cleaner cinnamon-and-apple flavor without changing the cookie’s texture or the caramel filling.
Storage and Reheating
- Refrigerator: Keep assembled whoopie pies covered and refrigerated for up to 4 days. The cookies soften a little as they sit against the filling.
- Freezer: Freeze the assembled pies in a single layer until firm, then wrap individually and store in an airtight container for up to 1 month. Thaw overnight in the refrigerator; the filling may be a little less silky after freezing.
- Reheating: These are best chilled, not reheated. A microwave can soften the cream cheese filling too much, so let a pie sit at room temperature briefly if you prefer a softer bite.
Questions That Come Up When Making These Whoopie Pies
Apple Cider Whoopie Pie Cookies With Caramel – Homemade Recipe
Ingredients
Equipment
Method
- Simmer the apple cider in a small saucepan over medium heat for 8-12 minutes, until reduced to 1/2 cup; transfer to a heatproof measuring cup and cool completely.
- Heat the oven to 350°F and line two baking sheets with parchment paper.
- Whisk the flour, baking soda, cinnamon, nutmeg, and salt together in a medium bowl.
- Beat the butter and brown sugar in a large bowl with an electric mixer on medium speed for 2-3 minutes, until fluffy.
- Beat in the egg, sour cream, and vanilla, then beat in the cooled cider.
- Add the flour mixture to the butter mixture in two additions, mixing on low just until no dry streaks remain.
- Scoop the batter into 24 portions of about 1 1/2 tablespoons each and place 12 on each baking sheet, spaced about 2 inches apart.
- Bake both sheets at 350°F for 10-12 minutes, swapping rack positions and rotating the sheets front to back halfway through, until the tops spring back lightly when touched.
- Cool the cookies on the baking sheets for 5 minutes.
- Transfer the cookies to a wire rack and cool completely.
- Warm the heavy cream in a microwave-safe cup for 10-15 seconds, until warm but not boiling.
- Combine the granulated sugar and water in a 1-quart heavy saucepan over medium heat, gently swirling the pan without stirring, for 4-6 minutes, until the syrup is deep amber.
- Remove the pan from the heat and carefully whisk in the warm cream.
- Return the pan to low heat and stir for 1-2 minutes, until the caramel is smooth.
- Pour the caramel into a heatproof bowl and cool completely.
- Beat the cream cheese in a medium bowl until smooth.
- Beat in the powdered sugar gradually.
- Beat in the cooled caramel until smooth.
- Cover and refrigerate the filling for 20-30 minutes, until thick enough to spread.
- Spread about 2 tablespoons of filling on the flat side of 12 cookies and top with the remaining cookies, flat sides facing the filling.
- Refrigerate for 20 minutes to firm the filling.