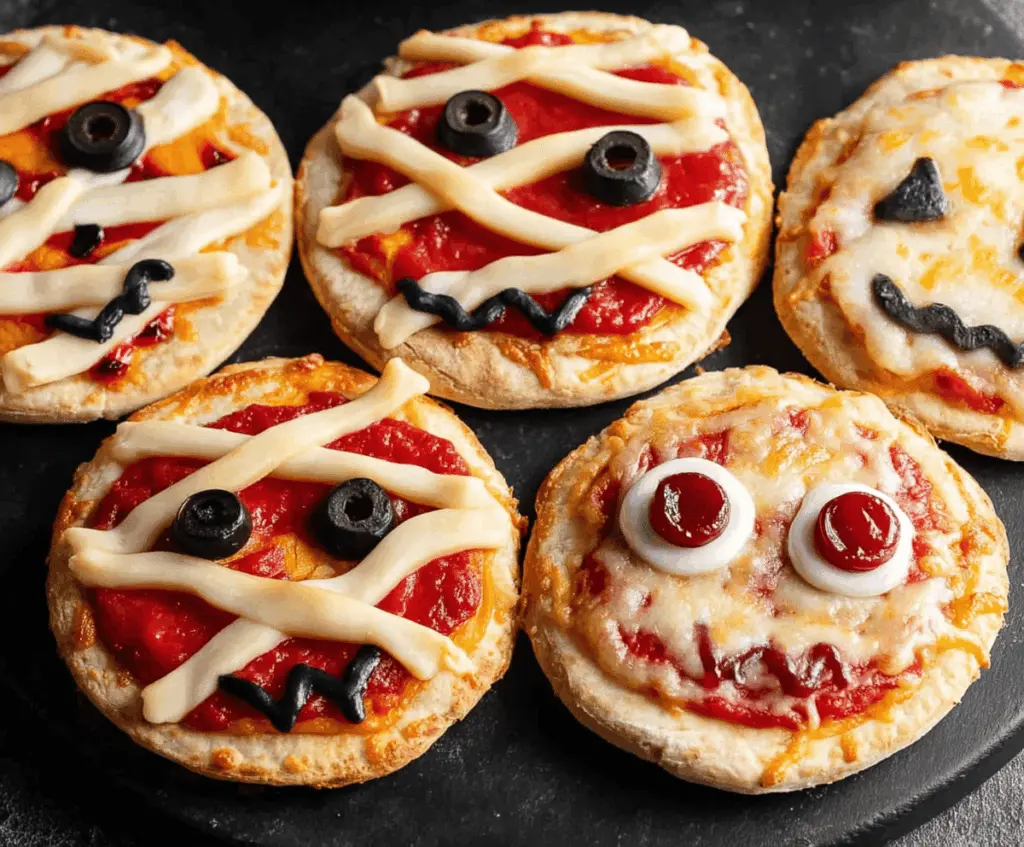
Spooky Mini Halloween Pizzas are bite-sized treats that pack a whole lot of fun. These little pizzas are topped with cheesy goodness and decorated with playful spooky faces using olives, pepperoni, and peppers to create ghosts, pumpkins, and monsters. They’re perfect for adding some festive spirit to any Halloween gathering without being too scary or tricky to make.
I love making these mini pizzas because they’re so easy and customizable. I usually let the kids help with the toppings—it turns into a fun little competition to see who can create the spookiest or silliest pizza face. Plus, they cook quickly, so you don’t have to wait long before digging in, which is always a win in my book!
These pizzas are great for Halloween parties, snack time, or even a cozy night at home with a spooky movie. I like to serve them with a side of marinara for dipping and watch everyone’s faces light up as they bite into these festive little creations. They’re simple, cheerful, and a great way to celebrate without all the fuss.
Key Ingredients & Substitutions
- Mini Pizza Crusts
- These are the base of your spooky creations. You can use store-bought ones to save time or make your own dough if you prefer fresh crusts. Tortillas or pita bread work well too for a thinner crust.
- Pizza Sauce
- Classic marinara sauce works perfectly. If you want to mix it up, try a white garlic sauce or pesto for a different twist. Tomato sauce with a little Italian seasoning also works well.
- Mozzarella Cheese
- Shredded mozzarella melts beautifully and gives that classic cheesy pull. For a sharper taste, mix in some cheddar or fontina. Vegan cheese can be a good substitute for dairy-free options.
- Black Olives
- These are great for eyes and details. If you don’t have black olives, try sliced black grapes or small pieces of roasted seaweed for a similar look.
- Pepperoni
- Adds color and a meaty bite. For a vegetarian option, use roasted red peppers or sun-dried tomatoes to mimic the look and add flavor.
- Pizza Dough Strips
- Used for the mummy bandages, this should be pliable but firm enough to not burn or shrink too much. Refrigerated pizza dough is perfect for easy cutting and handling.
How Do I Create Fun and Neat Mummy Bandages on Mini Pizzas?
Making mummy wraps can feel tricky, but a few tricks help keep them neat and delicious:
- Chill the dough: Cold dough is less sticky and easier to cut into thin strips without tearing.
- Thin but sturdy strips: Cut dough about 1/4 inch wide—not too thick, or they won’t cook fully; not too thin, or they might burn quickly.
- Layer with care: Crisscross strips loosely over the sauce and cheese so they look like bandages but leave space for the eyes.
- Brush with oil: A light brush of olive oil helps the strips turn golden brown and stay soft instead of drying out.
- Don’t overload: Keep toppings minimal on bandages so they bake evenly without sogginess.
Following these steps gives you mummy pizzas that look cute but also bake with just the right texture. Plus, it’s fun to assemble, especially with kids helping!
Equipment You’ll Need
- Baking sheet – perfect for holding all your mini pizzas while they bake evenly.
- Rolling pin – helps you roll out pizza dough strips thinly for mummy bandages.
- Sharp knife or pizza cutter – makes cutting dough strips and shaping toppings easy and precise.
- Small bowls – great for organizing toppings like olives, pepperoni, and cheese for easy access.
- Pastry brush – useful for brushing olive oil on dough strips to help them brown nicely.
Flavor Variations & Add-Ins
- Swap mozzarella for cheddar or pepper jack cheese to add a different flavor and color.
- Add cooked sausage or ground beef for a meatier pizza version that kids love.
- Try roasted veggies like bell peppers or mushrooms for a tasty vegetarian option.
- Use colored bell peppers or cherry tomatoes to create fun and vibrant spooky faces.

Spooky Mini Halloween Pizzas
Ingredients You’ll Need:
For the Base:
- 4 mini pizza crusts (pre-made or homemade)
- 1 cup pizza sauce or marinara sauce
- 1 ½ cups shredded mozzarella cheese
For the Toppings:
- ¼ cup black olives, sliced
- ¼ cup sliced pepperoni, halved (optional for eyes)
- 1/2 cup pizza dough (for mummy wraps)
- 1 tbsp olive oil (for dough strips)
- Black olive tapenade or finely chopped black olives (for mouths and details)
How Much Time Will You Need?
This recipe takes about 15 minutes to prepare, including assembling your spooky pizzas, plus about 10-12 minutes to bake. So, in just under 30 minutes, you’ll have a batch of fun and festive mini pizzas ready to enjoy!
Step-by-Step Instructions:
1. Prepare and Preheat
Start by preheating your oven to 400°F (200°C). Place your mini pizza crusts on a baking sheet so they’re ready to be topped.
2. Sauce and Cheese Base
Spread 2-3 tablespoons of pizza sauce evenly over each mini crust. Then sprinkle your shredded mozzarella cheese generously on top — this will be the gooey base for your spooky designs.
3. Make Mummy Pizzas
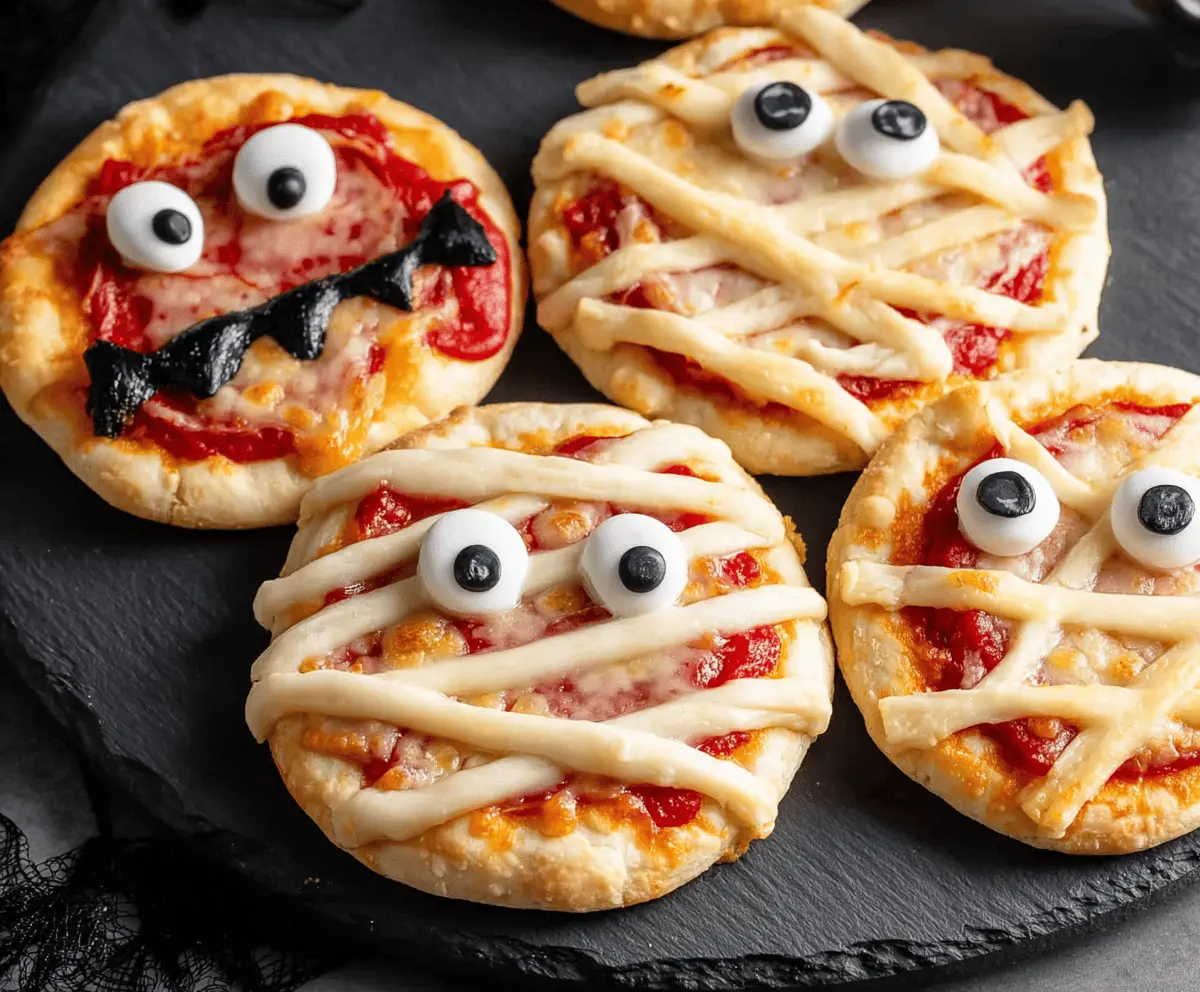
Roll out your pizza dough a little and cut it into thin strips, about ¼ inch wide. Lay these strips in crisscross patterns over three of your pizzas to create the mummy “bandages.” Place two black olive slices on each mummy pizza as eyes right on top of the strips. For the mouth, use a little black olive tapenade or chopped olives to form a squiggly line under the bandages.
4. Jack-o’-Lantern and Monster Faces
On the last pizza (without mummy bandages), create a jack-o’-lantern face by placing olive pieces for the nose and mouth on top of the cheese. For a monster pizza, use small mozzarella rounds or edible eyes for the eyes, topped with halved pepperoni for pupils. Add a little ketchup or extra pizza sauce to make a spooky red mouth.
5. Bake and Serve
Brush some olive oil lightly over the dough strips to help them brown in the oven. Bake all the pizzas at 400°F (200°C) for 10-12 minutes, or until the cheese is melted and bubbly and the crust starts to turn golden. Let the pizzas cool for a moment before serving your festive and fun Halloween snacks!
Can I Use Frozen Pizza Crusts for This Recipe?
Yes! Just be sure to thaw them completely in the refrigerator before assembling your pizzas to ensure even baking and prevent sogginess.
How Can I Make These Mini Pizzas Vegetarian or Vegan?
For a vegetarian version, simply skip the pepperoni or swap it for roasted veggies. For vegan pizzas, use dairy-free cheese and plant-based toppings like olives, bell peppers, and vegan sausage.
Can I Prepare These Mini Pizzas Ahead of Time?
Definitely! Assemble the pizzas up to step 4, then cover and refrigerate for up to 24 hours. Bake them fresh when ready to serve for the best taste and texture.
How Should I Store Leftovers?
Keep leftover mini pizzas in an airtight container in the fridge for up to 3 days. Reheat in the oven or toaster oven to keep the crust crispy rather than using the microwave.