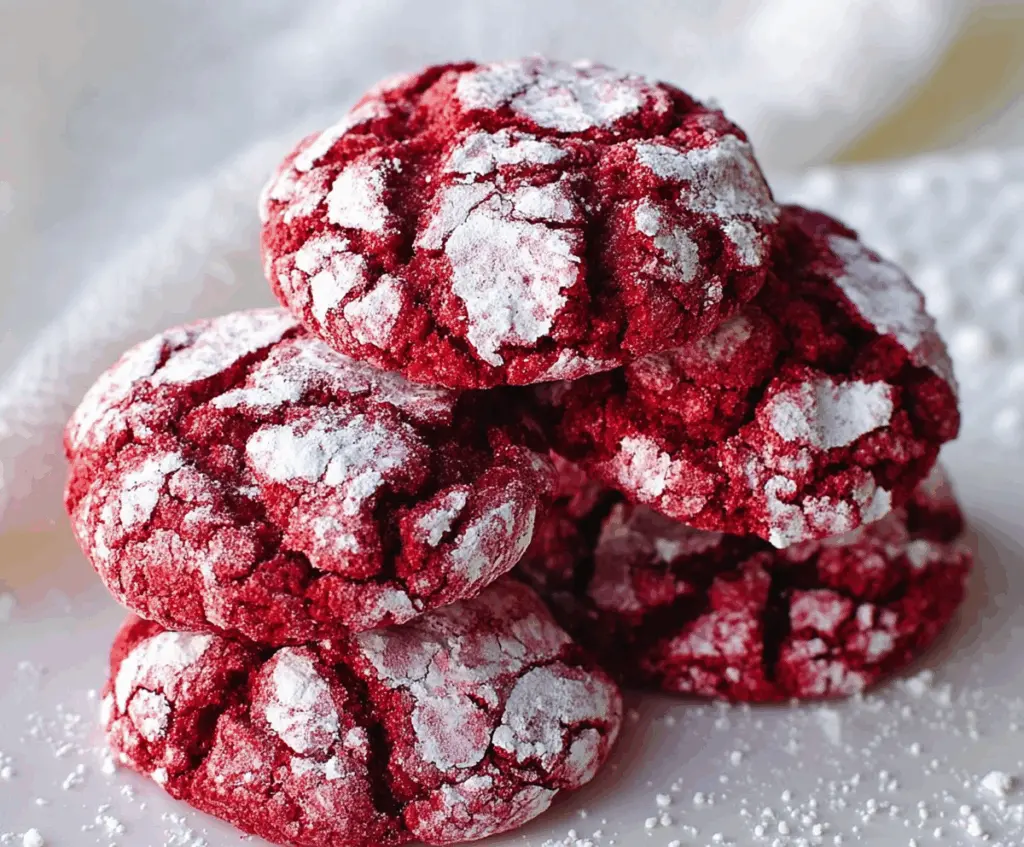
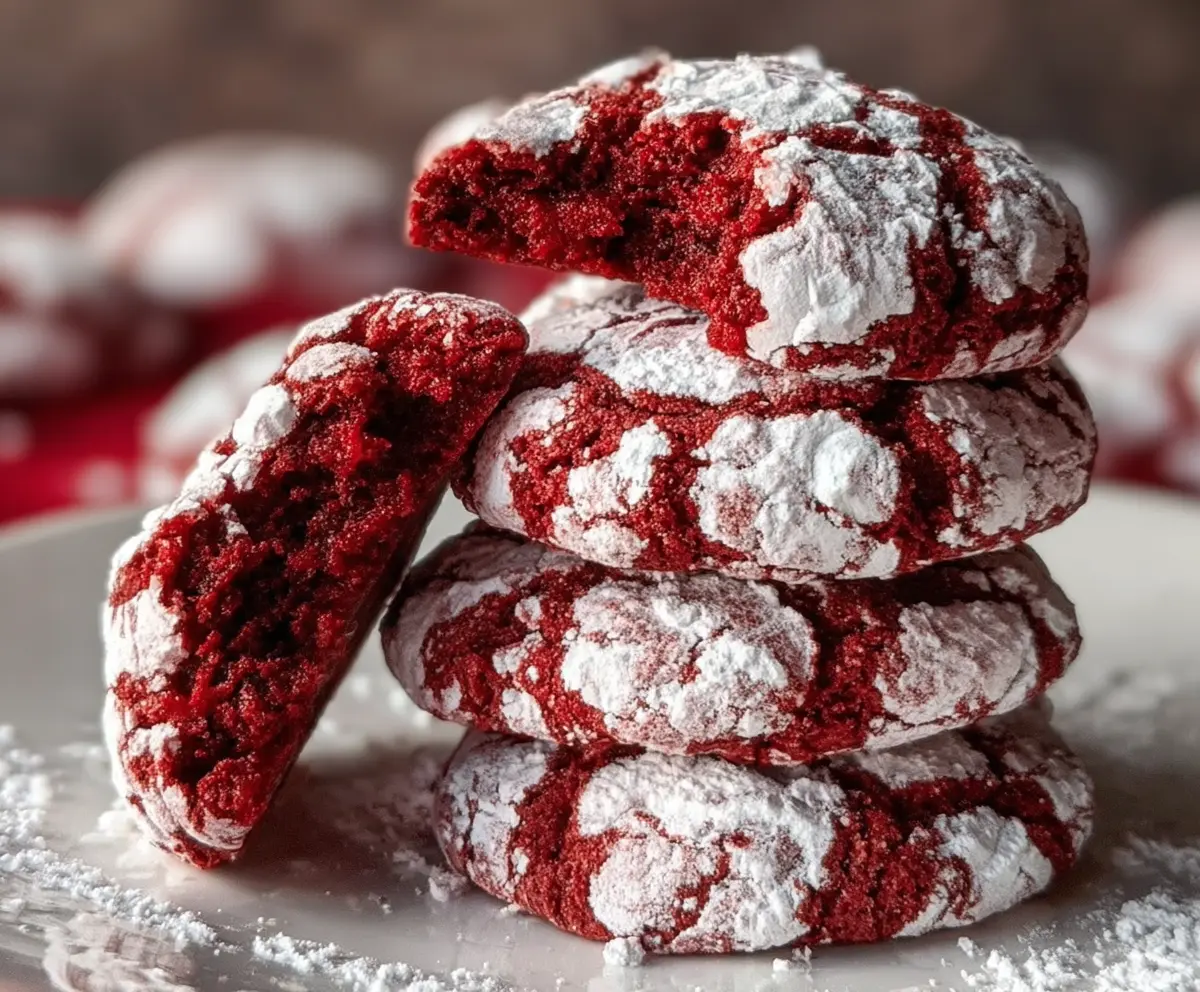
Red Velvet Crinkle Cookies are a festive and fun twist on the classic red velvet flavor. These cookies are soft and chewy with a slight chocolatey taste, all wrapped in a beautiful crackled, powdered sugar coating that gives them a charming, frosted look. They’re perfect for when you want a sweet treat that looks as good as it tastes.
I love how these cookies come out with a soft center and a tender crumb every time. The crinkle effect makes them extra special, and the red color feels so festive, especially around holidays or celebrations. A little tip I’ve learned is to roll the dough generously in powdered sugar before baking—it really gives that lovely cracked finish you see in pictures.
One of my favorite ways to enjoy these cookies is fresh from the oven with a glass of cold milk or a steaming cup of coffee. They’re a hit with friends and family, always disappearing fast at gatherings. Making them is also a fun way to get cozy in the kitchen and feel like you’re baking something a little fancy without much fuss.
Key Ingredients & Substitutions
- Butter
- Using unsalted butter lets you control the salt amount. If you need a dairy-free option, try vegan margarine or coconut oil. Just know it might change the texture a bit.
- Red Food Coloring
- Gel food coloring works best for vibrant color without changing dough texture. If you prefer natural colors, beet juice powder is a nice alternative.
- Cocoa Powder
- Unsweetened cocoa powder gives that subtle chocolate note. Dutch-processed cocoa can be used for a smoother flavor but may slightly alter the dough’s rise.
- Powdered Sugar
- Rolling cookies generously in powdered sugar is key to the pretty crinkle effect. Don’t skip this step or use too little sugar; the cracks won’t show well.
How Can I Get Perfect Crinkles on My Red Velvet Cookies?
The crinkled look happens when the dough expands and cracks during baking. Here’s how to get it right every time:
- Chill the dough: Refrigerate for at least 1 hour to make the dough firm. This helps the cookies hold their shape while baking.
- Roll generously in powdered sugar: A thick coating creates contrast and highlights the cracks.
- Don’t overcrowd: Leave space between cookies on the baking sheet so they can spread evenly.
- Watch bake time closely: Bake until cookies puff and crack, usually 10-12 minutes. Overbaking will dry them out and reduce the crackle effect.
I find gently pressing the dough balls into the powdered sugar rather than just rolling helps the sugar stick better. This simple trick really boosts the crackle pattern and makes the cookies look extra special!
Equipment You’ll Need
- Mixing bowls – for combining wet and dry ingredients easily.
- Electric mixer or hand whisk – makes creaming butter and sugar simple and smooth.
- Measuring cups and spoons – for accurate ingredient amounts, key to consistent cookies.
- Baking sheets – you’ll need a flat surface for even baking and spreading.
- Parchment paper or silicone baking mat – helps prevent sticking and makes cleanup easy.
- Cookie scoop or tablespoon – for uniform cookie sizes and even baking.
- Sifter or fine mesh sieve – perfect for dusting powdered sugar and sifting dry ingredients.
Flavor Variations & Add-Ins
- Add white chocolate chips for a sweet contrast that pairs nicely with the cocoa flavor.
- Mix in chopped nuts like pecans or walnuts to add crunch and a nutty note.
- Try swapping cocoa powder for espresso powder to deepen the chocolate flavor.
- Stir in a teaspoon of cinnamon for a warm, spicy twist that complements red velvet well.
How to Make Red Velvet Crinkle Cookies?
Ingredients You’ll Need:
- 1/2 cup (115g) unsalted butter, softened
- 1 cup (200g) granulated sugar
- 1 large egg
- 1 tablespoon unsweetened cocoa powder
- 1 tablespoon red food coloring (liquid or gel)
- 1/2 teaspoon vanilla extract
- 1 cup (125g) all-purpose flour
- 1/2 teaspoon baking powder
- 1/4 teaspoon baking soda
- 1/4 teaspoon salt
- 1/2 cup powdered sugar (for rolling)
How Much Time Will You Need?
This recipe takes about 15 minutes to prepare, plus 1 hour of chilling time to let the dough firm up. Baking the cookies takes another 10-12 minutes. In total, plan for around 1 hour and 30 minutes, mostly hands-off during chilling and baking.
Step-by-Step Instructions:
1. Prepare Your Oven and Baking Sheets
Start by preheating your oven to 350°F (175°C). Line two baking sheets with parchment paper to stop the cookies from sticking and help them bake evenly.
2. Mix Wet Ingredients
In a large bowl, cream together the softened butter and granulated sugar until the mixture is light and fluffy. Beat in the egg, red food coloring, and vanilla extract until everything is well combined.
3. Combine Dry Ingredients
In another bowl, sift together the all-purpose flour, unsweetened cocoa powder, baking powder, baking soda, and salt. This helps keep your cookies light and airy.
4. Make the Dough
Slowly add the dry ingredients to the wet mixture, stirring until a soft dough forms. Cover the dough and place it in the refrigerator for about 1 hour to chill. Chilling makes it easier to roll later.
5. Shape and Coat the Cookies
When the dough is firm, scoop out portions (about 1.5 inches each) and roll them into balls. Generously roll each ball in powdered sugar, making sure they’re well coated — this will create the crinkled look after baking.
6. Bake and Cool
Place the coated dough balls on the prepared baking sheets, spacing them about 2 inches apart. Bake for 10-12 minutes, until the cookies puff up and crackle beautifully on top. Let them cool on the baking sheet for 5 minutes, then move them to a wire rack to cool completely.
7. Enjoy!
Serve these soft and chewy red velvet crinkle cookies with a cold glass of milk or your favorite warm drink. They’re sure to be a hit!
Can I Use Gel Food Coloring Instead of Liquid?
Yes! Gel food coloring works great and often gives a more vibrant red color without adding extra liquid to the dough. Just use the same amount or slightly less than the liquid food coloring called for.
Do I Need to Chill the Dough Before Baking?
Chilling is highly recommended! It firms up the dough, making it easier to roll and helps the cookies keep their shape and develop those signature cracks as they bake.
How Should I Store Leftover Cookies?
Store baked cookies in an airtight container at room temperature for up to 3-4 days. To keep them fresh longer, you can freeze them in a sealed container for up to 2 months—just thaw at room temperature before eating.
Can I Make These Cookies Gluten-Free?
Yes, substitute the all-purpose flour with a gluten-free flour blend that’s suitable for baking. Just make sure it includes xanthan gum or add some separately to help with texture and structure.