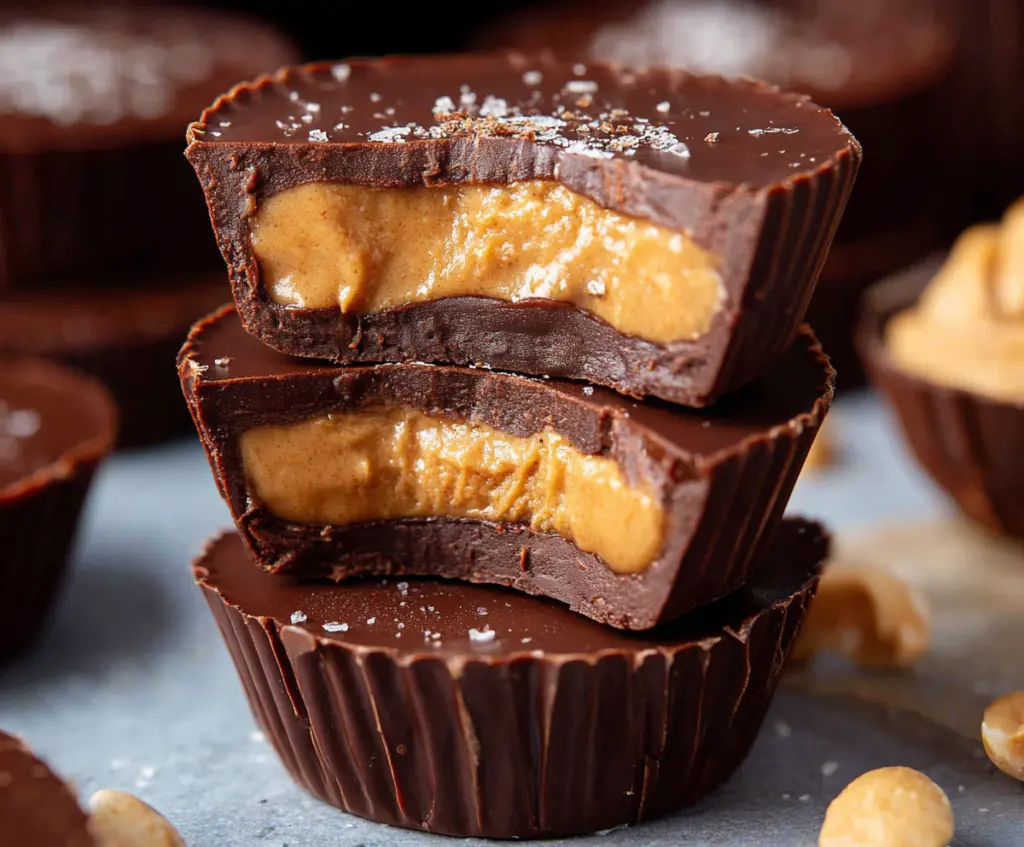
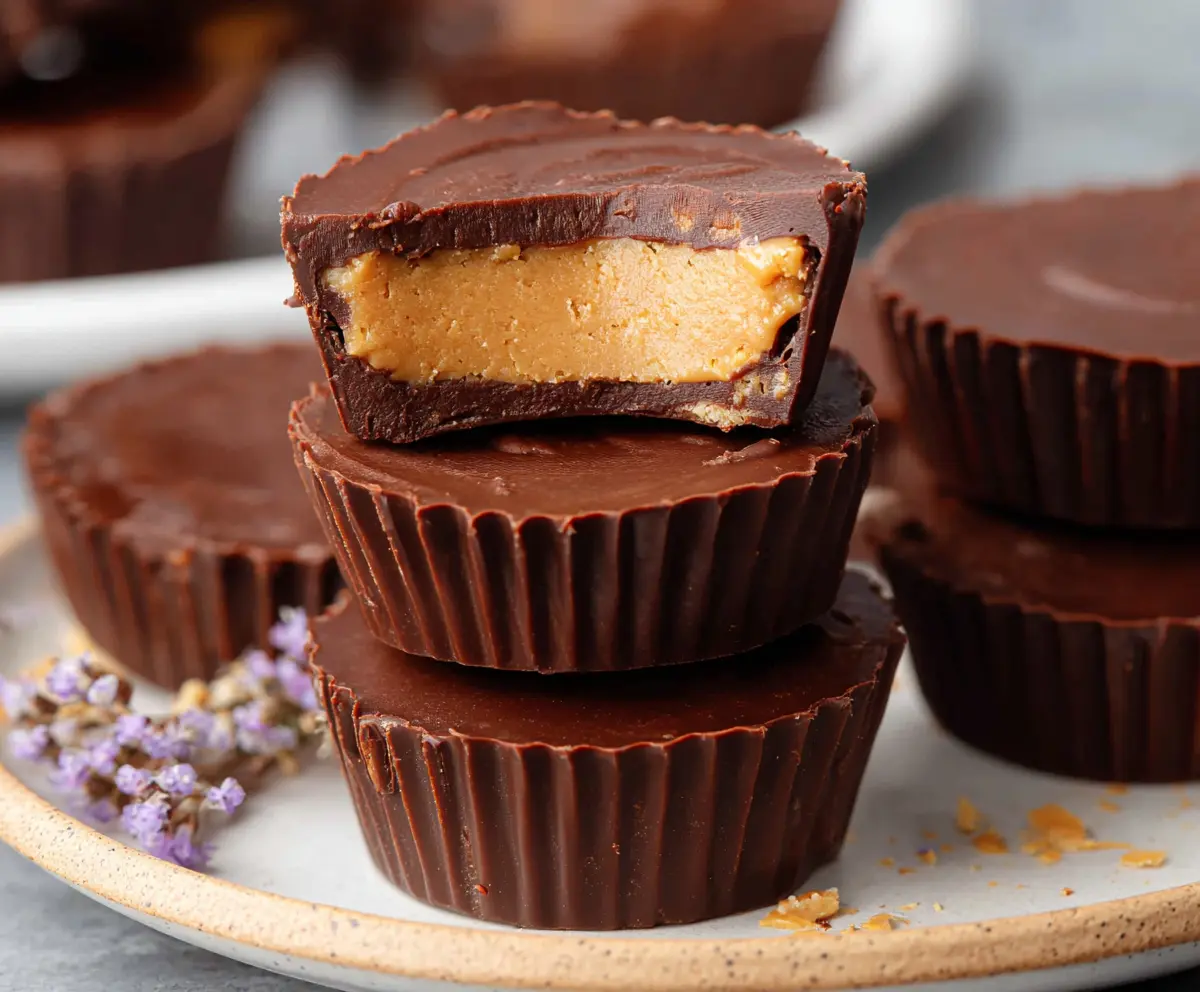
Healthy Peanut Butter Cups are a simple, tasty treat that hits the spot without any of the usual guilt. These cups have just the right blend of creamy peanut butter and smooth chocolate, but made with ingredients that feel good for you. They’re soft, a little sweet, and totally satisfying, perfect for when you want something special but also a bit wholesome.
I love making these peanut butter cups because they’re quick to put together and you don’t have to wait forever to enjoy them. I usually keep a batch in the fridge so I can grab one whenever a chocolate craving hits. Plus, I feel great knowing there’s no weird stuff hiding in there—just real flavors that I can feel good about giving myself or sharing with friends.
My favorite way to enjoy Healthy Peanut Butter Cups is to eat them straight from the fridge when they’re cool and firm, but not too hard. They make a great little dessert after dinner or even a special snack during the day. I’ve found that friends and family always ask for the recipe once they try one, so it’s a sweet little secret I love to share!
Key Ingredients & Substitutions
- Natural Peanut Butter
- I prefer unsweetened and unsalted peanut butter for a more natural, less salty taste. You can swap it with almond or cashew butter if you want a nutty twist or need a peanut-free option.
- Pure Maple Syrup or Honey
- Both add natural sweetness without refined sugar. Maple syrup gives a mild flavor, while honey is a bit richer. For a vegan choice, stick with maple syrup.
- Coconut Oil
- Coconut oil helps melt the chocolate smooth and adds a subtle tropical hint. If you don’t have it, use any neutral oil like avocado or melted butter (if dairy is okay).
- Dark Chocolate
- Choose 70% cocoa or higher for less sugar and more antioxidants. If you prefer sweeter cups, try mixing dark and semi-sweet chocolate or use vegan chocolate chips for a dairy-free version.
How to Get Smooth, Firm Peanut Butter Cups Without Cracking?
Melting and setting the chocolate properly is essential for these cups to look great and hold together well. Here’s what I do:
- Use gentle heat to melt chocolate, microwaving in short bursts (30 seconds) and stirring between each to avoid burning.
- Add coconut oil to thin the chocolate slightly, which helps it spread more easily and harden with a nice snap.
- Freeze the first chocolate layer just until solid—about 10 minutes—so the peanut butter doesn’t mix into it but sticks well.
- After adding the peanut butter, pour the final chocolate layer carefully to cover the filling completely and tap the tray lightly to smooth the surface.
- Chill in the fridge or freezer until fully set, then store in the fridge. This keeps the chocolate firm and prevents melting or cracking.
Equipment You’ll Need
- Microwave-safe bowl – perfect for gently melting chocolate without burning it.
- Muffin tin or silicone molds – these shape the peanut butter cups cleanly and make them easy to pop out.
- Measuring cups and spoons – help you get the right amount of each ingredient for the best balance.
- Spoon or small spatula – useful for spreading chocolate and layering the filling evenly.
- Refrigerator or freezer – essential to chill and set the cups quickly and keep them firm.
Flavor Variations & Add-Ins
- Swap peanut butter for almond or cashew butter to change the nutty flavor and try something different.
- Add a pinch of cinnamon or chili powder in the peanut butter layer for a warm or spicy kick.
- Mix chopped nuts or granola into the peanut butter filling for extra crunch and texture.
- Sprinkle crushed sea salt or chopped pretzels on top before chilling to add a salty contrast that’s so tasty.
Healthy Peanut Butter Cups
Ingredients You’ll Need:
For the Peanut Butter Filling:
- 1 cup natural creamy peanut butter (unsweetened and unsalted)
- ¼ cup pure maple syrup or honey
- 2 tablespoons coconut oil, melted (half of the total ¼ cup)
- ½ teaspoon vanilla extract
- ¼ teaspoon sea salt
For the Chocolate Coating:
- 2 cups dark chocolate chips or chopped dark chocolate (70% cocoa or higher)
- 2 tablespoons coconut oil, melted (remaining half of the ¼ cup)
For Topping:
- Extra sea salt, a pinch for sprinkling on top
How Much Time Will You Need?
Expect about 15 minutes to mix and assemble your peanut butter cups, plus an additional hour to chill them until firm. Total active time is quick, and chilling helps the cups set up nicely for that perfect bite.
Step-by-Step Instructions:
1. Prepare the Peanut Butter Filling:
In a medium bowl, combine the peanut butter, maple syrup or honey, 2 tablespoons of melted coconut oil, vanilla extract, and salt. Mix until everything is smooth and creamy. Set this delicious filling aside for now.
2. Melt the Chocolate:
Place the dark chocolate and 2 tablespoons of coconut oil in a microwave-safe bowl. Heat in 30-second intervals, stirring well between each, until the mixture is completely melted and silky smooth.
3. Make Bottom Chocolate Layer:
Line a muffin pan with paper liners or use silicone molds. Spoon 1 to 1.5 tablespoons of melted chocolate into each cup and spread evenly to cover the bottom. Pop the pan into the freezer for about 10 minutes so this layer becomes solid.
4. Add the Peanut Butter Layer:
Spoon about 1 to 1.5 tablespoons of the peanut butter filling onto the frozen chocolate layers, gently pressing it down to make it level and compact.
5. Top with More Chocolate:
Pour the remaining melted chocolate on top of the peanut butter, covering it fully. Tap the mold gently to smooth out the tops. Sprinkle a tiny pinch of sea salt over each cup for a lovely contrast.
6. Chill and Set:
Place the peanut butter cups in the refrigerator or freezer for at least one hour until they are firm and set.
7. Serve and Store:
Once firm, carefully remove the peanut butter cups from the molds. Keep them stored in an airtight container in the refrigerator. They last up to two weeks and taste best when eaten chilled.
Can I Use Frozen Peanut Butter Cups?
Yes! You can freeze these peanut butter cups to keep them fresh longer. Just store them in an airtight container or freezer-safe bag, and thaw for a few minutes at room temperature before enjoying.
Can I Substitute the Peanut Butter?
Absolutely! Almond butter, cashew butter, or sunflower seed butter work well as alternatives. Just make sure they are creamy for best texture in the filling.
How Should I Store Leftovers?
Store leftover cups in an airtight container in the refrigerator for up to two weeks. Keep them chilled to maintain firmness and freshness.
Can I Make These Ahead of Time?
Definitely. You can prepare the peanut butter filling and chocolate layers in advance, then assemble and chill when ready. They store well and make a great grab-and-go snack.