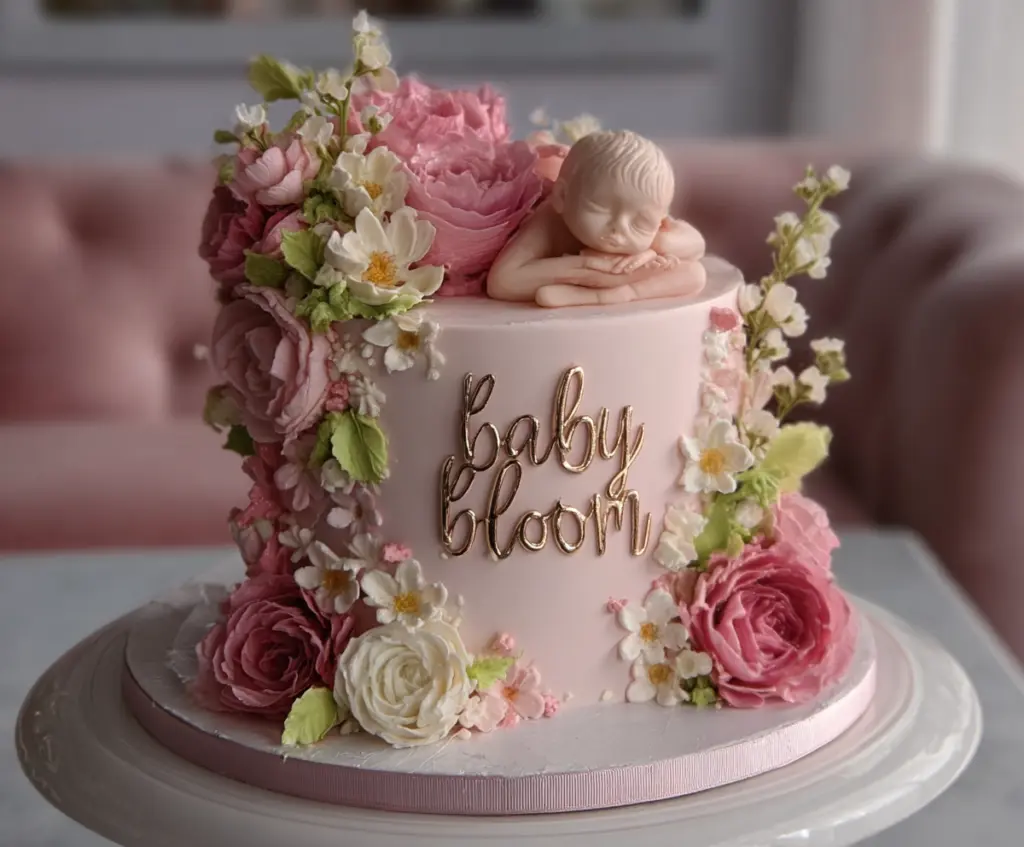
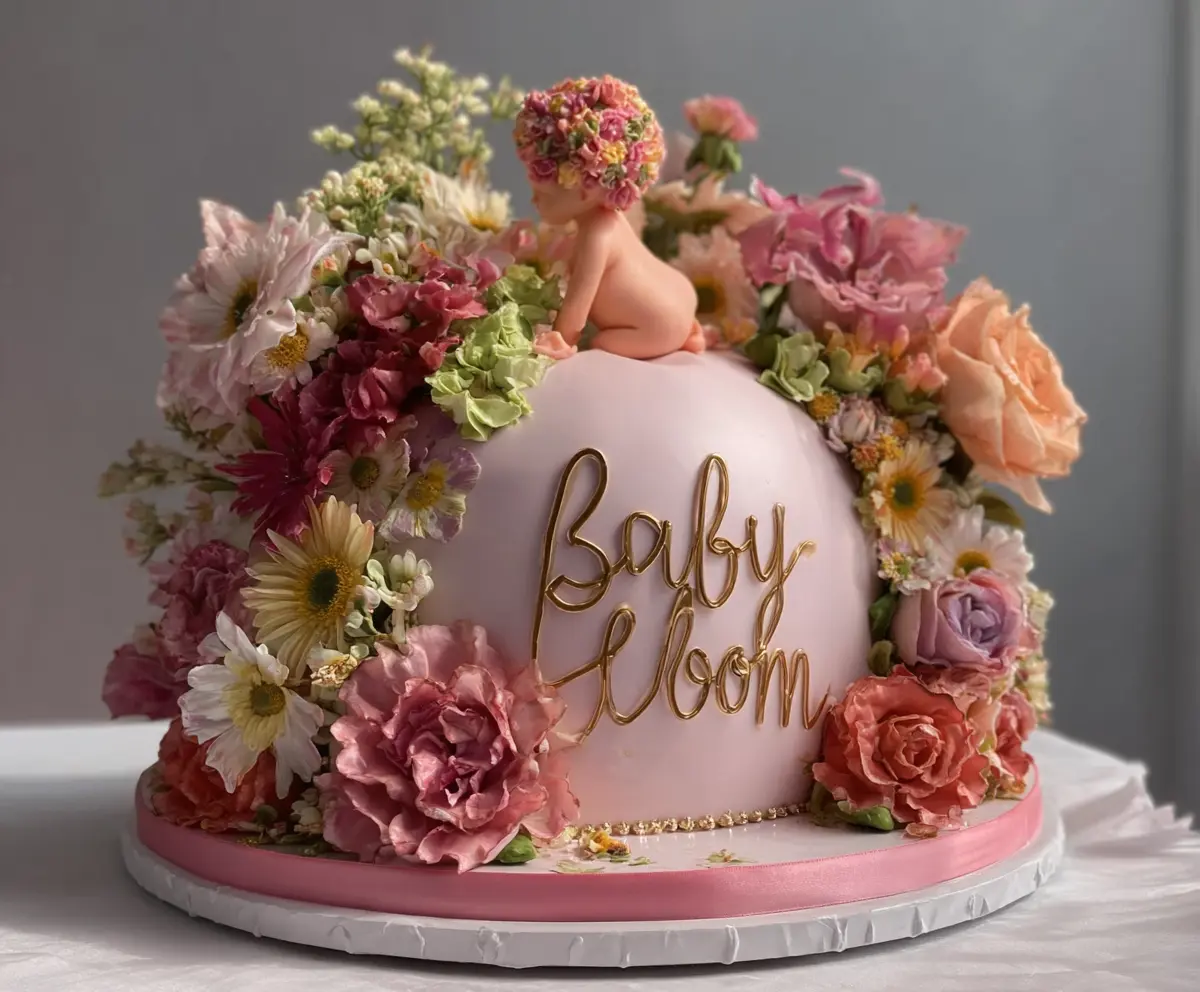
Baby in Bloom Cake is a charming, light treat that feels as fresh and sweet as a spring garden. This cake usually features soft, fluffy layers with gentle flavors like vanilla or citrus, often decorated with pretty, edible flowers or pastel-colored frosting that makes it look almost too pretty to eat. It’s a perfect choice for celebrating special moments, especially around baby showers or welcoming new life.
I always love making the Baby in Bloom Cake when I want to add a little extra joy to a gathering. The flowers on top can be real or made from frosting, and they bring such a lovely touch of nature that brightens up the table. I find it’s a cake that invites smiles and curiosity — everyone wants to know how it’s so light and beautiful. A little tip I’ve picked up: using fresh lemon zest in the batter adds just enough zing to keep it feeling fresh and lively.
When I serve this cake, I like keeping the setting simple so the cake’s delicate charm really shines. A cup of tea or a glass of sparkling lemonade pairs wonderfully with it, making the moment feel cozy and special. Whether you’re celebrating a baby’s arrival, a birthday, or just a day when you feel like enjoying something gentle and pretty, Baby in Bloom Cake is a sweet way to make any occasion a bit more memorable.
Key Ingredients & Substitutions
- All
- purpose flour: This forms the cake's structure. If you want a lighter texture, try cake flour or a mix of cake and all-purpose. For gluten-free, use a gluten-free blend but add a binder like xanthan gum.
- Butter
- Butter adds rich flavor and moisture. Use unsalted to control salt levels. You can swap for margarine or vegan butter if needed, but flavor may differ slightly.
- Granulated sugar & powdered sugar
- Granulated sugar sweetens the cake, while powdered sugar smooths the buttercream. When mixing buttercream, always sift powdered sugar to avoid lumps.
- Eggs
- Eggs help with rise and texture. Large eggs are standard, but if smaller, use an extra one. For egg-free options, try applesauce or commercial egg replacers, but expect texture changes.
- Vanilla extract
- Adds warm flavor; pure vanilla is best but imitation works if needed.
- Milk and heavy cream
- Milk keeps the cake moist. Whole milk is ideal, but any milk or milk alternative works. Heavy cream in frosting makes it creamy and smooth; replace with full-fat coconut milk for dairy-free frosting.
- Gel food coloring
- Gel colors give vibrant hues without watering down frosting. Liquid colors can make frosting runny.
- Fondant/modeling chocolate
- For decorations, fondant is soft and pliable. Modeling chocolate holds details better and tastes richer. Use what feels easiest to you.
How Do You Get Smooth Buttercream & Perfect Cake Layers?
Smooth frosting and level cake layers make your cake look professional. Here’s how to get it right:
- Buttercream texture: Beat butter well before adding sugar. Add powdered sugar slowly to avoid dust and lumps. Use heavy cream to loosen it and get a light, fluffy texture. Stop beating once smooth to avoid air bubbles.
- Coloring: Add gel color little by little. Mix well so the color blends evenly without streaks.
- Leveling cake layers: Cool cakes completely before leveling. Use a serrated knife or cake leveler. Cut off any domes so layers stack flat and stable.
- Crumb coat: Apply a thin layer of frosting to trap crumbs. Chill this before final coat to keep frosting clean and smooth.
- Final frosting: Use a bench scraper or offset spatula. Smooth rotating the cake on a turntable helps get even sides.
Equipment You’ll Need
- Two 8-inch round cake pans – perfect size for even, stackable layers.
- Mixing bowls – a medium one for dry ingredients, a large one for batter mixing.
- Electric mixer or stand mixer – makes beating butter and sugar easy and fluffy.
- Whisk – great for combining dry ingredients evenly without clumps.
- Serrated knife or cake leveler – helps level cake layers for a neat stack.
- Spatulas (rubber and offset) – for folding batter and spreading frosting smoothly.
- Piping bags and petal tips – essential to pipe delicate flowers and leaves.
- Turntable (optional) – makes frosting and decorating easier and smoother.
- Cake board or serving plate – sturdy base for assembling and serving the cake.
- Food-safe paintbrush – for painting gold lettering with edible paint or luster dust.
Flavor Variations & Add-Ins
- Vanilla to almond extract swap – gives a nutty note that pairs well with floral decorations.
- Fold in fresh lemon zest to the batter – adds a fresh, bright flavor perfect for spring celebrations.
- Add finely chopped strawberries or raspberries between layers – for a fruity surprise and a bit of color.
- Use cream cheese in the frosting instead of heavy cream – for a tangier, richer taste that balances sweetness.
How to Make Baby in Bloom Cake?
Ingredients You’ll Need:
Cake Layers:
- 2 ½ cups all-purpose flour
- 2 ½ tsp baking powder
- ½ tsp salt
- 1 cup unsalted butter, softened
- 2 cups granulated sugar
- 4 large eggs
- 1 tbsp vanilla extract
- 1 cup whole milk
Buttercream Frosting:
- 1 ½ cups unsalted butter, softened
- 5 cups powdered sugar, sifted
- ¼ cup heavy cream
- 2 tsp vanilla extract
- Pinch of salt
- Pink gel food coloring (for pale pink frosting)
Decorations:
- Fondant or modeling chocolate for baby figurine
- Buttercream or royal icing for flowers
- Gel food colors: pinks, whites, greens, yellows
- Gold edible paint or gold luster dust with clear alcohol (for lettering)
How Much Time Will You Need?
This recipe takes about 20-25 minutes to prepare the batter and frosting, plus 25-30 minutes for baking. Allow cooling time of about 30-40 minutes before assembling. Decorating, including making flowers and baby figurine, can take another 1-2 hours depending on your pace and detail. Chilling between steps requires about 30 minutes. Overall, plan around 3 hours for the full process.
Step-by-Step Instructions:
1. Prepare the Cake Layers:
Preheat your oven to 350°F (175°C). Grease and flour two 8-inch round cake pans. In a medium bowl, whisk together the flour, baking powder, and salt. In a large bowl, beat the softened butter and granulated sugar with an electric mixer until light and fluffy — this should take about 3 to 5 minutes.
Next, add the eggs one at a time, mixing well after each. Stir in the vanilla extract. Now, add the flour mixture and the milk alternately to the butter mixture, starting and ending with the flour mixture. Mix gently just until combined — don’t overmix!
Divide the batter evenly between the two prepared pans. Bake for 25 to 30 minutes, or until a toothpick inserted in the center comes out clean. Let the cakes cool in the pans for 10 minutes, then remove them to wire racks to cool completely.
2. Make the Buttercream Frosting:
Beat the softened butter on medium speed with a mixer until creamy, about 2 minutes. Gradually add the sifted powdered sugar one cup at a time, beating on low speed until fully combined after each addition.
Then, increase to medium speed and add the heavy cream, vanilla extract, and a pinch of salt. Continue to beat until the frosting is light and fluffy. Add pink gel food coloring little by little until you get a soft pale pink color you like.
3. Assemble and Frost the Cake:
Once the cakes are cool, level them using a serrated knife so the tops are flat and even. Place one cake layer on your cake board or serving plate. Spread an even layer of buttercream on top. Add the second cake layer on top.
Apply a thin crumb coat of frosting all over the cake to seal in crumbs. Chill the cake in the fridge for about 30 minutes so this coat can set. After chilling, cover the cake with a smooth final layer of buttercream frosting.
4. Decorate with Flowers:
Fill piping bags with buttercream or royal icing colored in shades of pink, white, cream, and green for leaves. Using petal piping tips, pipe delicate flowers and leaves cascading down the sides of the cake to create a blooming effect.
5. Create Baby Figurine:
Sculpt a sleeping baby figure from fondant or modeling chocolate, using the image as a guide for shape and detail. Place the figurine gently on top of the cake. Allow it to dry and harden until firm.
6. Add Lettering:
Mix gold luster dust with clear alcohol (like vodka) or use edible gold paint with a fine food-safe paintbrush. Carefully paint the words “baby bloom” on the side of the cake in elegant calligraphy style, or apply edible gold letters.
7. Final Touches:
Arrange additional piped flowers around the baby figurine to balance the decoration. Chill the cake briefly to set all decorations. Remove from fridge about 30 minutes before serving so it’s at room temperature and ready to enjoy.
Can I Use Frozen Cake Layers for This Recipe?
Yes, you can bake the cake layers ahead of time and freeze them completely wrapped in plastic and foil. When ready to assemble, thaw in the fridge overnight and bring to room temperature before frosting.
What’s the Best Way to Store the Finished Cake?
Store the decorated cake in the refrigerator, covered loosely with a cake dome or plastic wrap. Bring it to room temperature about 30 minutes before serving for the best flavor and texture.
Can I Substitute Fondant with Only Buttercream Decorations?
Absolutely! If you prefer not to use fondant, decorate the cake entirely with buttercream flowers and skip the baby figurine or create a simple baby figure with piped frosting.
How Do I Prevent Buttercream from Melting While Decorating?
Keep your kitchen cool if possible, and chill the cake between decoration steps. Use a chilled turntable and work quickly to reduce warming the frosting with your hands.