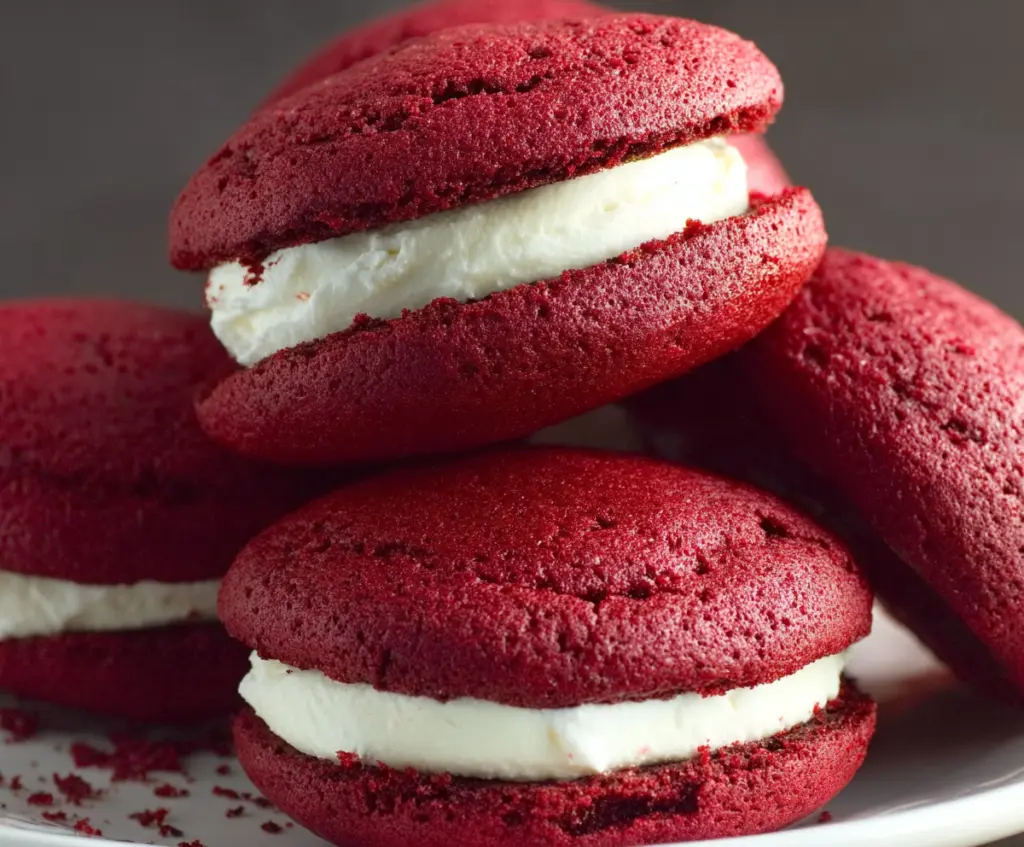
Red Velvet Whoopie Pies are these soft, cake-like cookies sandwiched with a creamy, sweet filling that’s just the right touch of rich. They’re a fun twist on the classic red velvet cake and have that perfect balance of moist texture and smooth, fluffy frosting right in the middle. The deep red color and subtle cocoa flavor make them pretty as well as tasty.
I love making these because they’re so easy to share and always make people smile. One of my favorite things is how you can eat them on the go without needing a plate or fork, which makes them perfect for picnics or parties. I also like to pop them in the fridge for a bit before serving so the filling gets a little firmer—makes them even more delightful to bite into.
Whenever I bring Red Velvet Whoopie Pies to get-togethers, they disappear fast. There’s something about that combination of soft, sweet cake with creamy frosting that just hits the spot every time. Plus, they’re a nice change from regular cookies or cupcakes and feel a bit special without any extra fuss. They’re a simple treat that always brightens up the room!
Key Ingredients & Substitutions
- All
- purpose Flour: This builds the soft, cakey texture. You can swap with cake flour for an even lighter cookie.
- Cocoa Powder
- Adds subtle chocolate flavor. Unsweetened is best, but Dutch-processed works too for less acidity.
- Buttermilk
- Gives moisture and tang. If you don’t have it, mix 1 cup milk with 1 tbsp vinegar or lemon juice, let sit 5 mins.
- Red Food Coloring
- This is key for that classic red velvet look. Use gel or paste for brighter color without extra liquid.
- Cream Cheese
- The star in the filling that adds tanginess and creaminess. Make sure it’s softened for easy mixing.
How Do I Get Soft, Moist Whoopie Pie Cookies?
Here’s the trick for those soft, fluffy red velvet cookies:
- Mixing order matters: Cream butter and sugar well, then add egg and vanilla for a smooth base.
- Alternate adding wet and dry: Add flour and buttermilk mixtures in parts, starting and ending with flour. This prevents overmixing.
- Don’t overmix batter: Stop as soon as the ingredients combine. Overmixing can make cookies tough.
- Baking time: Bake just until set and springy to the touch, usually 10-12 minutes. Overbaking dries them out.
- Cooling: Cool completely before adding filling to keep them from breaking.
Equipment You’ll Need
- Baking sheets – flat sheets let the cookies bake evenly without spreading too much.
- Parchment paper – keeps the cookies from sticking and helps with easy cleanup.
- Mixing bowls – you’ll need a few for dry and wet ingredients and the frosting.
- Hand or stand mixer – makes creaming butter and sugar smooth and quick.
- Spoon or small ice cream scoop – for dropping uniform cookie batter rounds.
- Wire cooling racks – cools cookies evenly to avoid sogginess before filling.
- Spatula or piping bag – spreads or pipes the cream cheese filling cleanly.
Flavor Variations & Add-Ins
- Swap cream cheese filling for marshmallow fluff for a lighter, sweeter center.
- Add a sprinkle of cinnamon or nutmeg to the batter for warm spice notes.
- Mix mini chocolate chips into the batter for little bursts of chocolate in each bite.
- Use orange zest in the filling to add a fresh citrus twist that brightens the flavor.

How to Make Red Velvet Whoopie Pies
Ingredients You’ll Need:
For the Red Velvet Cake Cookies:
- 2 cups all-purpose flour
- 2 tbsp unsweetened cocoa powder
- 1 tsp baking powder
- ½ tsp baking soda
- ½ tsp salt
- ½ cup unsalted butter, softened
- 1 cup granulated sugar
- 1 large egg
- 1 tsp vanilla extract
- 1 cup buttermilk
- 1 tbsp red food coloring
For the Cream Cheese Filling:
- 8 oz cream cheese, softened
- ½ cup unsalted butter, softened
- 2 cups powdered sugar, sifted
- 1 tsp vanilla extract
How Much Time Will You Need?
This recipe takes about 20 minutes to prepare, around 12 minutes to bake the cookies, and about 1 hour chilling time to let the filling set properly. So, expect roughly 1 hour and 30 minutes total from start to finish.
Step-by-Step Instructions:
1. Prepare and Bake the Red Velvet Cookies:
Preheat your oven to 350°F (175°C) and line two baking sheets with parchment paper. In a medium bowl, whisk together the flour, cocoa powder, baking powder, baking soda, and salt. In a large bowl, beat the softened butter and granulated sugar until fluffy, about 3-4 minutes. Add in the egg and vanilla, mixing until well combined.
In a small bowl, mix the buttermilk with the red food coloring. Then, alternate adding the flour mixture and the colored buttermilk to the butter mixture in three parts, beginning and ending with the flour mix. Mix gently each time—avoid overmixing to keep the cookies tender.
Drop rounded spoonfuls of the batter onto the prepared sheets about 2 inches apart using a tablespoon or small scoop. Bake for 10-12 minutes, until the cookies are set and spring back lightly when pressed. Let them cool completely on wire racks before filling.
2. Make the Cream Cheese Filling:
Beat the softened cream cheese and butter together in a bowl until smooth and creamy. Slowly add the powdered sugar and vanilla extract, beating until the filling is light and fluffy.
3. Assemble the Whoopie Pies:
Spread or pipe a generous amount of the cream cheese filling onto the flat side of one cookie. Top it with another cookie, gently pressing together to form a sandwich. Repeat with the rest.
Place the pies in the refrigerator for at least 1 hour so the filling firms up nicely. Enjoy your delicious and moist Red Velvet Whoopie Pies!
Can I Use Frozen Cream Cheese for the Filling?
It’s best to use cream cheese that’s fully thawed and softened at room temperature. This ensures the filling mixes smoothly without lumps.
How Can I Store Leftover Whoopie Pies?
Store them in an airtight container in the refrigerator for up to 4 days. Let them come to room temperature before serving for the best texture.
Can I Make the Cookies Ahead of Time?
Yes! You can bake the cookies in advance and freeze them unfilled for up to 2 months. Thaw completely before assembling with the filling.
Is There a Substitute for Buttermilk?
Absolutely! Mix 1 cup of milk with 1 tablespoon of lemon juice or vinegar. Let it sit for 5 minutes before using—it mimics buttermilk’s tang perfectly.