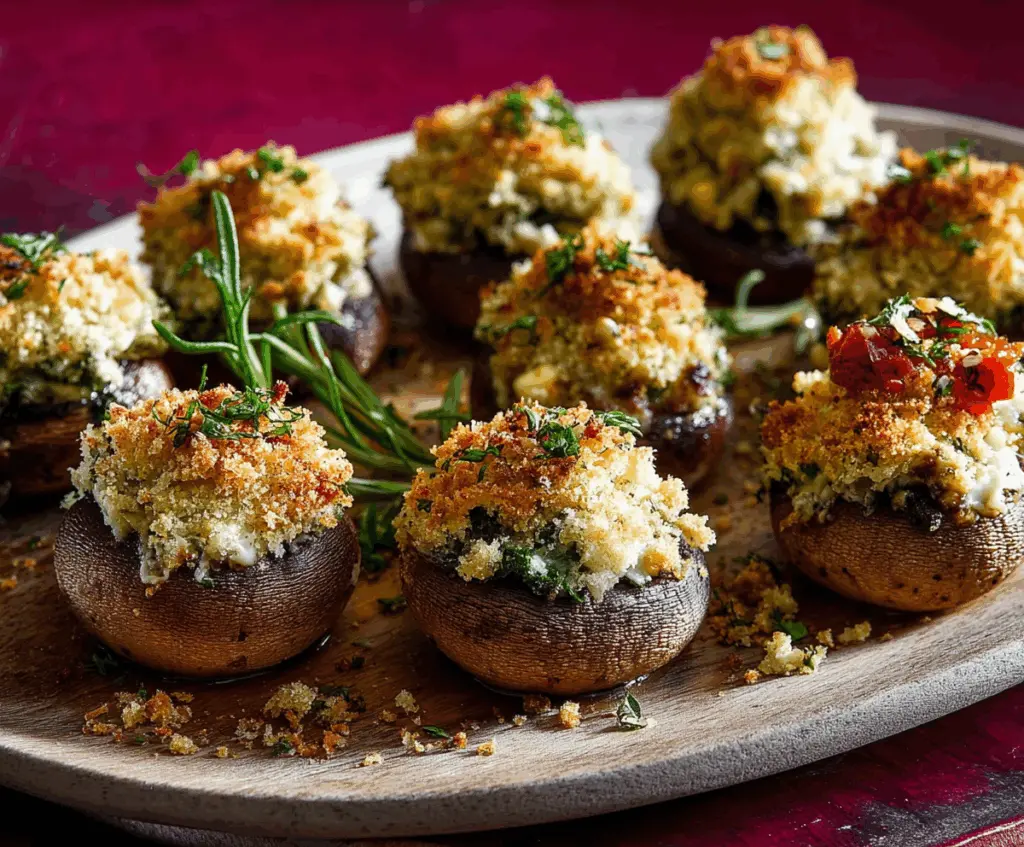
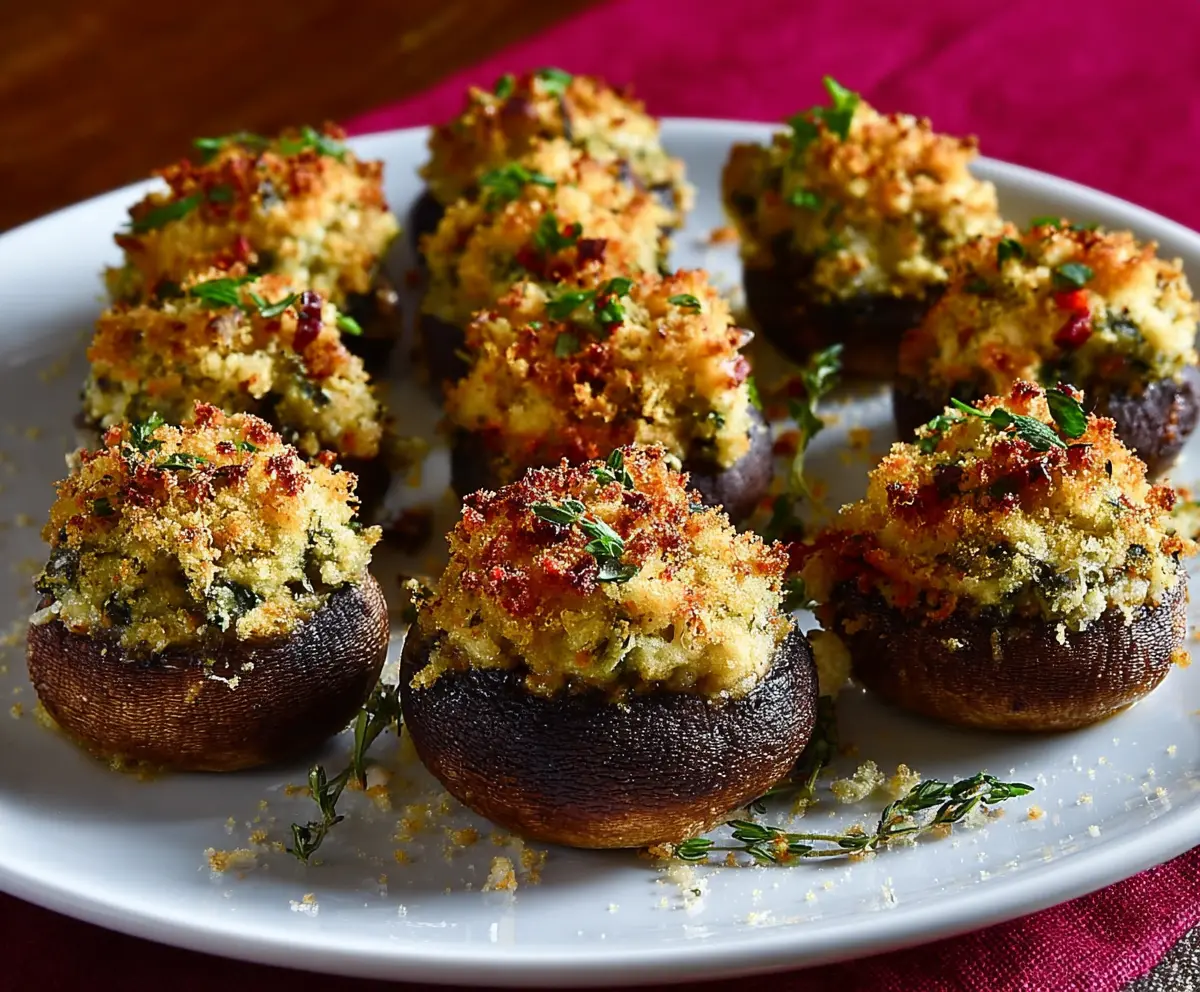
Stuffed Mushroom Caps are a simple, tasty treat that’s perfect as an appetizer or a delicious side dish. These mushrooms are filled with a flavorful mix of breadcrumbs, cheese, herbs, and sometimes a little garlic or sausage to make every bite full of texture and taste. The mushrooms become tender while the filling gets nice and golden on top, making them look as good as they taste.
I love making stuffed mushroom caps for gatherings because they’re easy to prepare ahead of time and always disappear quickly once they hit the table. My trick is to get creative with the stuffing—sometimes I add spinach for a fresh twist, or swap in different cheeses depending on what I have on hand. It’s like a little surprise in every mushroom!
For serving, I like to have these warm and fresh out of the oven, paired with a simple salad or just by themselves with a cold drink. They’re perfect for sharing and always get compliments, especially when I use bigger mushroom caps that hold plenty of the tasty filling. This recipe is one that I keep coming back to because it’s so reliable and crowd-pleasing every time.
Key Ingredients & Substitutions
- Mushrooms
- Large cremini or white mushroom caps work best. They hold the stuffing well and taste great. If you can’t find these, portobello mushrooms are a good, bigger option but may take longer to cook.
- Cream Cheese
- This adds creaminess to the filling. You can swap it with ricotta or mascarpone if you want a lighter texture or a different flavor.
- Parmesan Cheese
- It gives a salty, nutty taste. Pecorino Romano or Asiago can be used instead. For a dairy-free option, nutritional yeast adds a cheesy flavor.
- Breadcrumbs
- Panko breadcrumbs create a nice crunchy top. Regular breadcrumbs work, too. For gluten-free, use gluten-free breadcrumbs or crushed nuts.
- Herbs and Garlic
- Fresh parsley and thyme brighten the stuffing. Dried herbs are OK but use less. Garlic is key to flavor but can be adjusted to taste.
How Do I Get the Perfect Crispy, Golden Topping?
The top of stuffed mushrooms should be crunchy and golden without burning. Here’s how I do it:
- Use panko breadcrumbs—they toast better and crisp nicely.
- Brush the mushroom caps lightly with olive oil first to prevent sogginess.
- Mix a little olive oil or melted butter in the filling to help browning.
- Bake at 375°F (190°C) for 20-25 minutes, keeping an eye on the color.
- If the tops brown too fast, cover loosely with foil and remove near the end to finish crisping.
These tips help get the best texture between the tender mushroom and the crunchy, cheesy topping every time.
Equipment You’ll Need
- Baking sheet – perfect for holding the mushrooms evenly while they bake.
- Parchment paper – helps prevent sticking and makes cleanup easy.
- Skillet or frying pan – to sauté the mushroom stems, garlic, and onions for the filling.
- Mixing bowl – to combine all the stuffing ingredients smoothly.
- Spoon – handy for stuffing and pressing the filling into each mushroom cap.
Flavor Variations & Add-Ins
- Add cooked sausage or crumbled bacon for a rich, meaty twist that warms up the filling.
- Try swapping spinach for kale or artichoke hearts to add different greens and textures.
- Use goat cheese or feta instead of cream cheese for a tangy, bold flavor.
- Sprinkle smoked paprika or a pinch of cayenne for a subtle smoky or spicy kick.
Stuffed Mushroom Caps
Ingredients You’ll Need:
Mushrooms & Filling:
- 12 large mushroom caps (such as cremini or white mushrooms), cleaned and stems removed
- 2 tablespoons olive oil, divided
- ½ cup finely chopped mushroom stems
- 2 cloves garlic, minced
- ¼ cup finely chopped onion
- ½ cup fresh spinach, chopped (optional)
- ½ cup cream cheese, softened
- ¼ cup grated Parmesan cheese
- ¼ cup breadcrumbs (panko recommended)
- 1 tablespoon fresh parsley, chopped (plus extra for garnish)
- 1 teaspoon fresh thyme leaves (or ½ teaspoon dried thyme)
- Salt and freshly ground black pepper, to taste
- ¼ cup sun-dried tomatoes, finely chopped (optional, as garnish)
How Much Time Will You Need?
This recipe takes about 10 minutes to prepare and 20-25 minutes to bake, totaling roughly 30-35 minutes. It’s quick, making it a perfect appetizer for when you want something tasty but simple.
Step-by-Step Instructions:
1. Prepare the Oven and Mushrooms:
Start by preheating your oven to 375°F (190°C). Line a baking sheet with parchment paper or lightly grease it to prevent sticking. Lightly brush the mushroom caps with 1 tablespoon of olive oil and arrange them gill side up on the baking sheet.
2. Make the Filling:
Chop the reserved mushroom stems finely. Heat the remaining olive oil in a skillet over medium heat. Add the chopped stems, onion, and garlic, cooking until they become soft and fragrant, about 4-5 minutes. If you’re using spinach, add it now and cook just until wilted. Remove from heat and allow to cool a bit.
3. Combine Ingredients and Stuff Mushrooms:
In a bowl, mix the sautéed mushrooms and vegetables with cream cheese, Parmesan, breadcrumbs, parsley, and thyme. Season with salt and pepper to your liking. Spoon this mixture generously into each mushroom cap, forming a heaping mound, and gently press down so it sticks well.
4. Bake and Garnish:
Optional: sprinkle some finely chopped sun-dried tomatoes on top for color and extra flavor. Bake the stuffed mushrooms in the oven for 20-25 minutes, until the mushrooms are cooked through and the tops turn golden brown and crispy. Remove from the oven, garnish with extra parsley, and serve warm.
Can I Use Frozen Mushrooms for This Recipe?
While fresh mushrooms work best for this recipe, you can use frozen mushrooms if needed. Just make sure to thaw them completely and pat them dry before stuffing to avoid excess moisture that can make the filling soggy.
How Can I Make These Stuffed Mushrooms Ahead of Time?
You can prepare the stuffing and fill the mushroom caps a few hours in advance. Keep the stuffed mushrooms covered in the fridge and bake them right before serving to ensure they stay fresh and crispy.
What’s the Best Way to Store Leftovers?
Store leftover stuffed mushrooms in an airtight container in the refrigerator for up to 2 days. Reheat gently in the oven at 350°F (175°C) until warmed through to maintain their texture.
Can I Add Meat to the Filling?
Absolutely! Cooked sausage or crumbled bacon can be mixed into the filling for an extra savory boost. Just be sure to cook the meat fully before adding to the mixture.