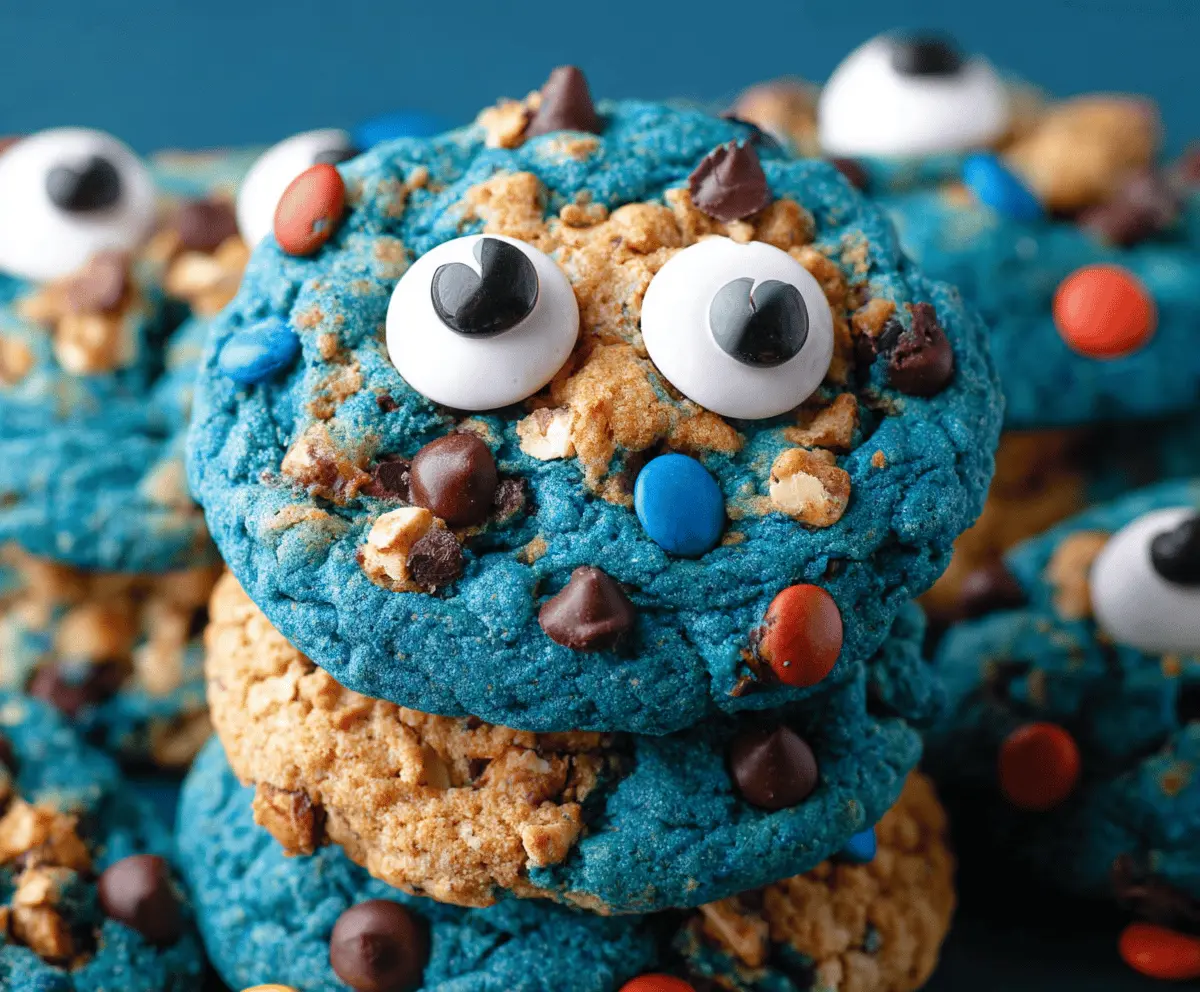
Monster Cookies are a fun and loaded treat, bursting with chewy oats, rich peanut butter, and a colorful sprinkle of candy-coated chocolate gems. They’re thick, satisfying, and have just the right mix of crunchy and soft textures that make every bite a little adventure.
I love making Monster Cookies because they remind me of childhood treats and big family gatherings. It’s great how you can toss in whatever nuts or candies you like, making them feel like your own special creation. I usually double the recipe since these cookies disappear faster than I can bake them!
These cookies are perfect for a quick snack, lunchbox surprise, or sharing at parties. I like to enjoy them with a cold glass of milk or even warmed up with a scoop of vanilla ice cream on top. Once you try these, you’ll find it hard to stick to just one—Monster Cookies have a way of bringing smiles all around.
Key Ingredients & Substitutions
- Peanut Butter
- This gives the cookies their rich and creamy flavor. If you’re allergic or want a different taste, try almond butter or sunflower seed butter instead—they work great too!
- Oats
- Quick oats provide chewiness without making the cookies too dense. You can swap them for old-fashioned rolled oats if you prefer a heartier texture.
- Chocolate & Peanut Butter Chips
- These add bursts of sweetness. Feel free to mix in white chocolate chips, butterscotch chips, or chopped nuts for variety.
- Blue Food Coloring
- This makes the monster theme fun and playful. Use gel coloring for the best, vibrant color without changing the dough’s texture.
- Candy Eyeballs & Decorations
- These turn cookies into monsters! If you don’t have candy eyes, you can use small chocolate chips and pipe white icing to create eye shapes.
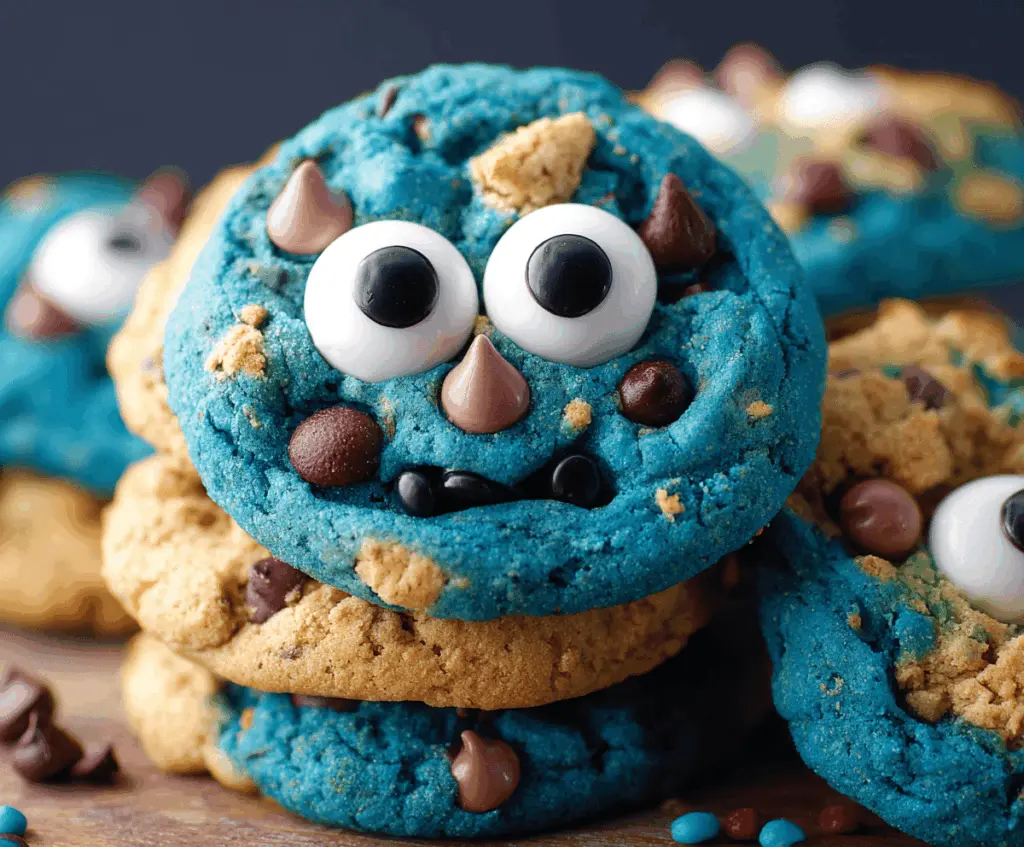
How Do You Make the Cookies Look Like Fun Little Monsters?
Decorating these cookies is all about adding personality with simple touches:
- First, mix half the dough with blue food coloring for a bright base.
- Press a scoop of blue and a scoop of plain dough together to get a fun two-tone cookie.
- After shaping the cookies, gently press candy eyeballs onto the blue part while the dough is still soft.
- Use mini chocolate chips or edible pens to add pupils, noses, and mouths. A little “smile” or “frown” makes them playful!
- Be careful not to push decorations too deep; this helps keep their shape and makes eyes stand out.
- Bake as directed, then let cool completely before moving to keep decorations intact.
With these ideas, your Monster Cookies will have lots of fun faces and bring out smiles in every bite!
Equipment You’ll Need
- Large mixing bowl – perfect for combining all your cookie ingredients easily in one place.
- Electric mixer or hand whisk – helps cream butter and sugars smoothly for a light, fluffy dough.
- Measuring cups and spoons – to get your ingredient amounts just right every time.
- Baking sheets – sturdy and flat, so your cookies bake evenly without spilling.
- Parchment paper or silicone baking mat – prevents sticking and makes cleanup much easier.
- Spoon or cookie scoop – shapes uniform cookies quickly and neatly.
Flavor Variations & Add-Ins
- Swap peanut butter for almond or cashew butter for a nutty twist without losing creaminess.
- Add chopped nuts like walnuts or pecans for extra crunch and a deeper flavor.
- Use butterscotch or white chocolate chips instead of or in addition to peanut butter chips for sweetness variety.
- Mix in dried cranberries or raisins for a chewy, fruity touch that balances the richness.
How to Make Monster Cookies
Ingredients You’ll Need:
Main Ingredients:
- 1 cup (2 sticks) unsalted butter, softened
- 1 cup brown sugar, packed
- 1 cup granulated sugar
- 1 cup creamy peanut butter
- 2 large eggs
- 1 teaspoon vanilla extract
- 2 1/2 cups all-purpose flour
- 1 teaspoon baking soda
- 1/2 teaspoon salt
- 3 cups quick oats
- 1 cup semisweet chocolate chips
- 1 cup peanut butter chips
Decoration & Coloring:
- Blue food coloring (gel or liquid)
- Candy eyeballs for decorating
- Black edible decorations or mini chocolate chips (for eyes’ centers and mouth details)
Time Needed:
This recipe takes about 15 minutes for preparation and mixing, around 10-12 minutes for baking, plus 5 minutes cooling time on the baking sheet and some extra time for cooling fully on a wire rack. All together, plan on about 35 to 40 minutes from start to finish.
Step-by-Step Instructions:
1. Preheat and Prepare:
Set your oven to 350°F (175°C). Line your baking sheets with parchment paper to prevent sticking and make cleanup easier.
2. Mix the Wet Ingredients:
In a large bowl, cream together the softened butter, brown sugar, granulated sugar, and peanut butter until everything is smooth and fluffy. Then, beat in the eggs one at a time, followed by stirring in the vanilla extract.
3. Combine Dry Ingredients:
In another bowl, whisk the flour, baking soda, and salt so they’re nicely mixed. Gradually add this dry mix into your wet ingredients, stirring gently just until combined.
4. Add Oats and Chips:
Stir in the quick oats, semisweet chocolate chips, and peanut butter chips until they are spread evenly throughout the dough.
5. Color the Dough:
Split the dough roughly in half; add blue food coloring to one half and mix until the color is even. This vibrant blue will help create your fun monster look.
6. Shape the Cookies:
For each cookie, scoop about a tablespoon of plain dough and a tablespoon of blue dough. Gently press them together to form a round cookie ball, or layer them creatively to look like a colorful monster.
7. Add Decorations:
Place the cookies spaced apart on your baking sheets. Lightly flatten each cookie with your hand or the back of a spoon. Press candy eyeballs onto the blue side of the cookie while the dough is still soft. Use mini chocolate chips or edible decorations to create pupils, noses, and mouths—making each cookie a unique little monster.
8. Bake and Cool:
Bake your cookies for 10 to 12 minutes, until their edges are lightly golden. Take them out and let cool on the baking sheet for 5 minutes, then transfer to a wire rack to cool completely.
9. Serve:
Enjoy your fun, colorful Monster Cookies fresh or store them in an airtight container to keep their chewy texture and monster charm for days!
Can I Use Natural Peanut Butter Instead of Creamy Peanut Butter?
Yes! Natural peanut butter works fine, but it may make the dough a bit softer. Chill the dough for 30 minutes before baking if it feels too sticky to handle.
How Should I Store Monster Cookies?
Store them in an airtight container at room temperature for up to 5 days. To keep them soft, add a slice of bread in the container—this helps maintain moisture.
Can I Make These Cookies Gluten-Free?
Absolutely! Use gluten-free all-purpose flour and certified gluten-free oats. The texture might be slightly different but still delicious.
Is It Okay to Freeze the Cookie Dough?
Yes, you can freeze the shaped cookie dough balls on a baking sheet, then transfer them to a freezer bag. Bake directly from frozen, adding a couple extra minutes to the baking time.